
How to Enable MuleSoft Vibes in VS Code
A step-by-step guide to turning on MuleSoft Vibes, the AI assistant, in VS Code: install the Anypoint Extension Pack, connect a free Salesforce Developer org, enable Agentforce, and start chatting.

You installed the Anypoint Extension Pack, opened MuleSoft Vibes… and it just won’t turn on. The AI features are greyed out, and logging in to Anypoint Platform doesn’t seem to change anything. The catch: MuleSoft Vibes needs a Salesforce org with Agentforce enabled behind it, and that connection isn’t set up for you.
This guide walks through the whole thing end to end, from installing the extension to seeing “How can I help you today?” in your editor. No prior Salesforce setup required; we’ll spin up a free Developer Edition org along the way.
What you’ll need
- Visual Studio Code installed (download it here).
- An Anypoint Platform account with admin permissions (sign up for free).
- A Salesforce Developer org, or a few minutes to create a free one (we’ll do that here).
Step 1: Install the Anypoint Extension Pack
Open VS Code, go to the Extensions view, and search for anypoint extension pack. Install the
Anypoint Extension Pack, and make sure it’s published by Salesforce.
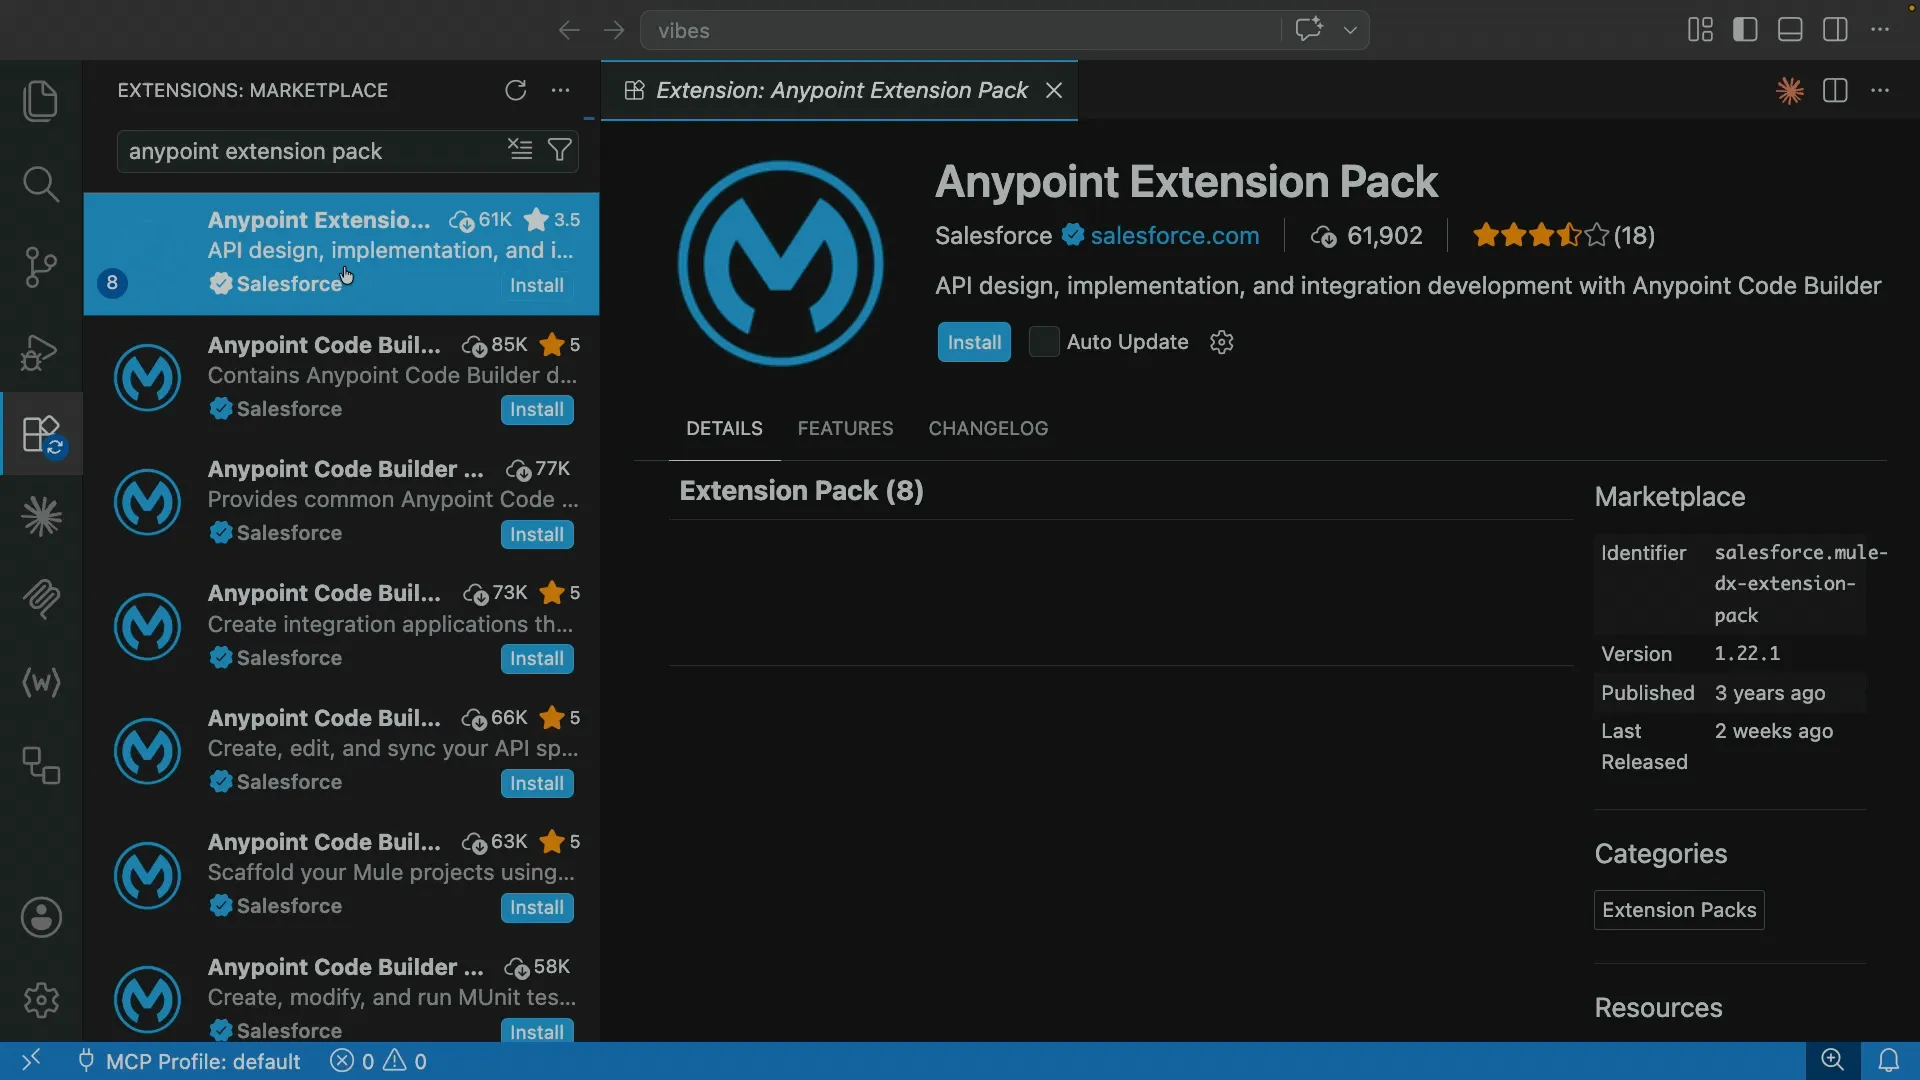
Once it finishes, you’ll get two new icons in the VS Code activity bar. The first MuleSoft logo is Anypoint Code Builder. The second one is MuleSoft Vibes, the AI assistant we’re here for. Click it, then click Log In to Anypoint Platform and follow the browser prompts to sign in.
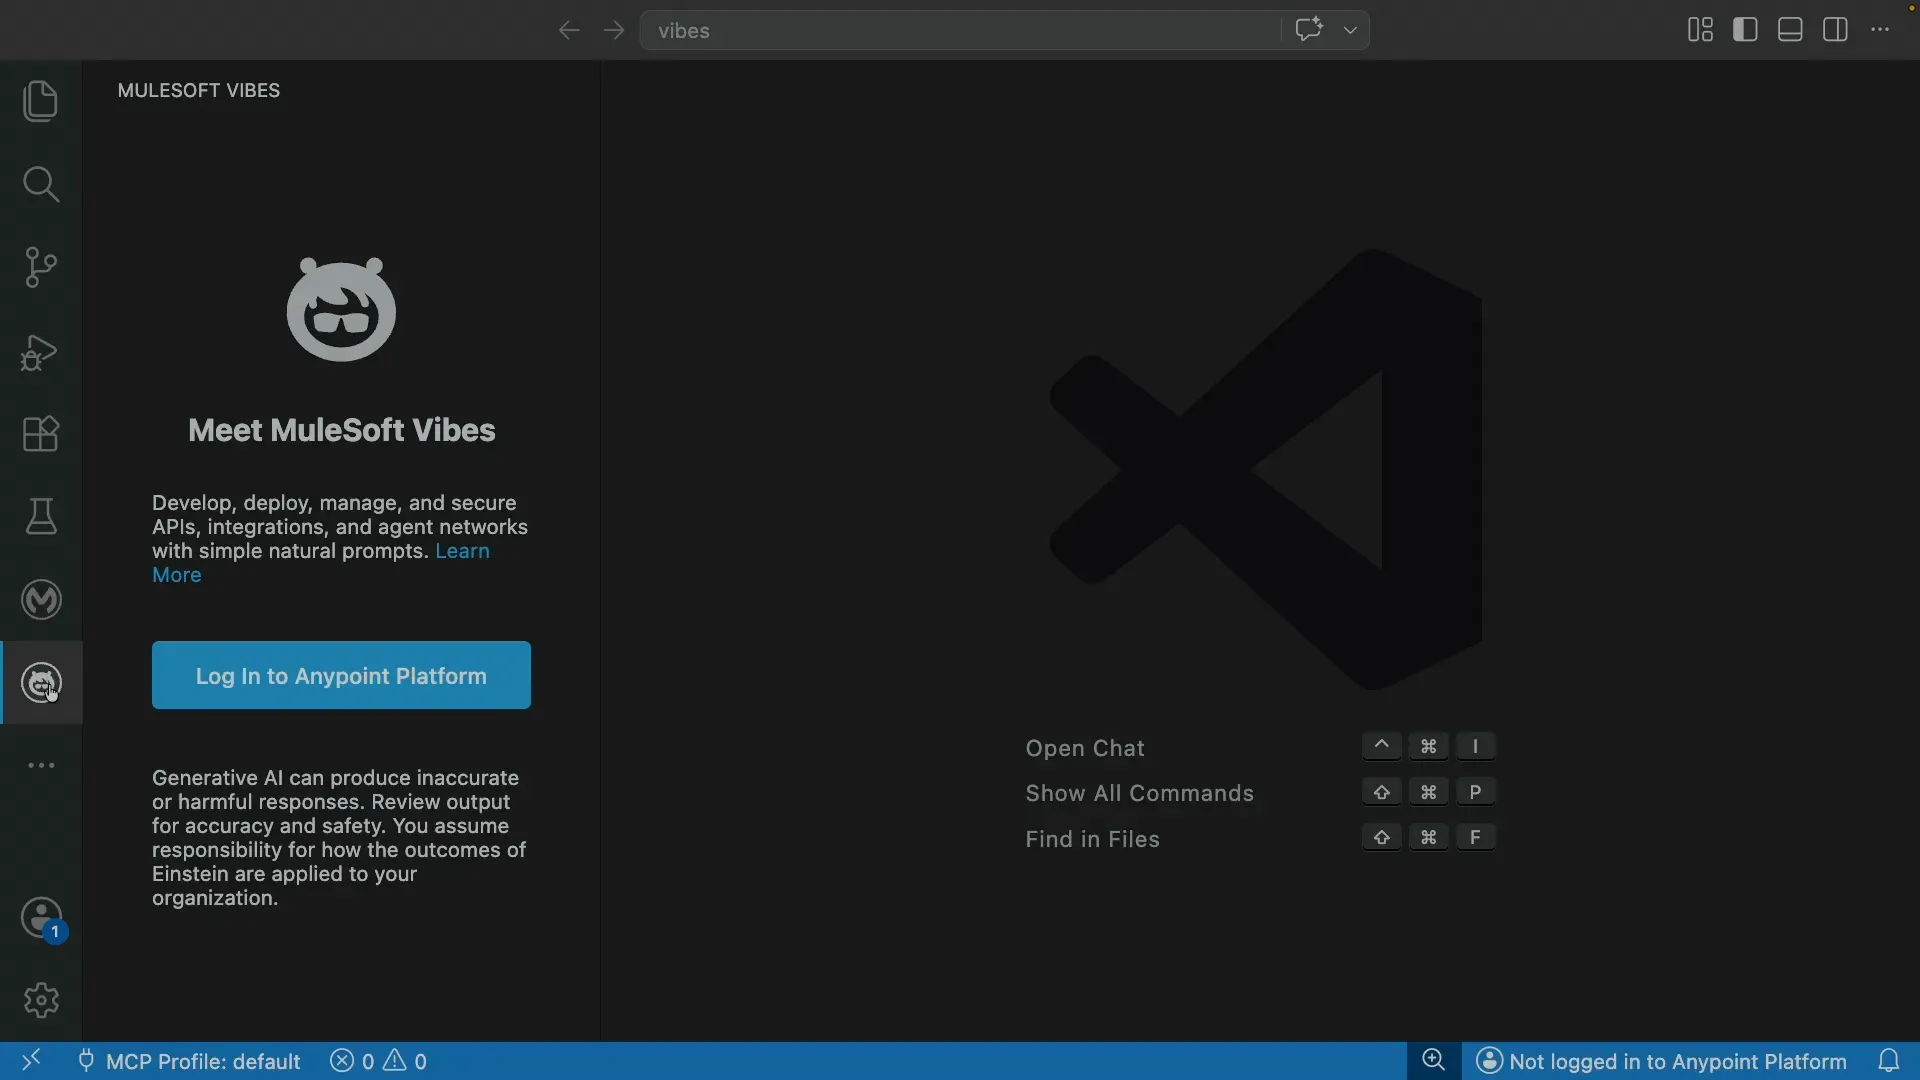
At this point Vibes still won’t have its AI features. That’s expected; the rest of the setup happens in Anypoint Platform and Salesforce.
Step 2: Enable Agentforce in Anypoint Platform
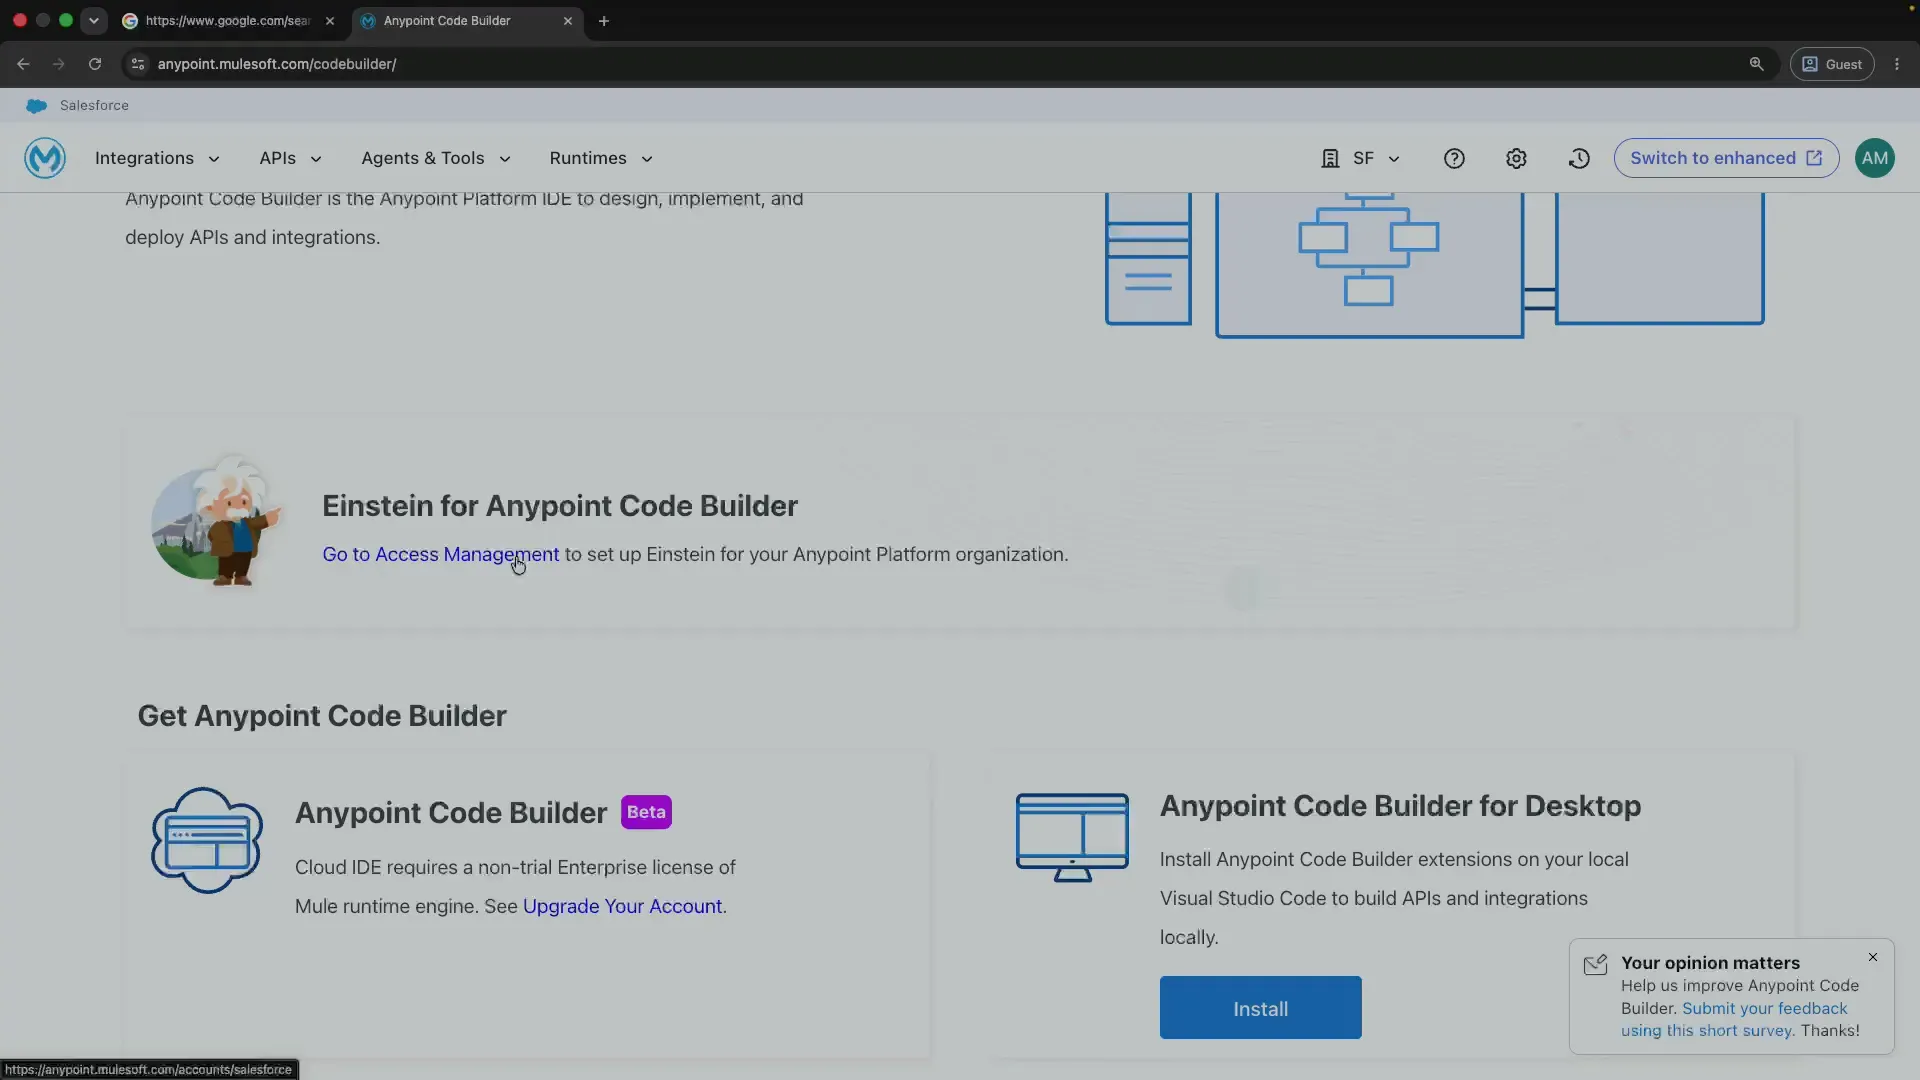
Log in to Anypoint Platform in your browser and open Anypoint Code Builder. From there, select Go to Access Management.
This will open Access Management in the Salesforce section. Find the Accept button to enable Agentforce for Anypoint Platform.
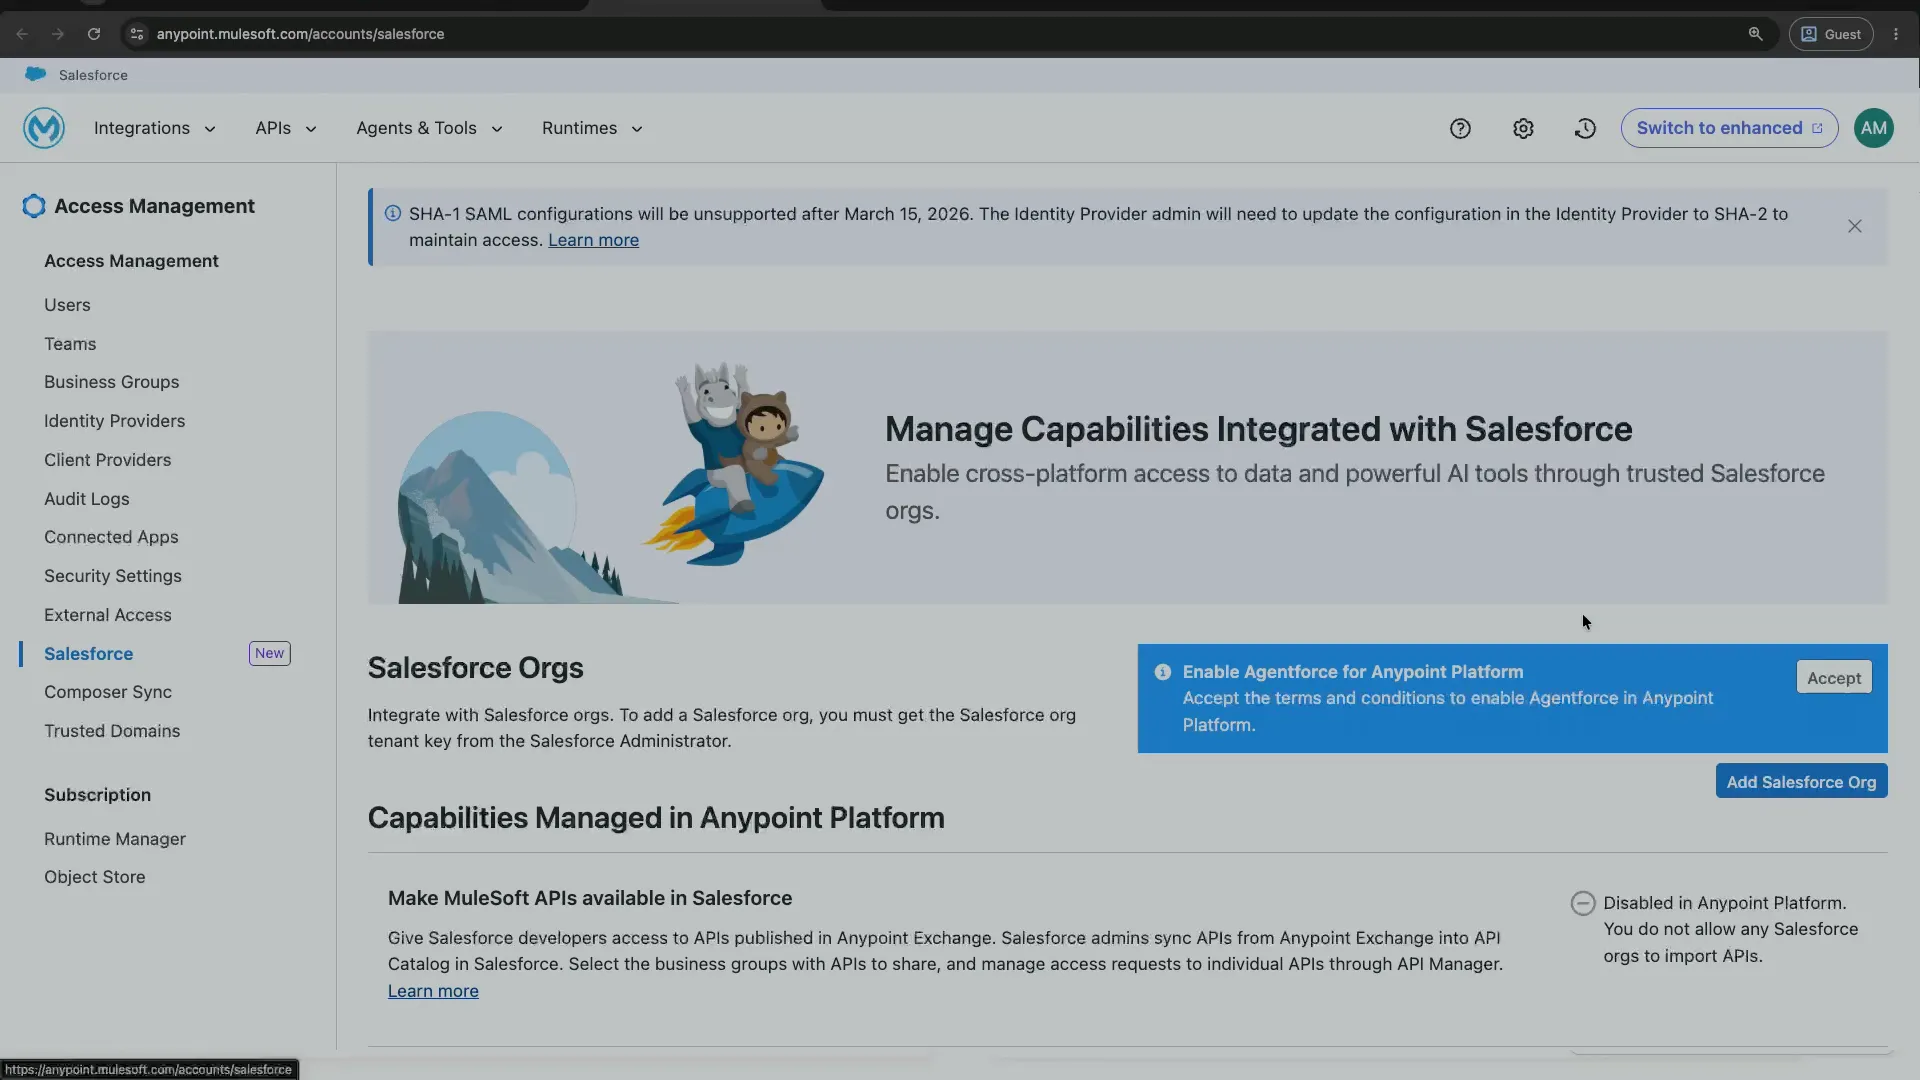
After you click Accept, this will open the terms and conditions. Check the I accept checkbox and press Accept again.
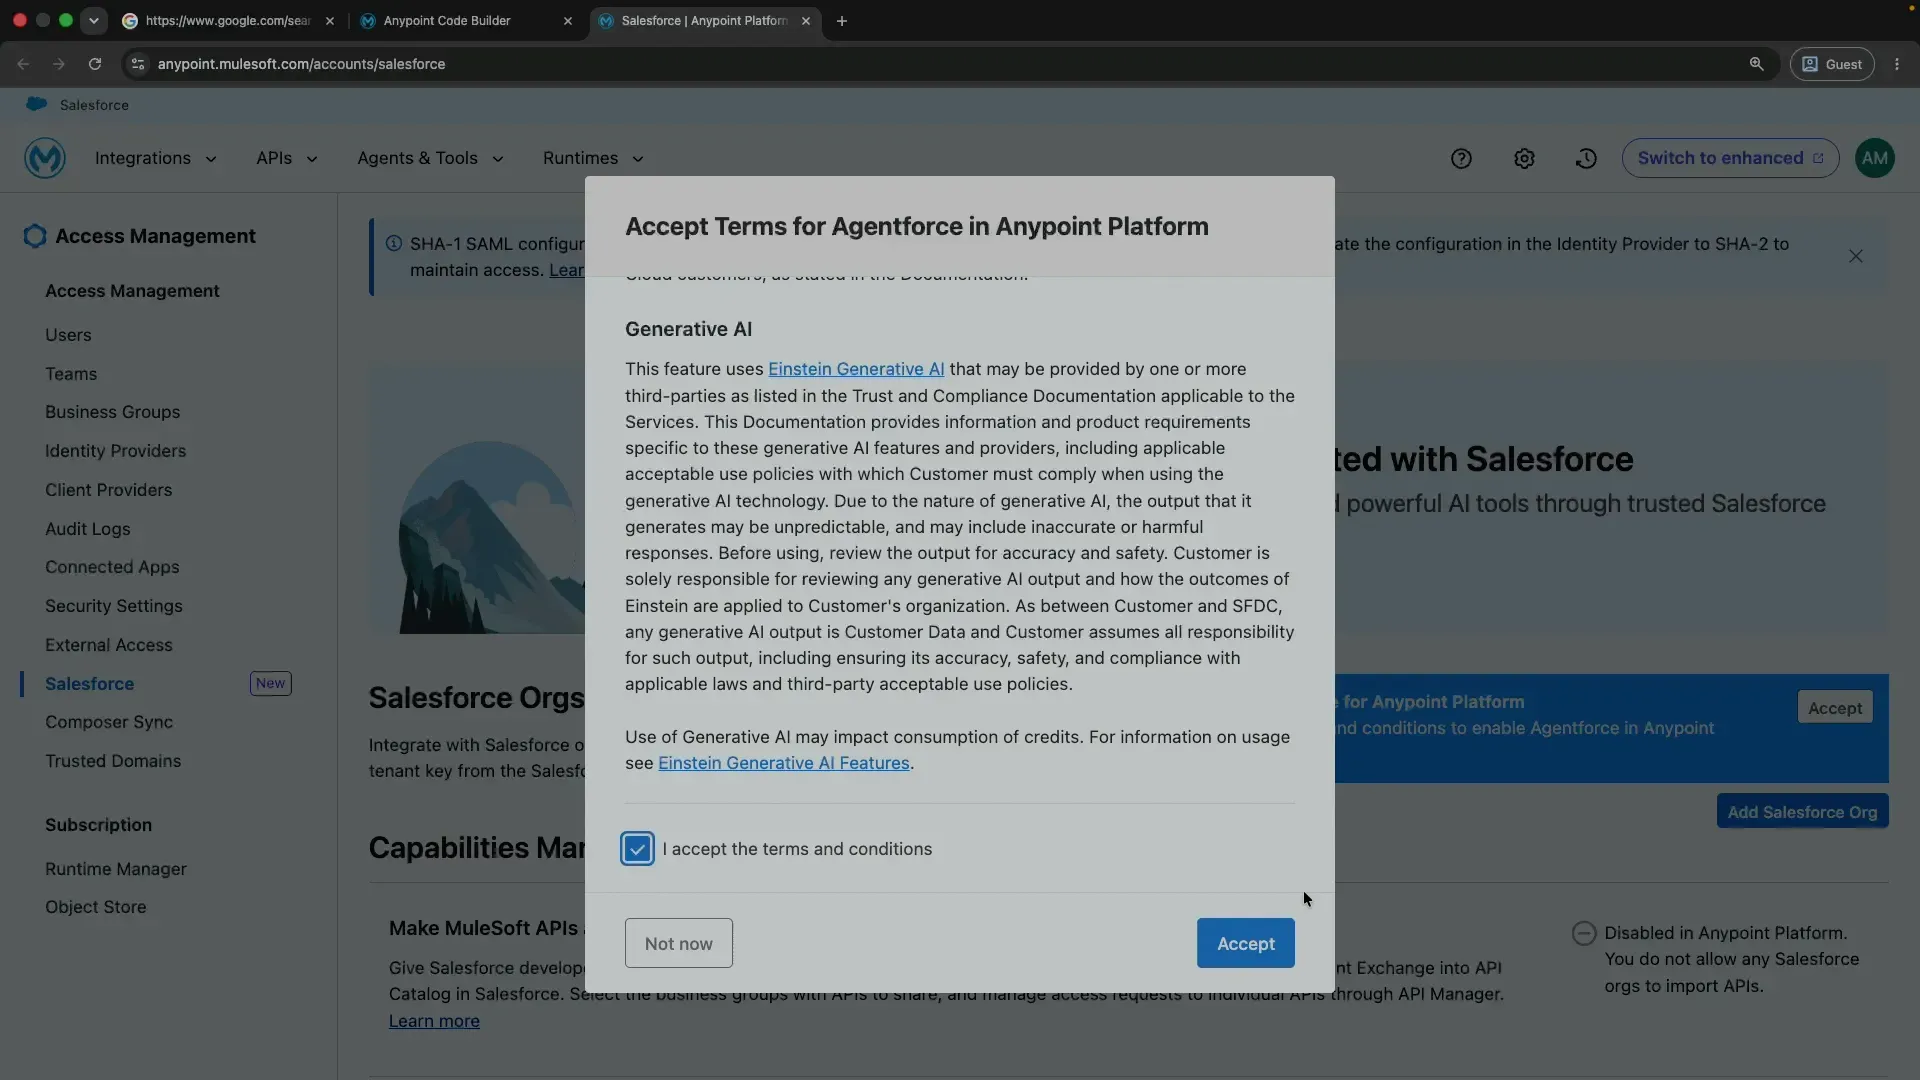
To finish enabling everything, you’ll need to connect a Salesforce org. If you don’t have one, the next step creates a free one.
Step 3: Create a free Salesforce Developer Edition org
Head to developer.salesforce.com and open Browse trials. Pick Get a Developer Edition. It’s free. Or you can go straight to the sign-up link directly.
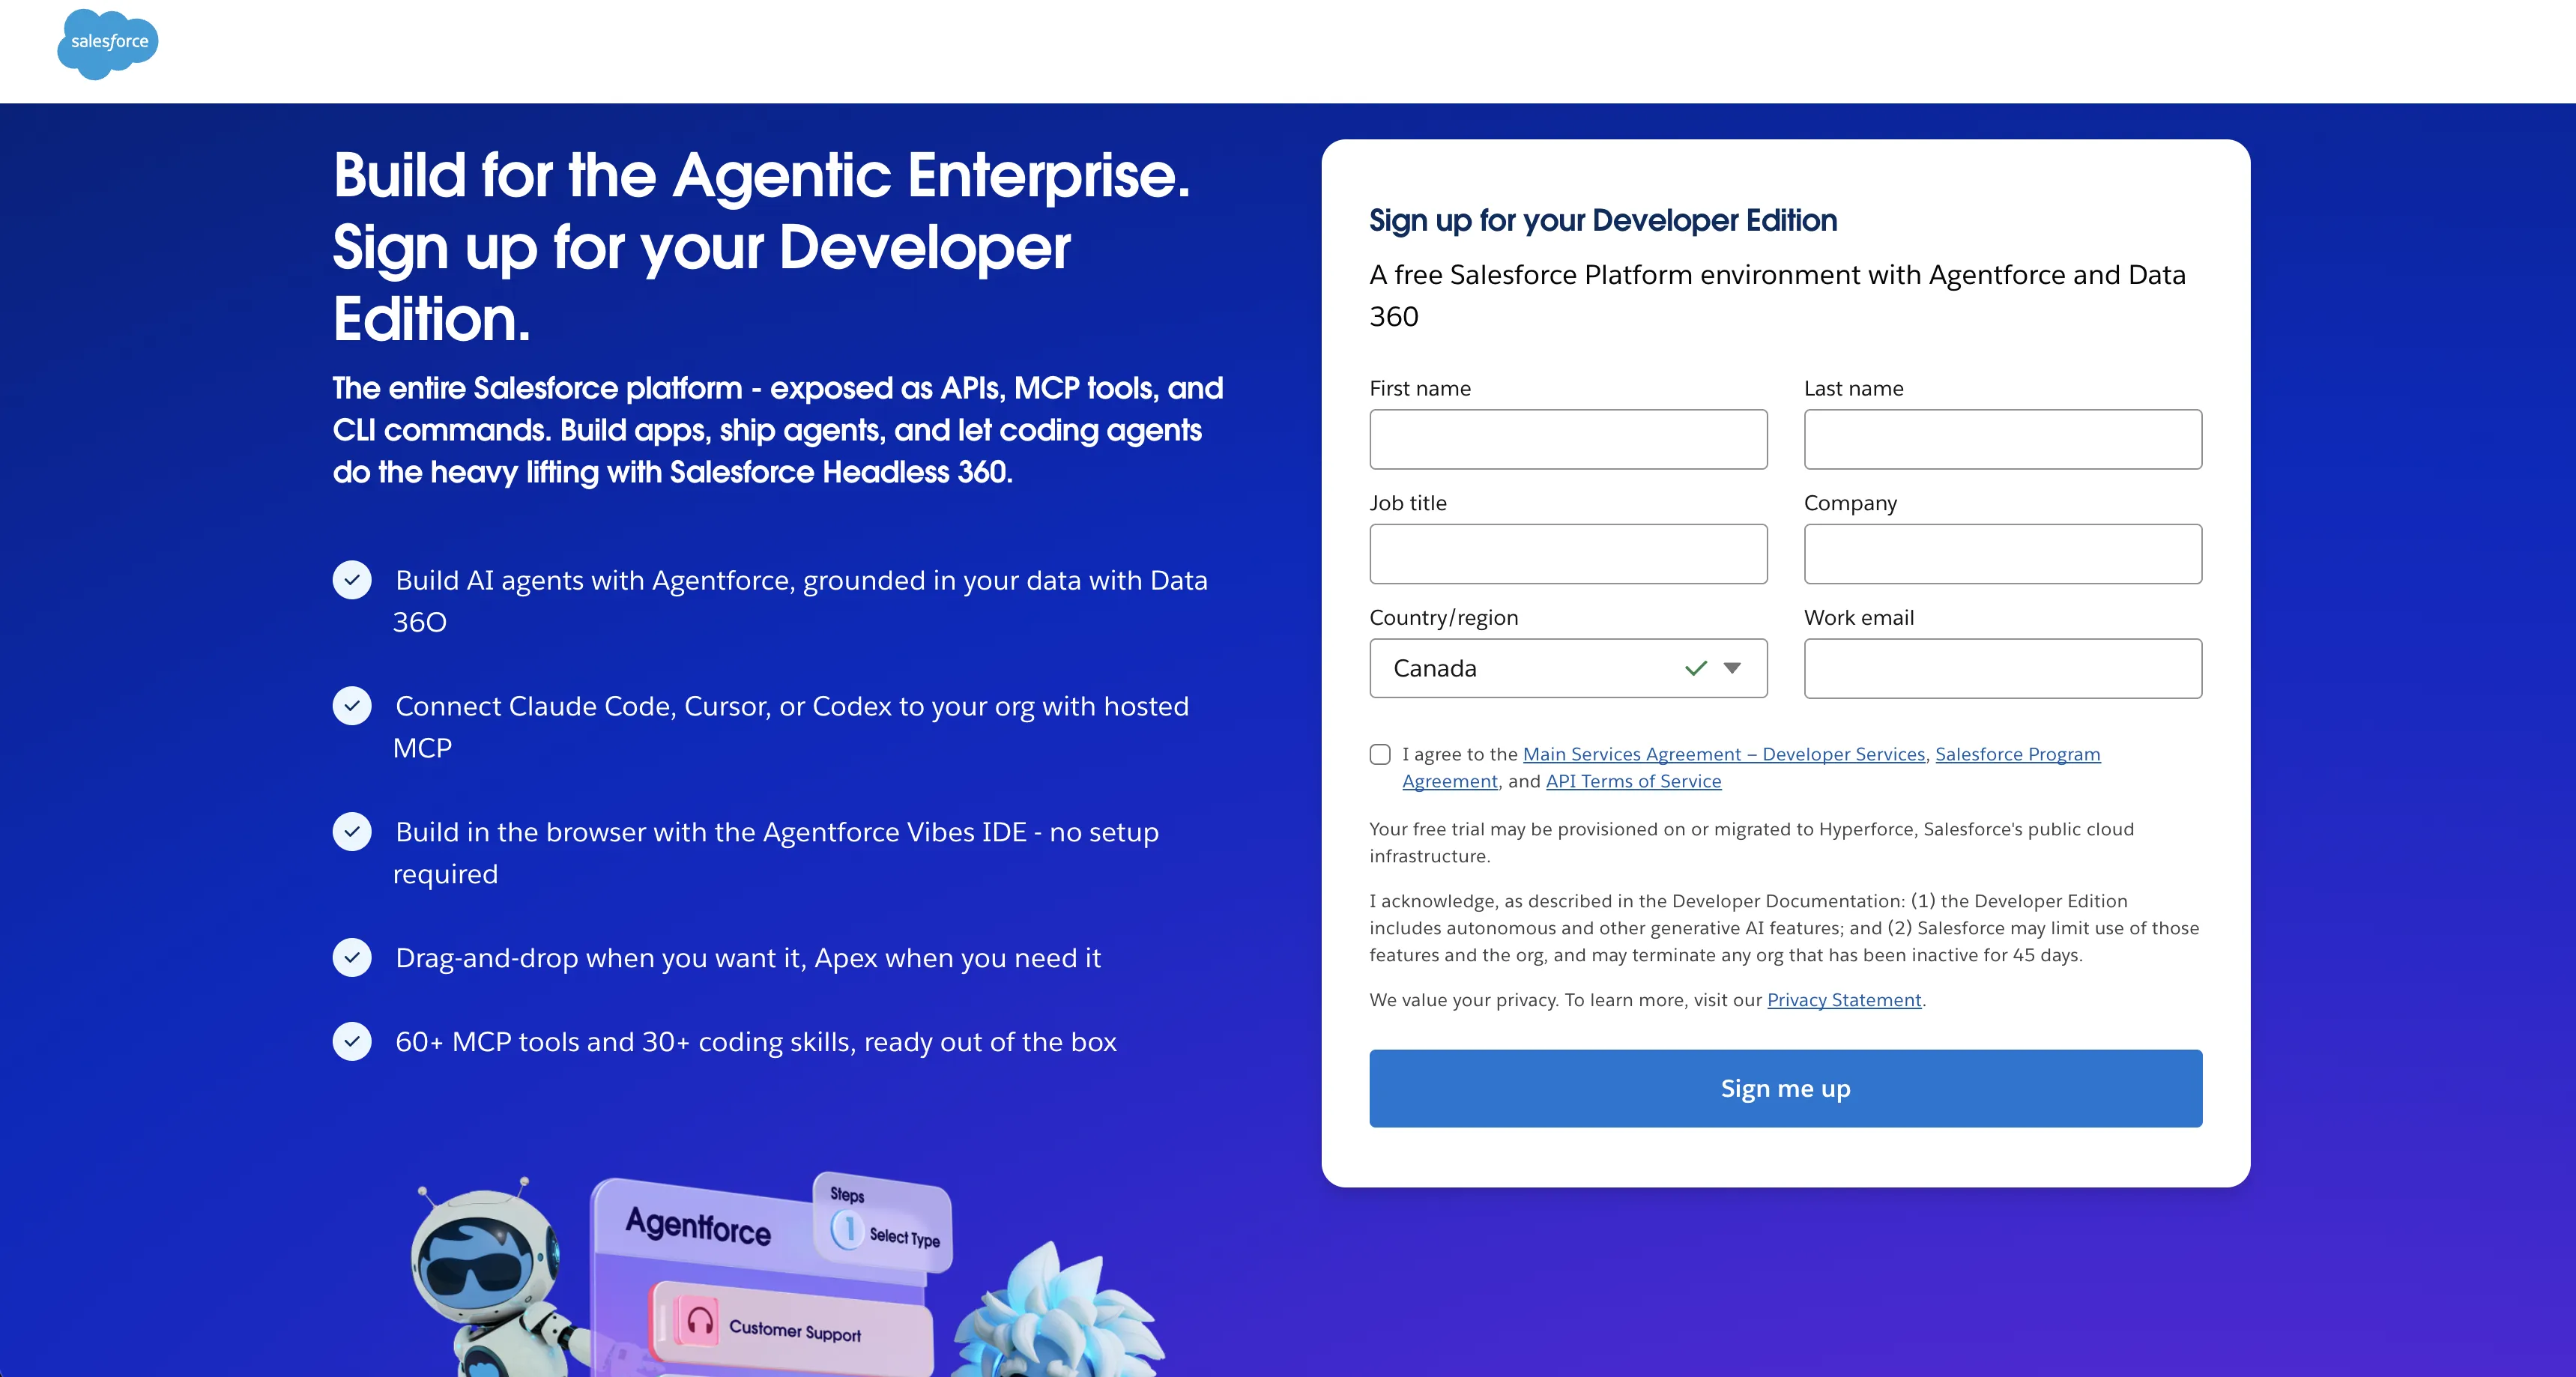
Fill in your details and click Sign me up. You’ll get an email to set your password; once that’s done, log in to your new org. Salesforce will send a verification code to your email; enter it, and you’re in your Developer Edition org.
Step 4: Turn on Agentforce and Einstein in Salesforce
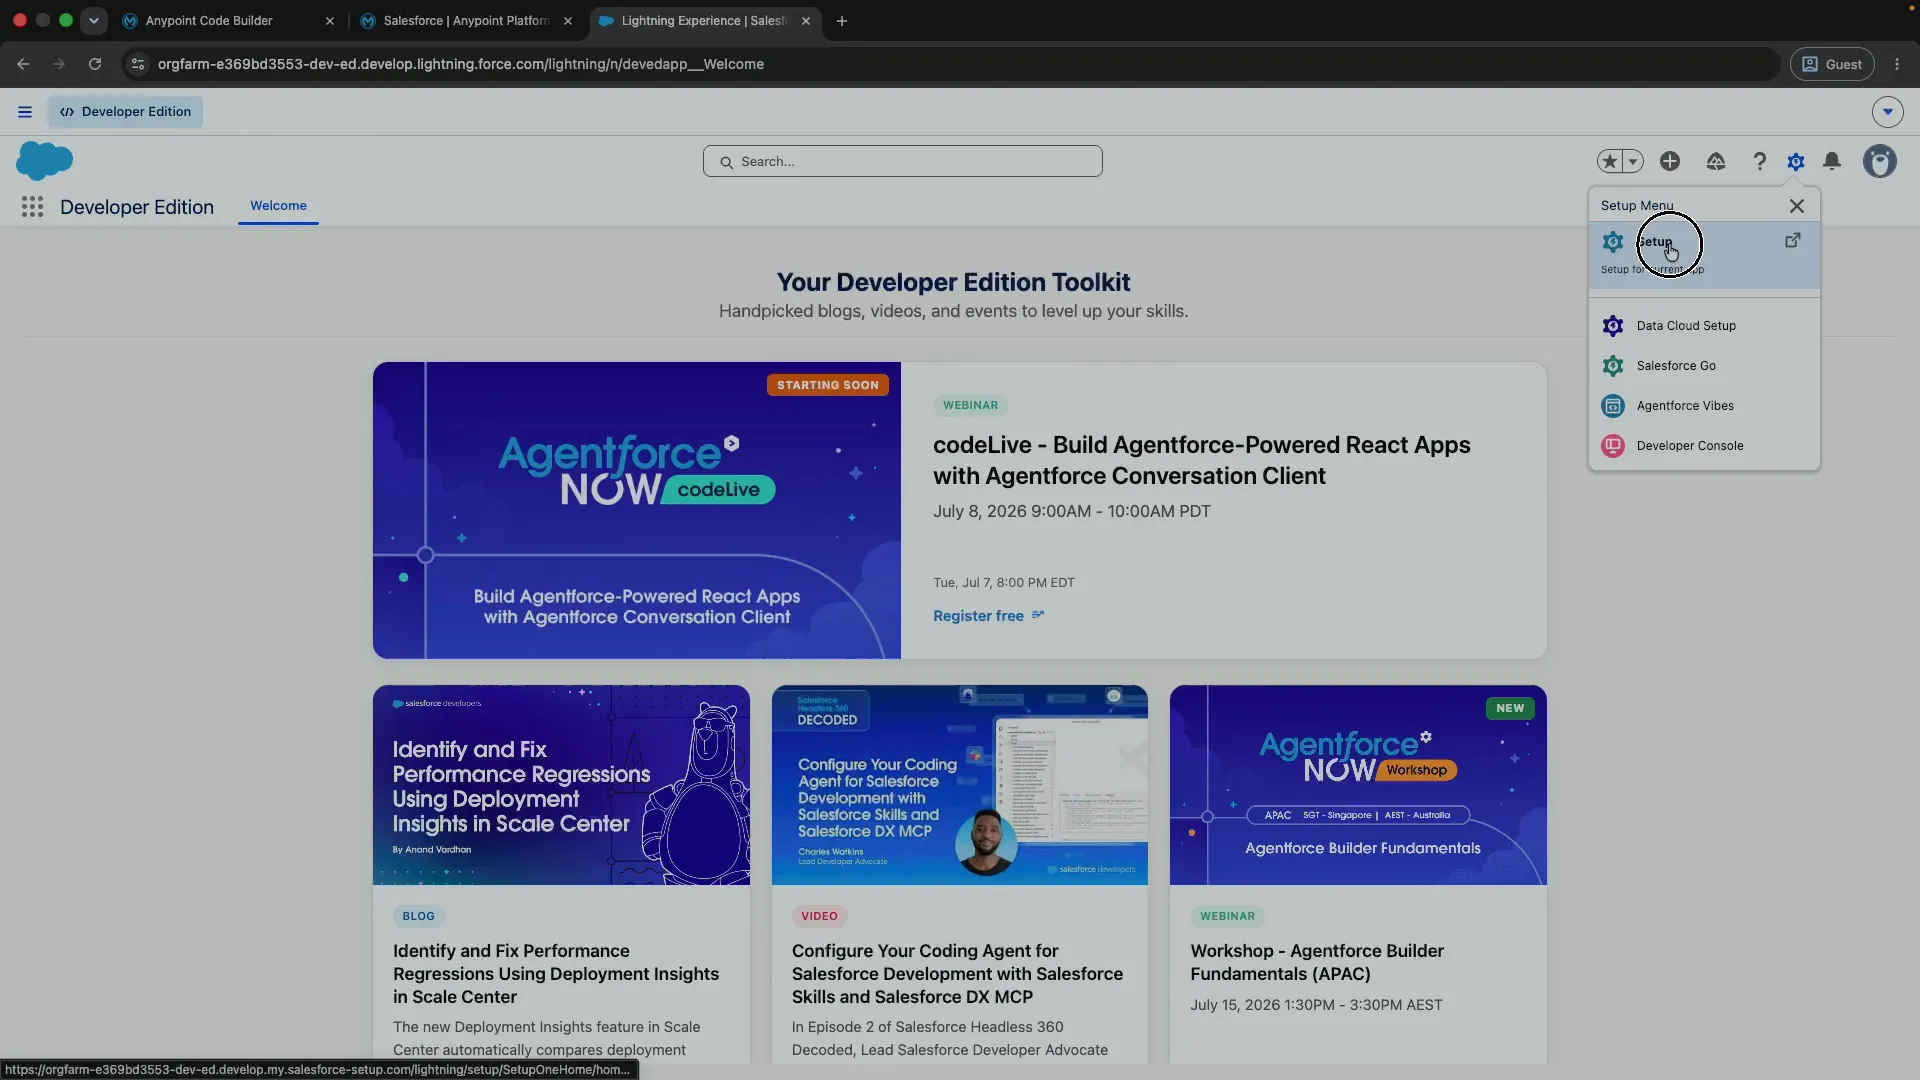
Click the gear icon and open Setup.
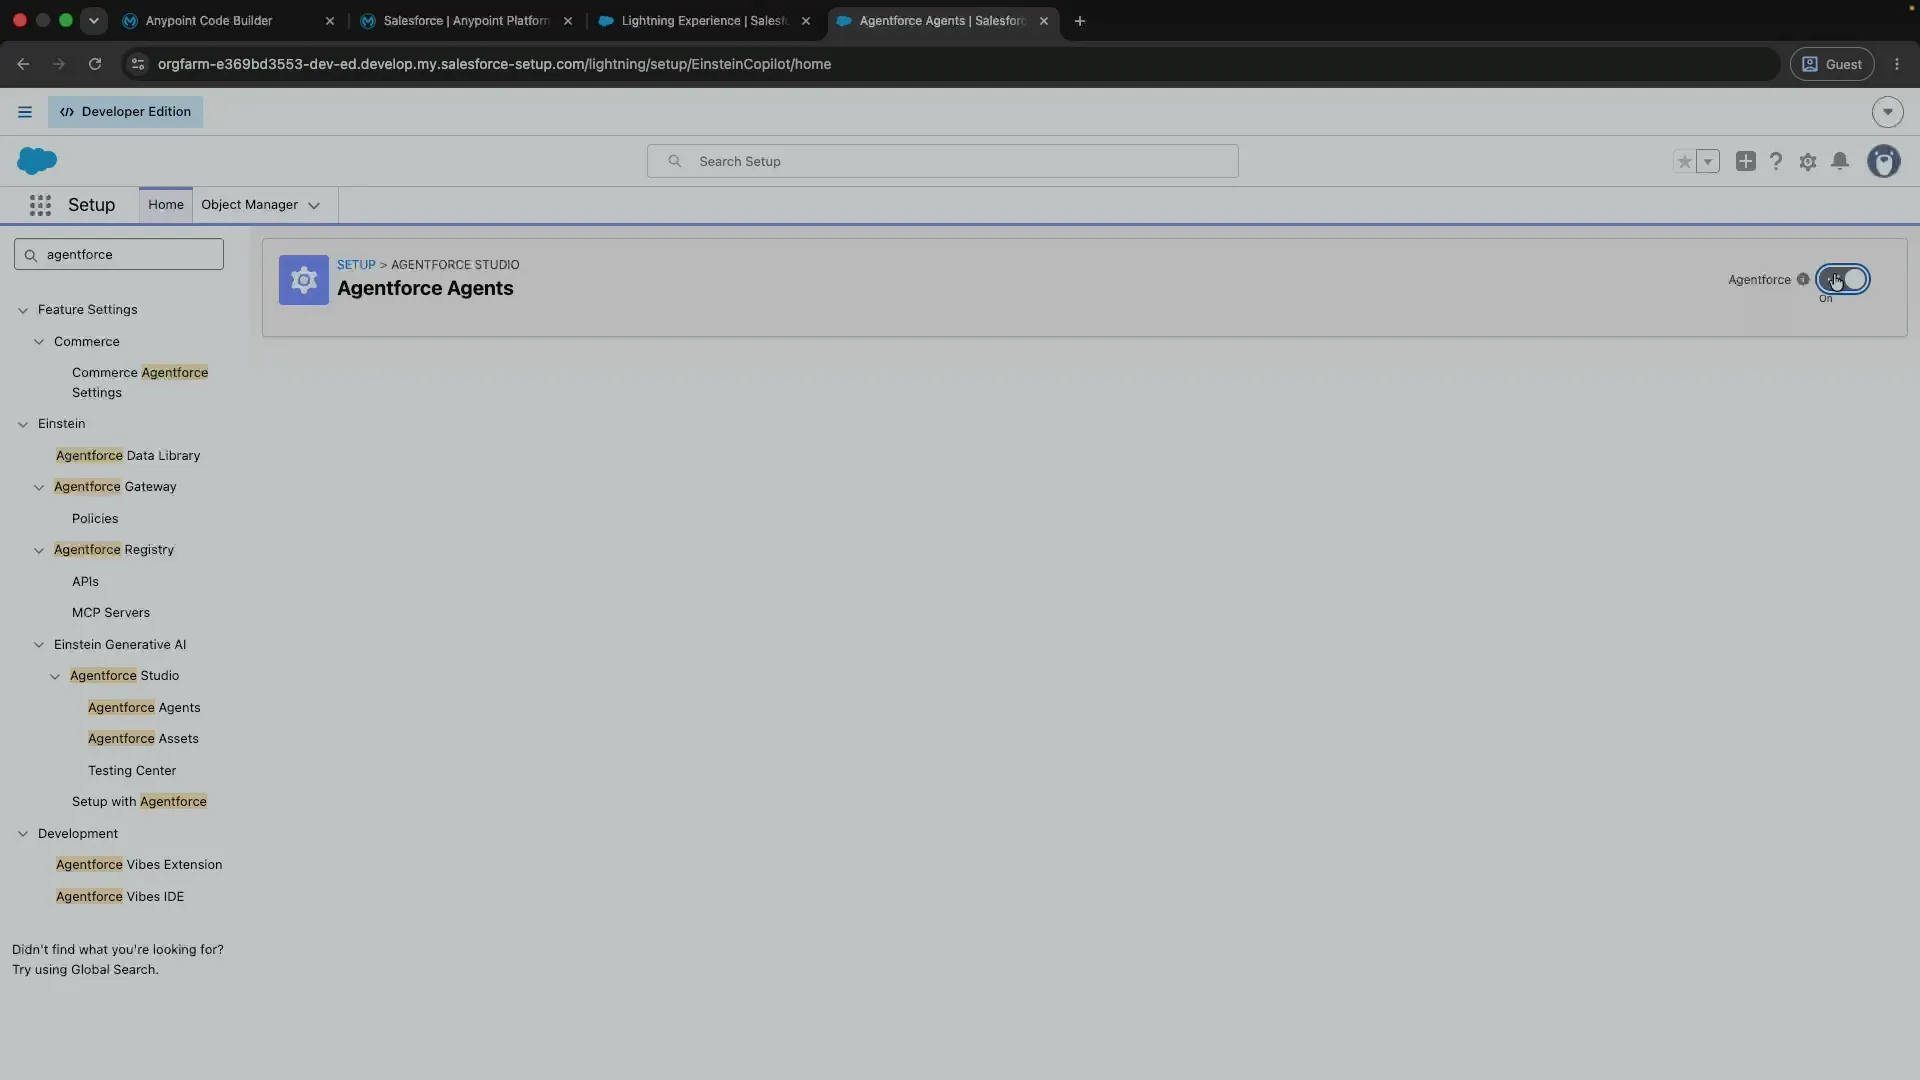
In Quick Find, search for agentforce, open Agentforce Agents, and toggle Agentforce on.
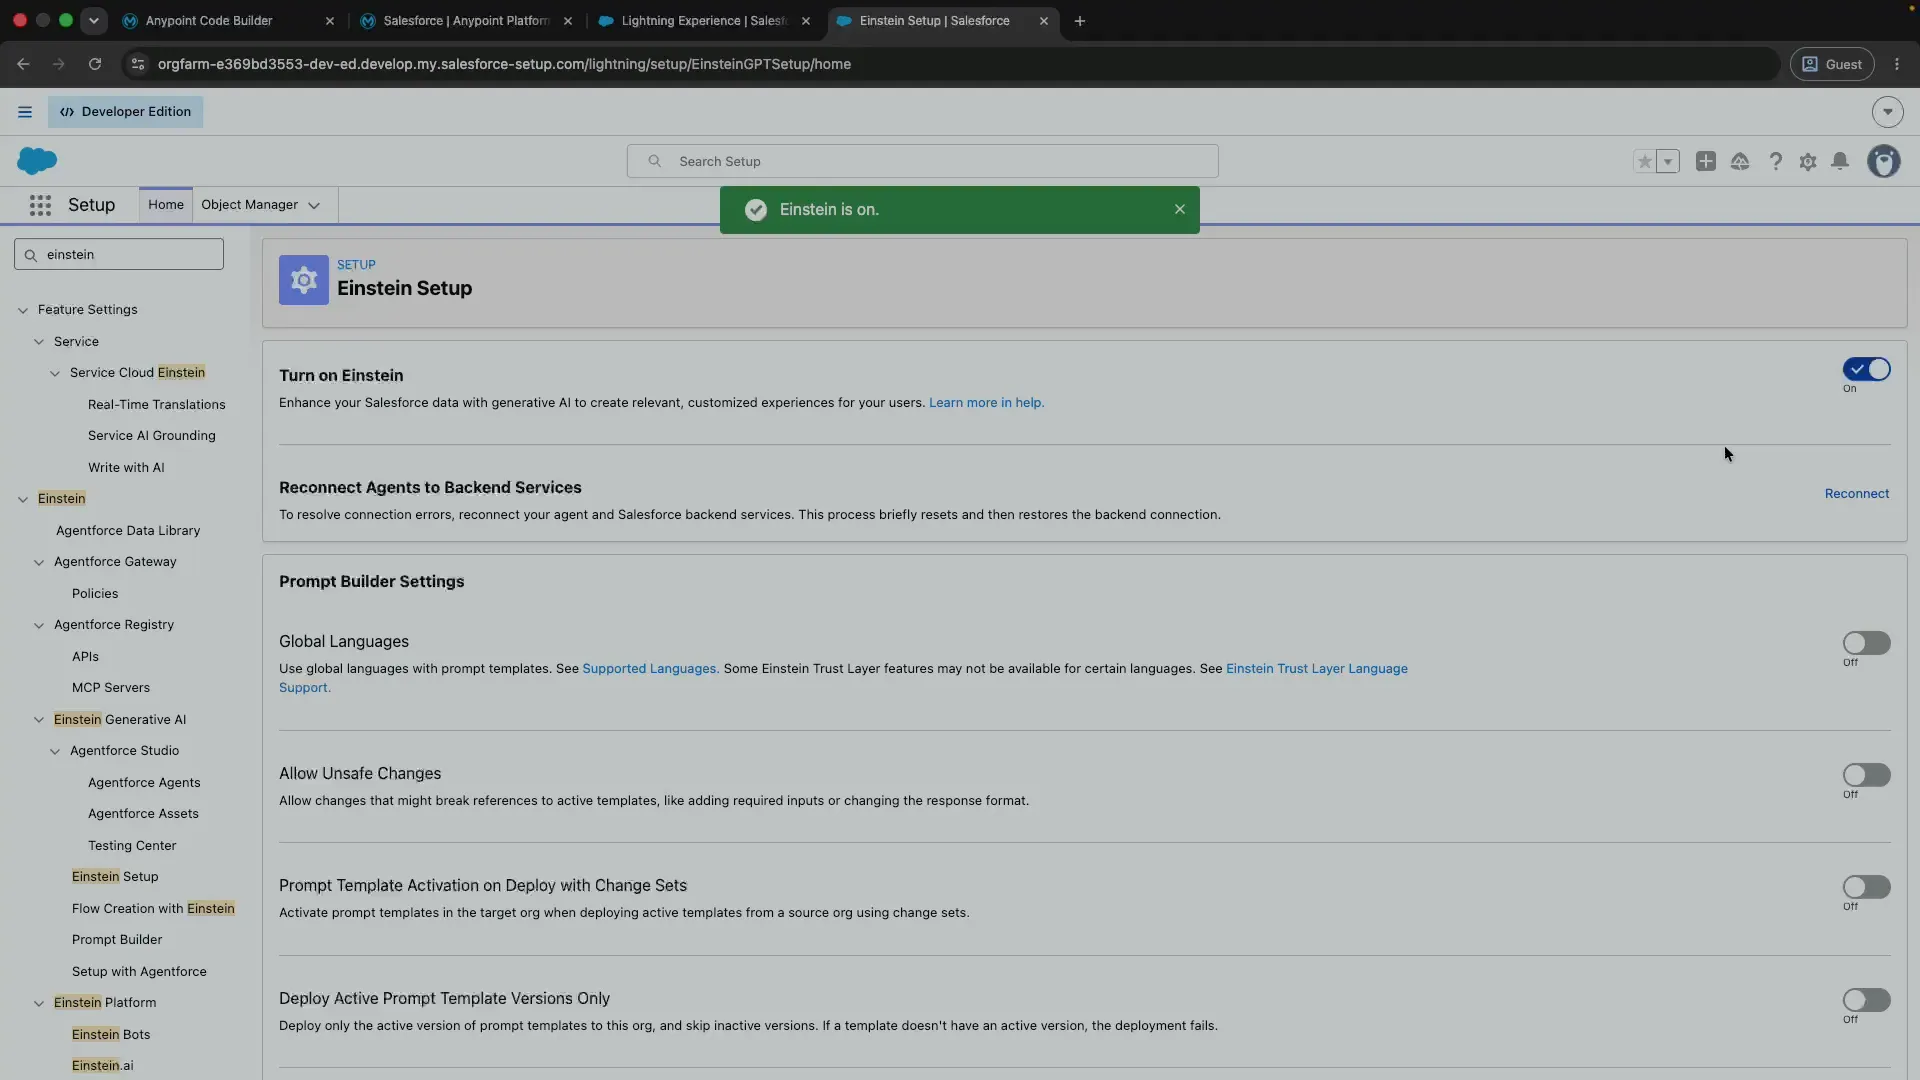
While you’re here, search for einstein, open Einstein Setup, and make sure Turn on Einstein
is switched on too, just in case.
Step 5: Connect Anypoint Platform to your Salesforce org
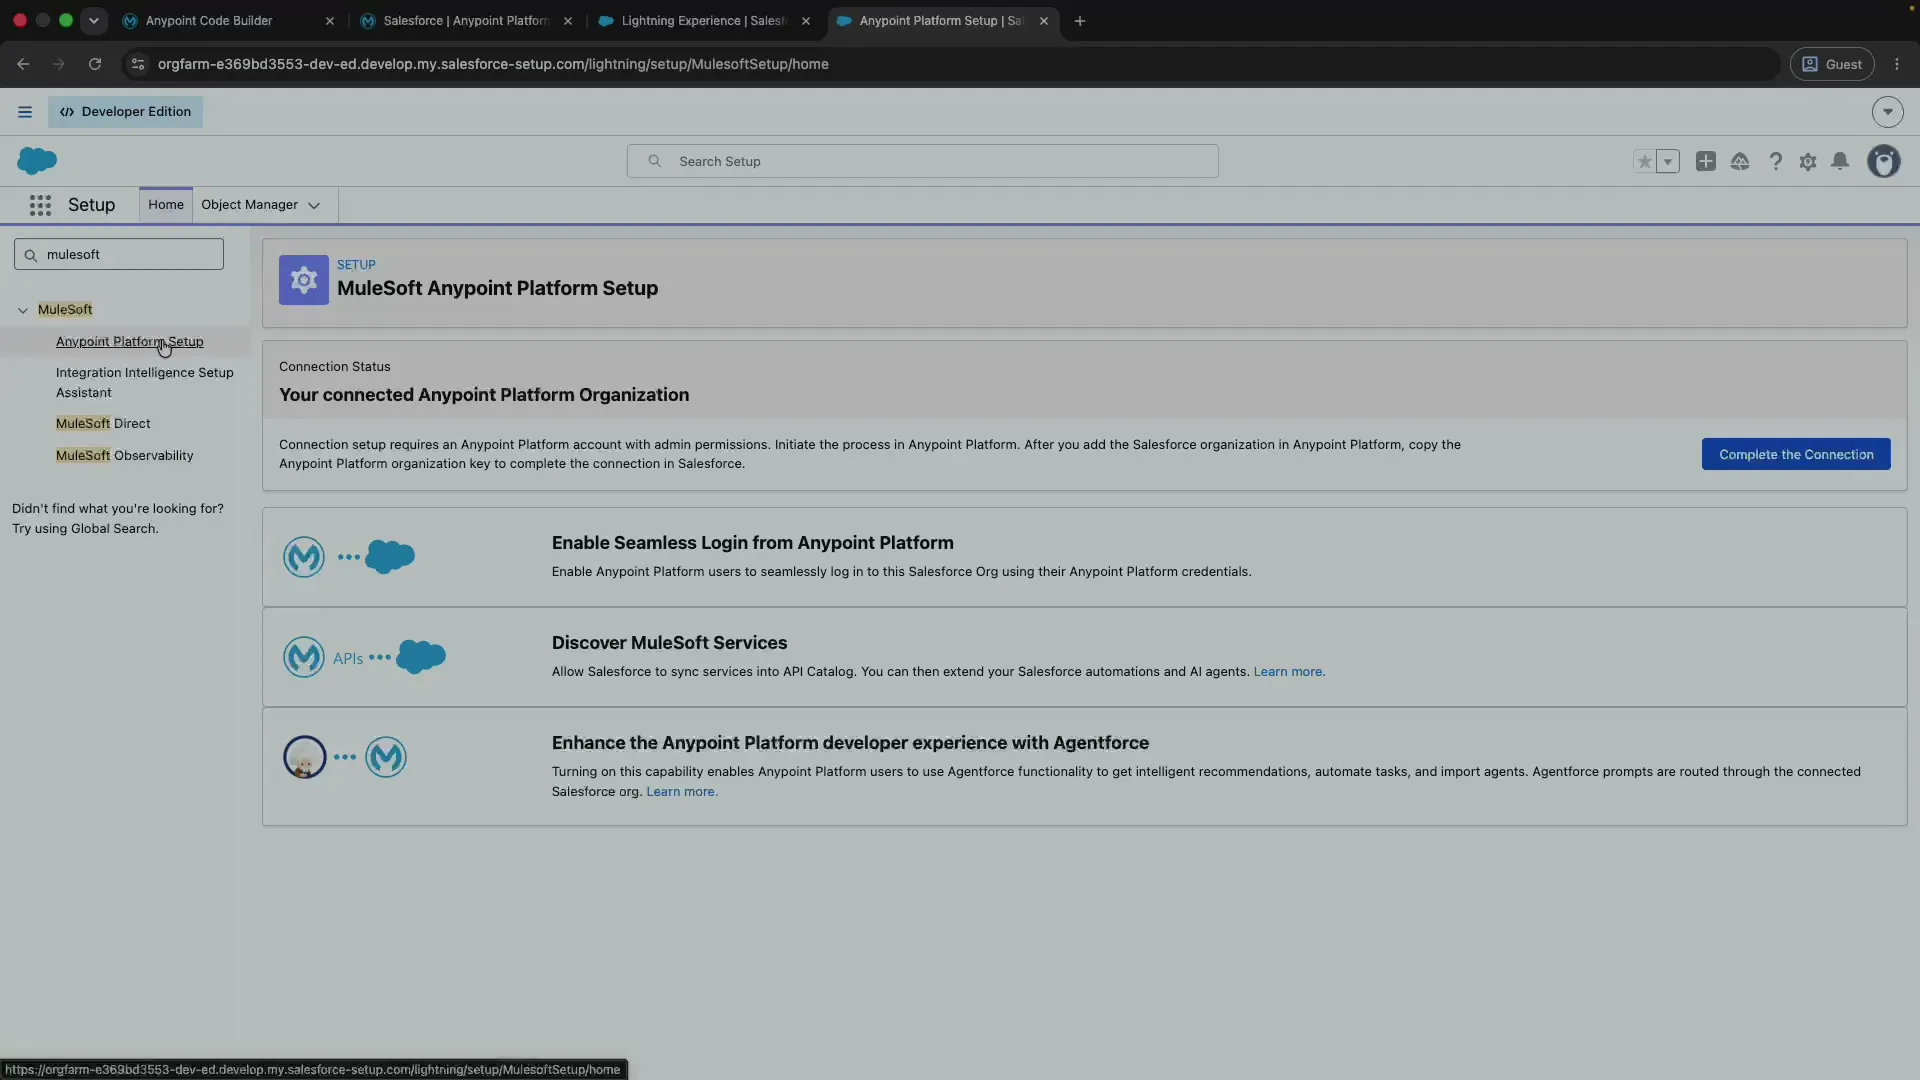
Still in Salesforce Setup, search for mulesoft and open MuleSoft Anypoint Platform Setup. Click
Complete the Connection.
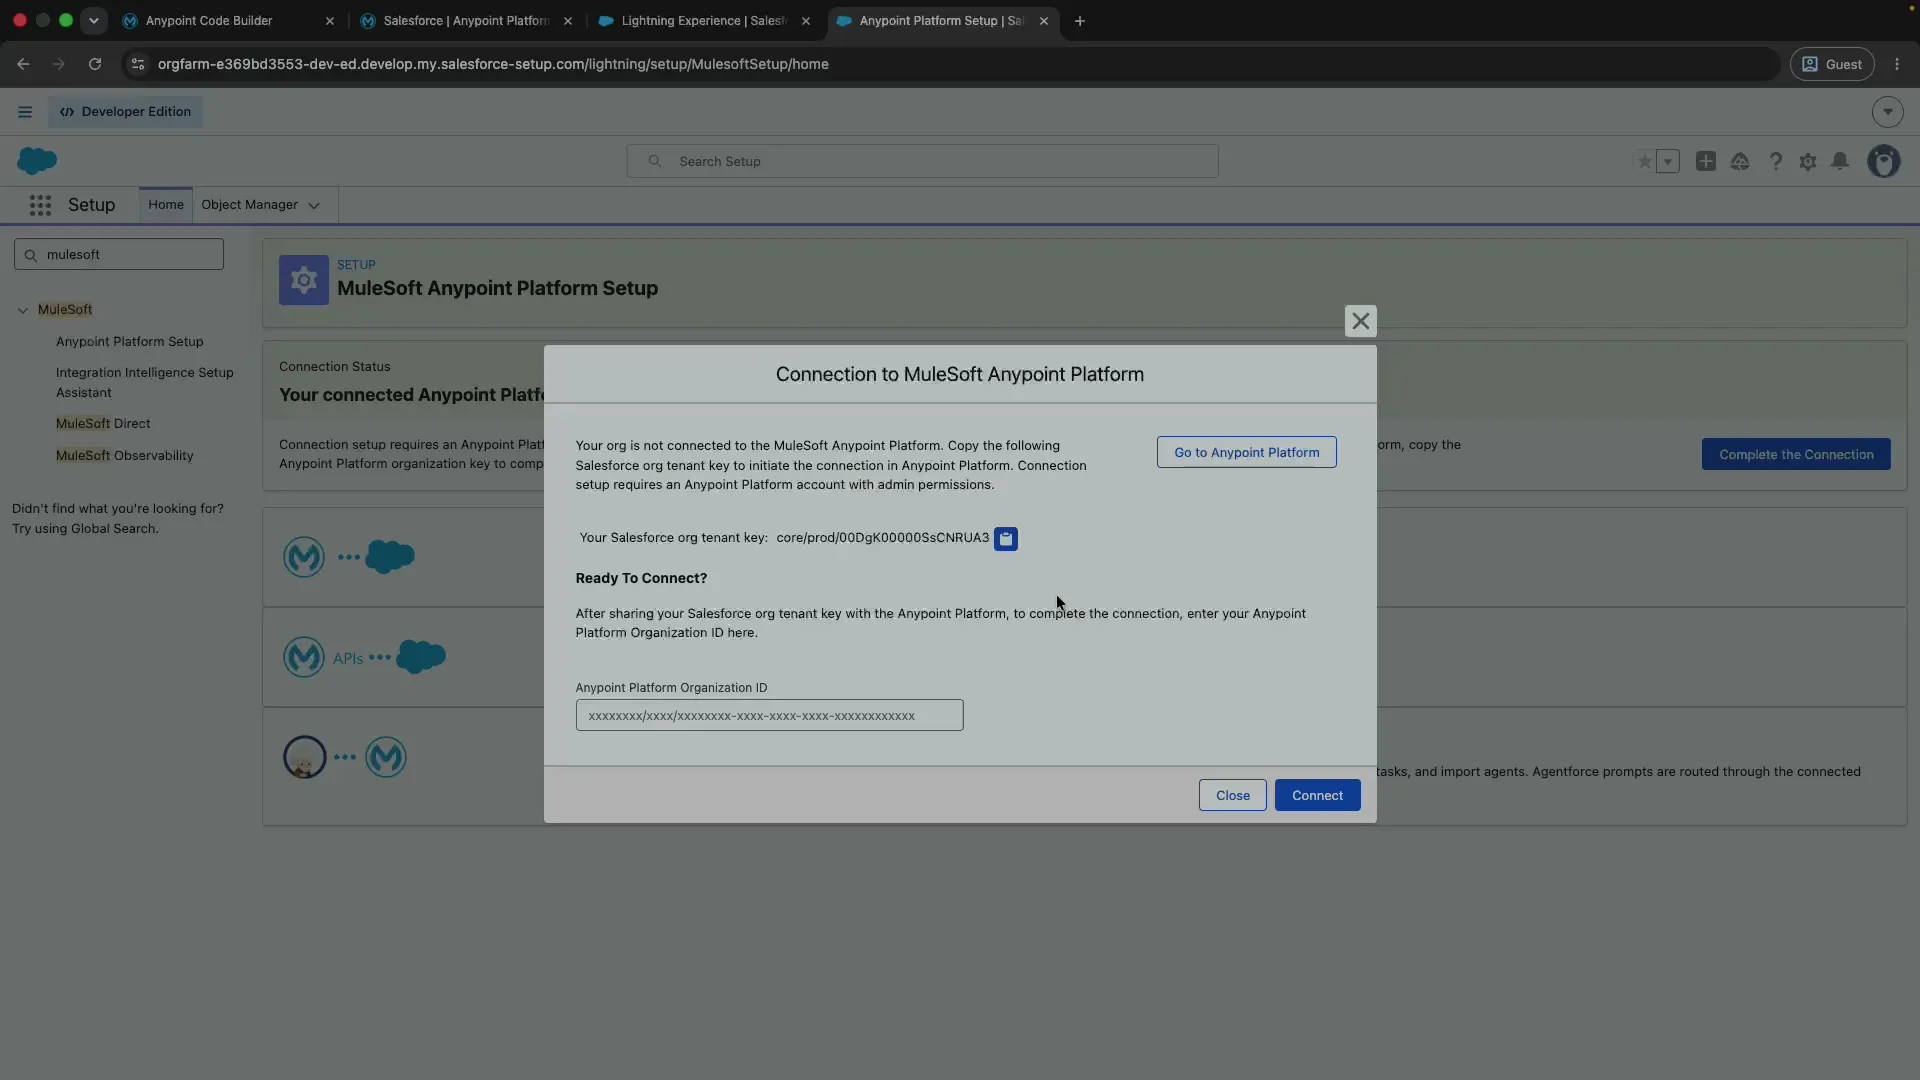
Copy your Salesforce org tenant key from the dialog.
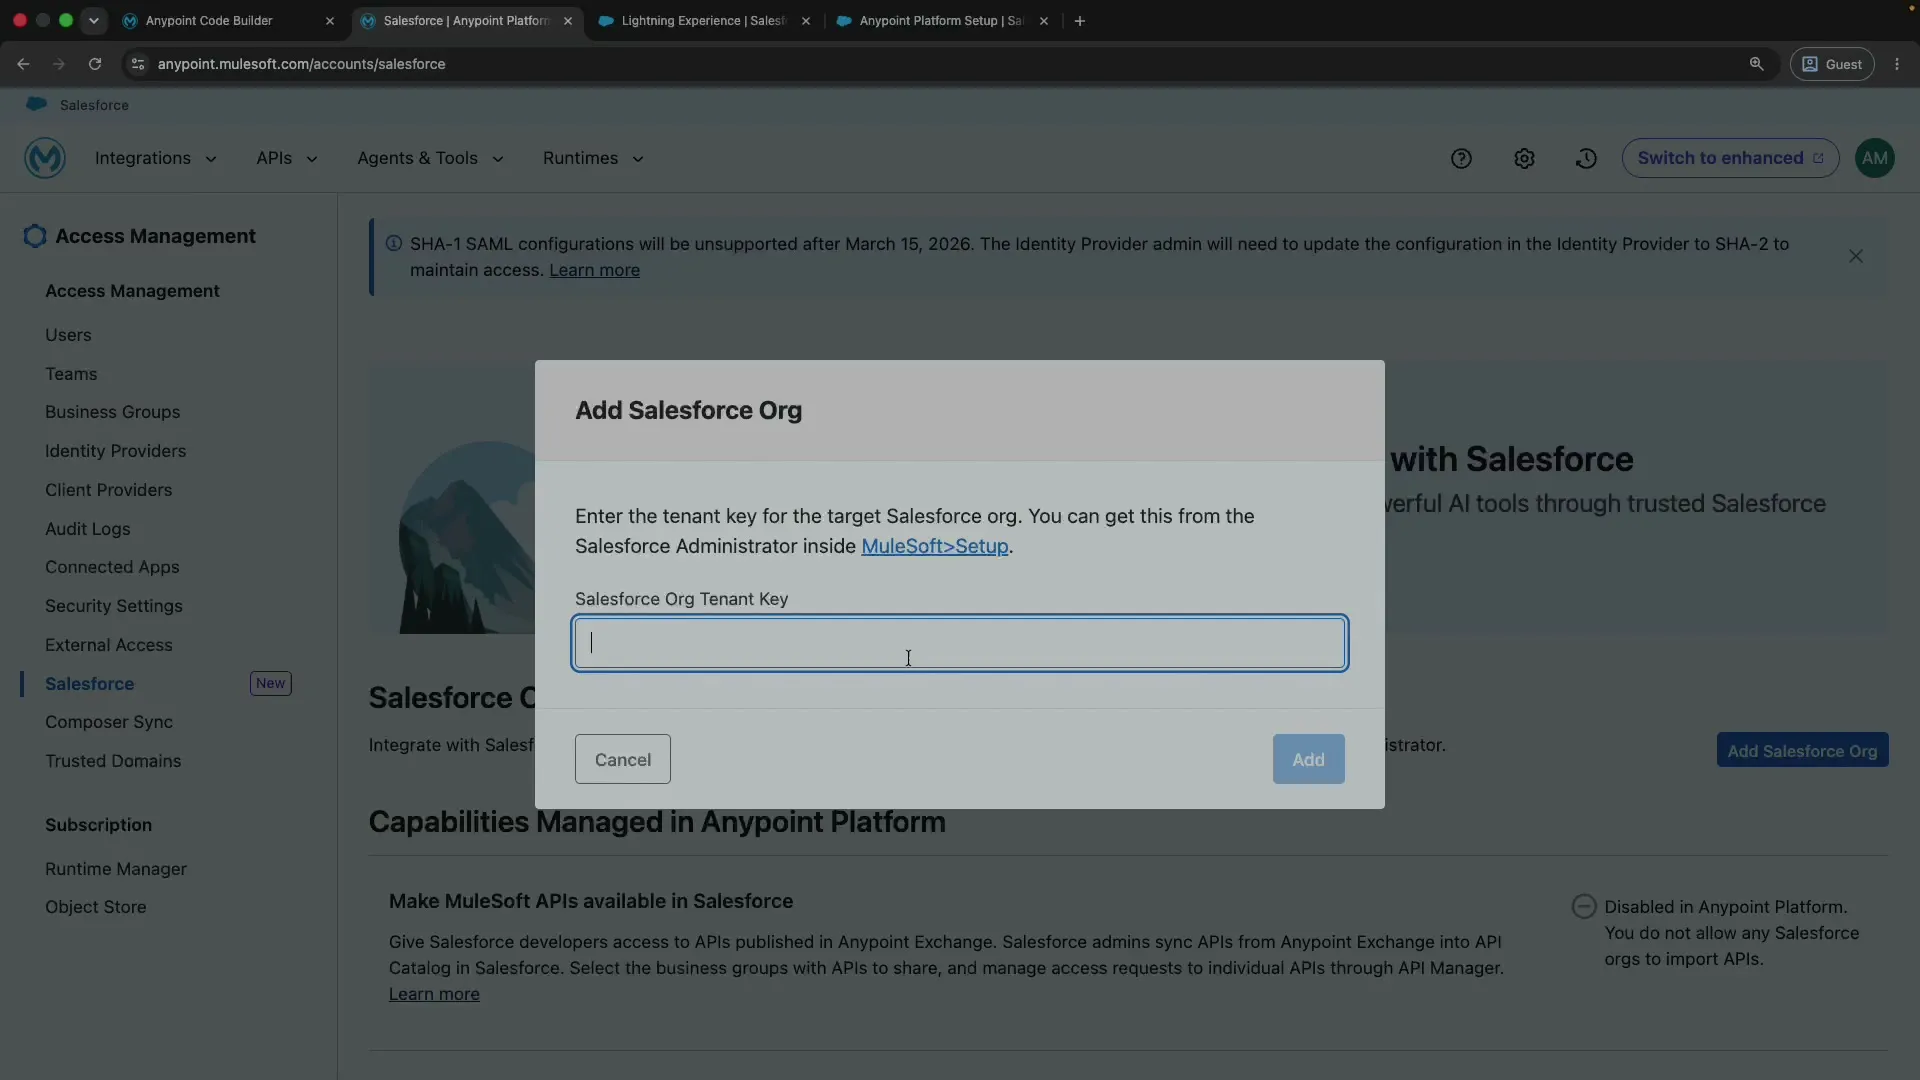
Now switch back to Anypoint Platform, go to Access Management and the Salesforce section, and click Add Salesforce Org. Paste the tenant key you just copied.
Tip
If you see the error An error occurred: Organization is not yet onboarded to GDoT, don’t panic.
Just wait a couple of minutes, refresh, and try again. It usually clears on its own.
Give the org a name you’ll recognize (I called mine sfdevaccount) and click Add.
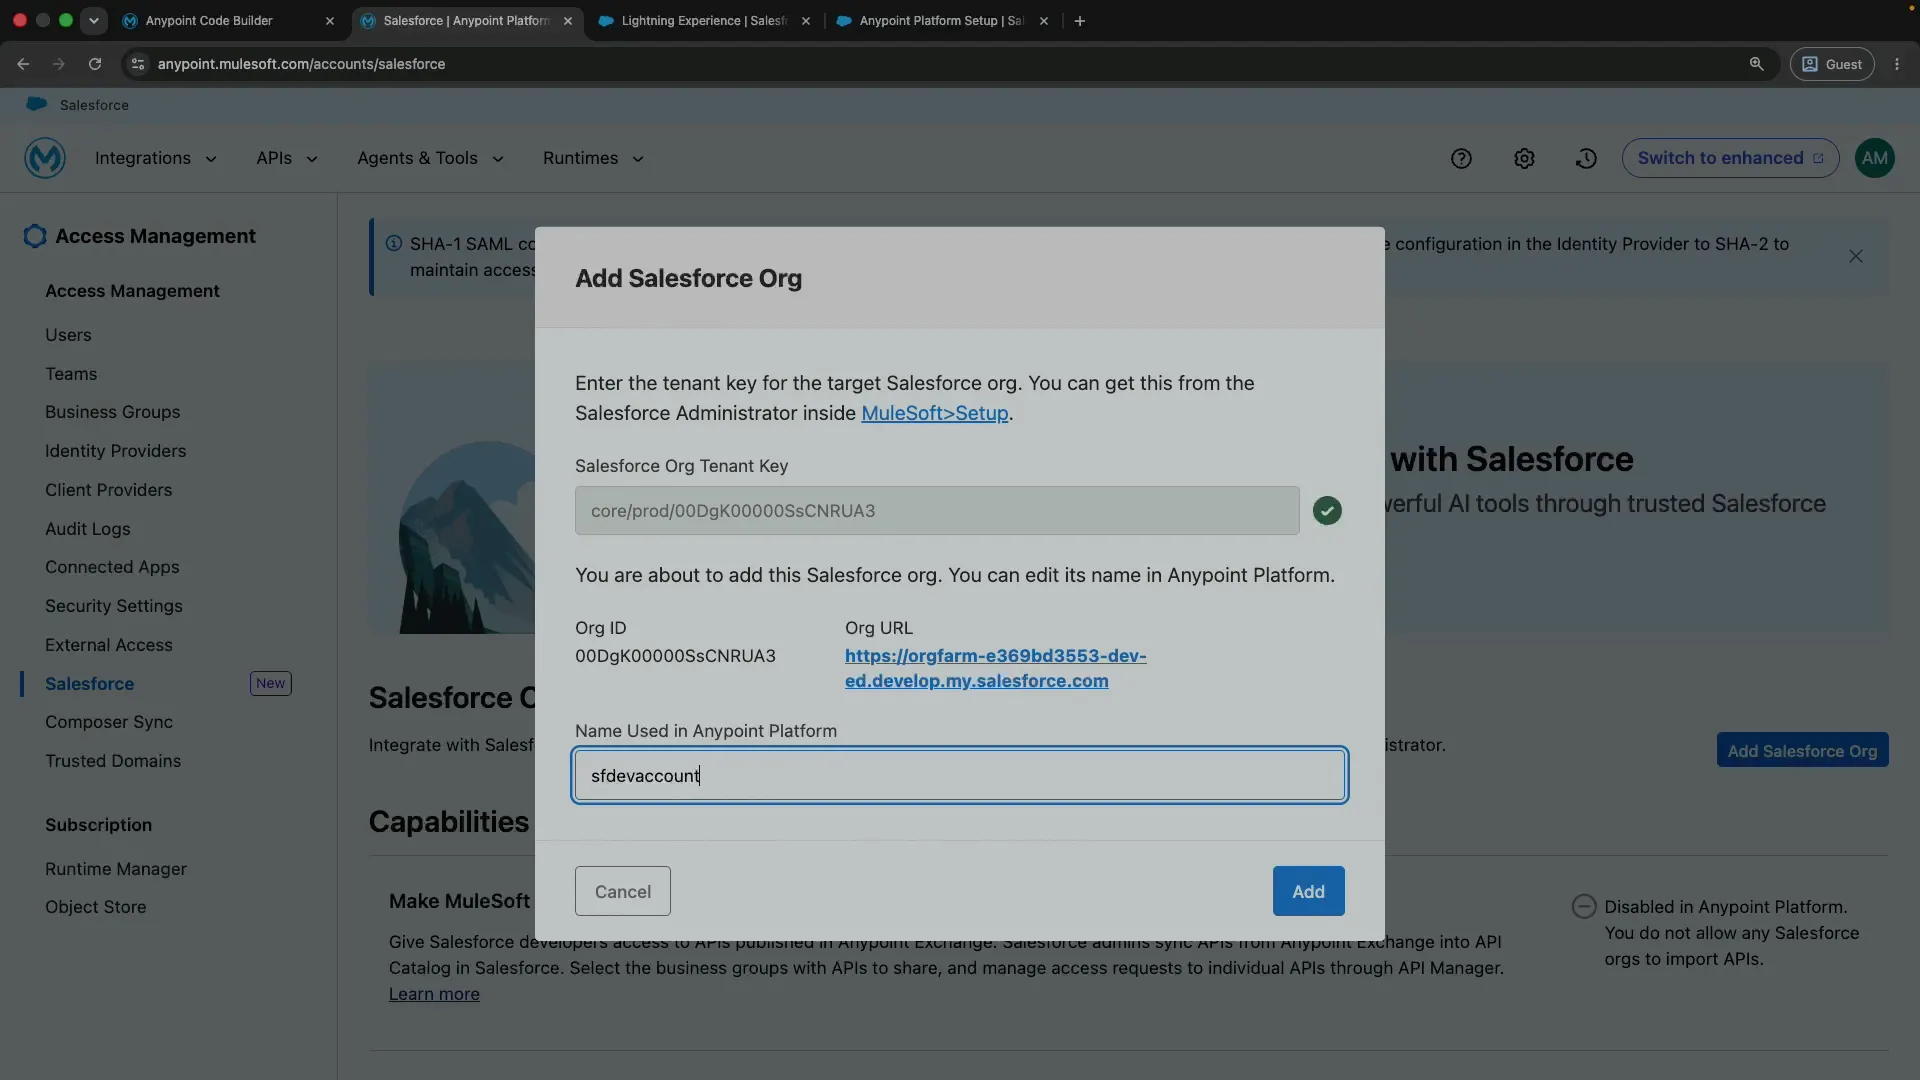
Anypoint Platform now gives you an Anypoint Platform Org Key. Copy it, go back to the Salesforce connection dialog, paste it into the Anypoint Platform Organization ID field, and click Connect.
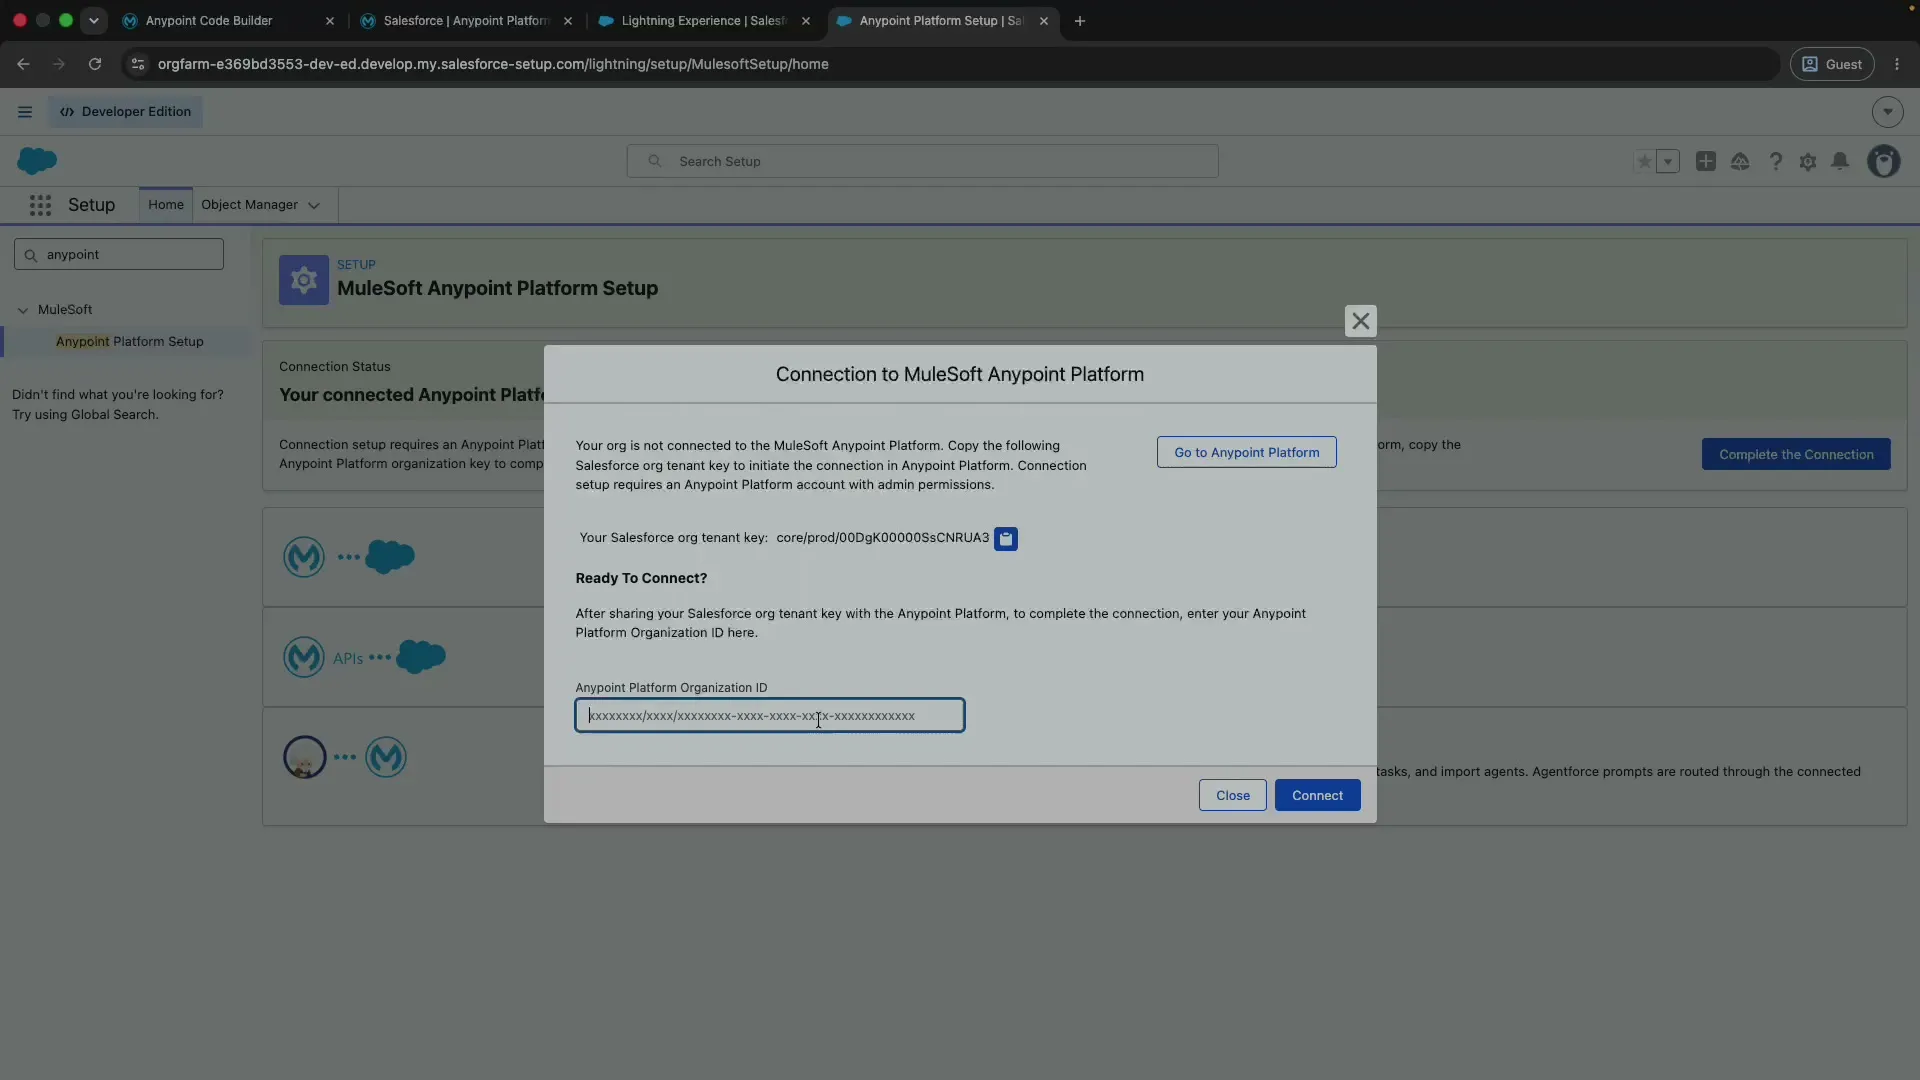
After that, you should see a success message saying the MuleSoft connection was created.
Step 6: Flip the final Agentforce toggle
One last switch: on the MuleSoft Anypoint Platform Setup page you land on after the connection succeeds, under Managed in Salesforce, turn on Enable Agentforce in Anypoint Platform.
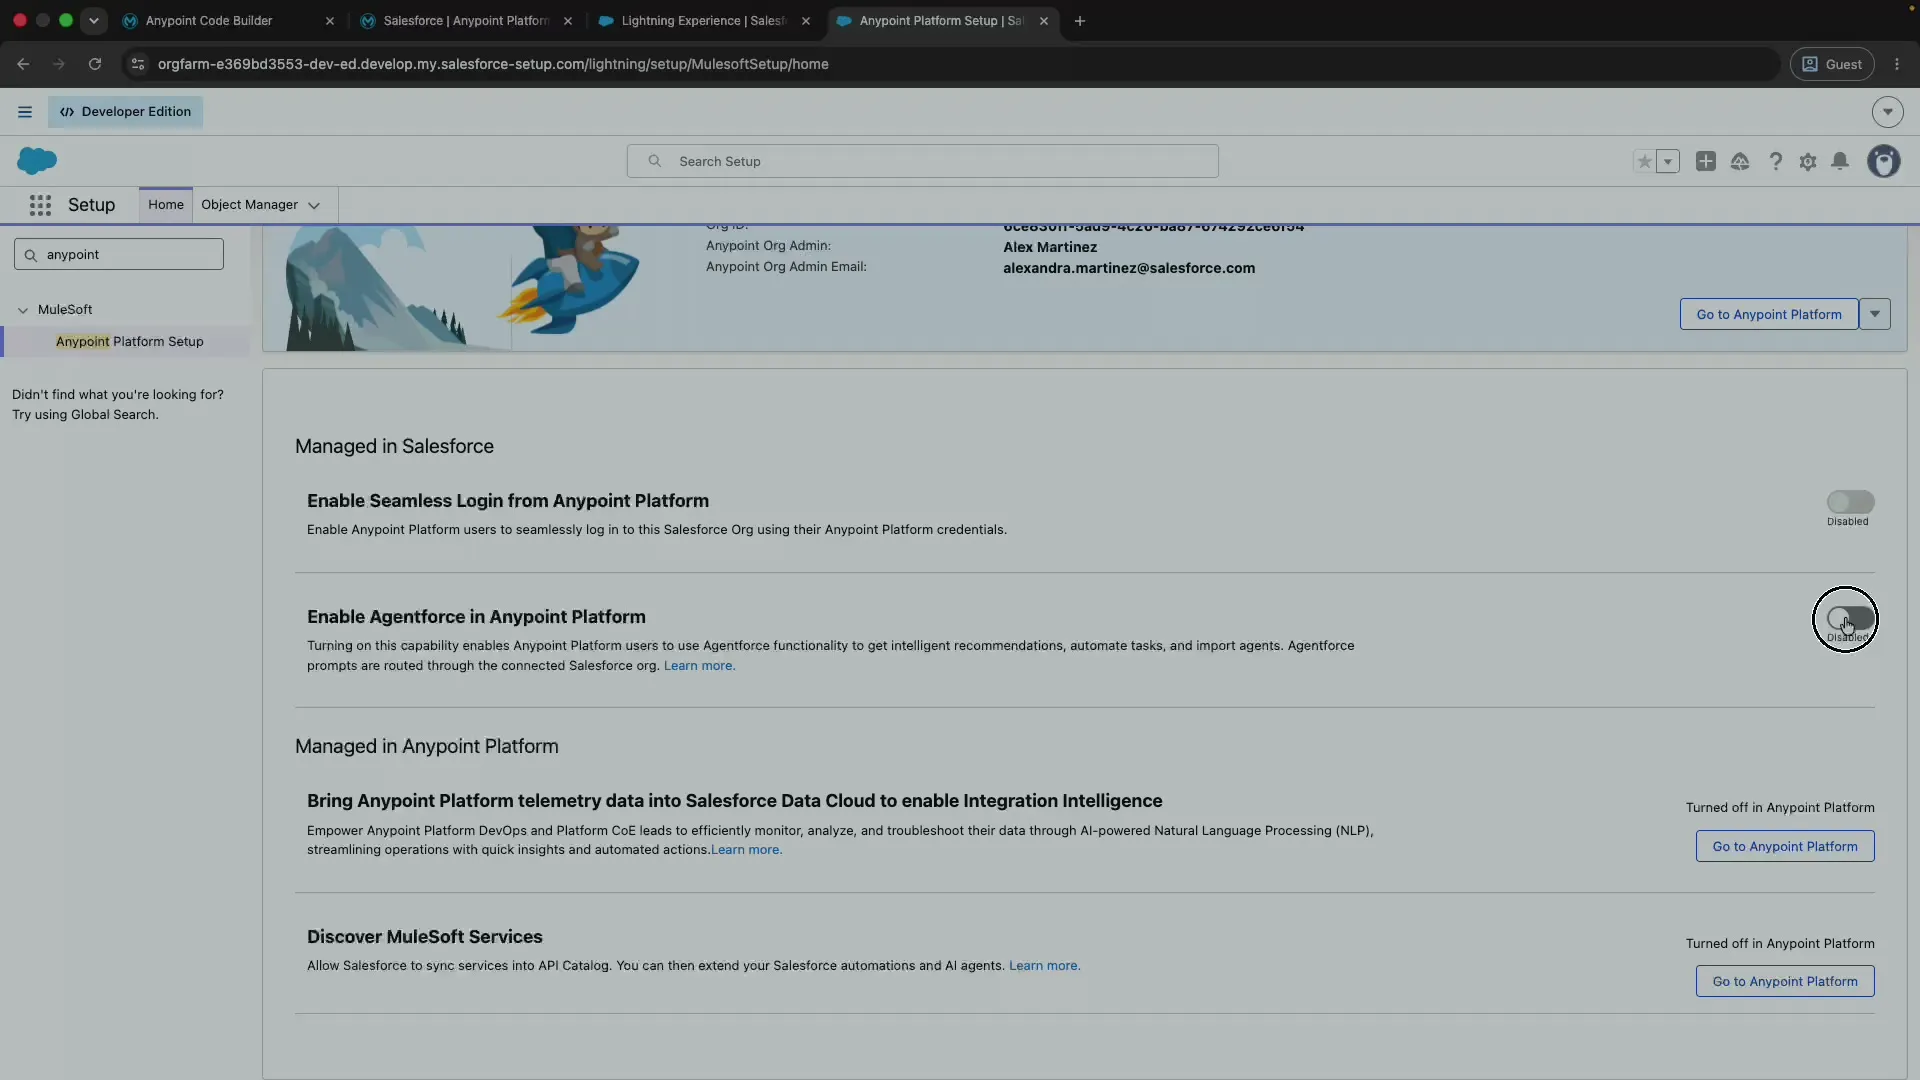
That’s the last piece. With this toggle on, Agentforce is enabled in Anypoint Platform and your Salesforce org is fully connected, so MuleSoft Vibes finally has everything it needs behind it. Time to head back to VS Code.
Step 7: Use MuleSoft Vibes!
Head back to VS Code and click Try Again on the MuleSoft Vibes panel (it might take a click or two while everything syncs). When it loads, you’ll see “How can I help you today?” with suggested prompts. Vibes is live! 🎉
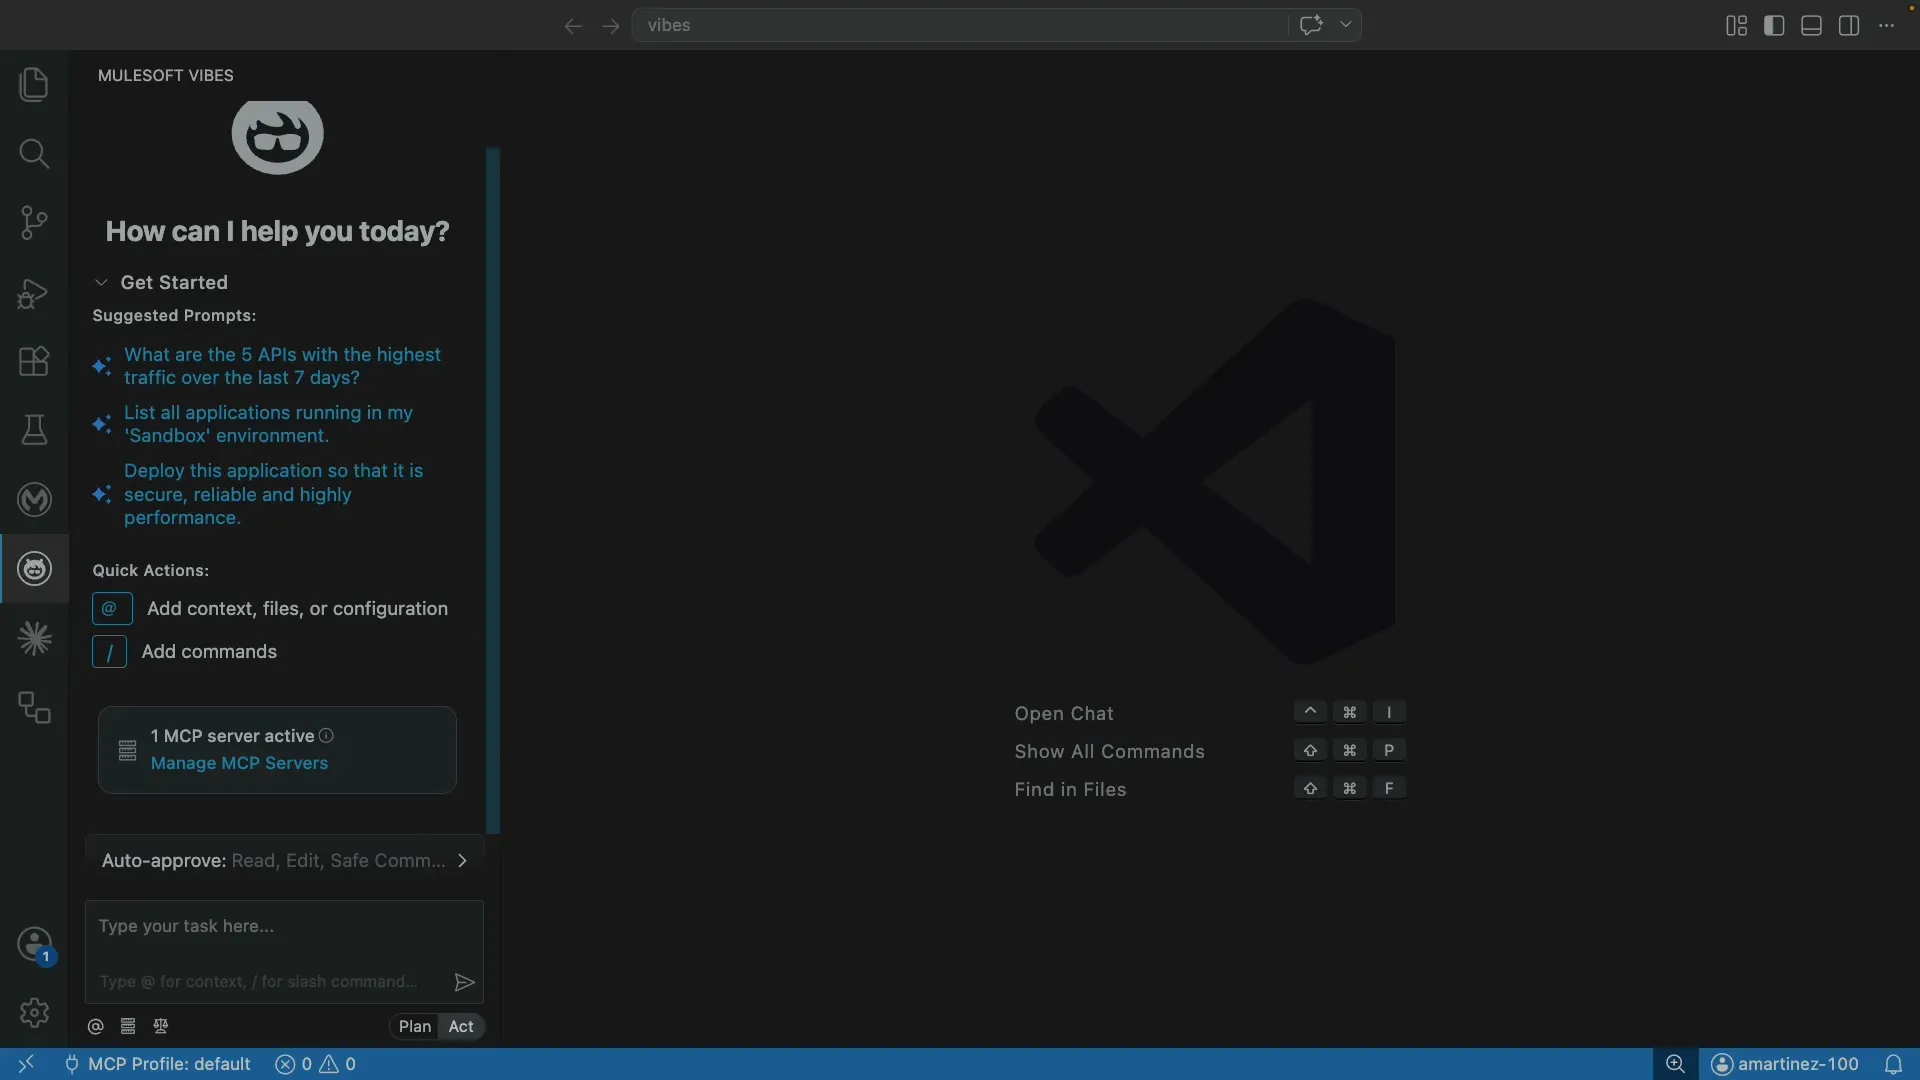
That’s everything you need to enable MuleSoft Vibes from Anypoint Code Builder or VS Code. From here you can ask it about your APIs, list running applications, or have it help you deploy, all right inside your editor.
FAQs
Frequently asked questions about this post.
-
Why won't MuleSoft Vibes turn on, with its AI features greyed out?
MuleSoft Vibes needs a Salesforce org with Agentforce enabled behind it, and that connection isn't set up for you by default. Logging in to Anypoint Platform alone won't enable the AI features. You have to enable Agentforce in Anypoint Platform, connect a Salesforce org, and flip the final Agentforce toggle, as this guide walks through.
-
Do I need a paid Salesforce org to use MuleSoft Vibes?
No. A free Salesforce Developer Edition org works. If you don't already have one, you can create it for free at https://www.salesforce.com/products/free-trial/developer/ , which this guide covers in Step 3.
-
What's the difference between Anypoint Code Builder and MuleSoft Vibes in VS Code?
After installing the Anypoint Extension Pack you get two new icons in the VS Code activity bar. The first MuleSoft logo is Anypoint Code Builder, and the second one is MuleSoft Vibes, the AI assistant this guide enables.
-
I logged in to Anypoint Platform but Vibes still has no AI features. Is that normal?
Yes, that's expected right after logging in. The rest of the setup happens in Anypoint Platform and Salesforce, so Vibes only gets its AI features once you've enabled Agentforce and connected a Salesforce org.
-
How do I fix "An error occurred: Organization is not yet onboarded to GDoT" when adding my Salesforce org?
This error appears when you add your Salesforce org in Anypoint Platform right after enabling Agentforce, because the org onboarding hasn't finished propagating yet. Wait a couple of minutes, refresh, and try adding the org again. It usually clears on its own.