How to integrate Solace PubSub+ Cloud with MuleSoft
In this article, I will demonstrate how to integrate Solace PubSub+ with MuleSoft to publish and consume the messages.
Integrate Solace PubSub+ Cloud with MuleSoft· Part 1 of 2
- 1.How to integrate Solace PubSub+ Cloud with MuleSoft
- 2.How to integrate Solace PubSub+ Cloud with MuleSoft - Negative Scenario (Error Handling)

GitHub repository with the Mule project can be found at the end of the post.
In this article, I will demonstrate how to integrate Solace PubSub+ with MuleSoft to publish and consume the messages.
What is PubSub+?
PubSub+ is a platform that enables the design, discovery, streaming and full lifecycle management of events across distributed enterprises. It provides all of the tools necessary to support a modern event-driven architecture. The main components of the platform are PubSub+ Event Brokers, PubSub+ Event Portal and PubSub+ Cloud Console.
More information in the PubSub+ for Developers website.
Advantages and Disadvantages of Event-Driven Approach
Advantages
- Flexibility
- Scalability
- Agility
- Responsiveness
- Real-time Interactions
- Processing on-demand
Disadvantages
- More careful design required
- More thought goes in design and tracking
Now let us see the steps involved in Integrating Solace and MuleSoft.
1. Creating a Solace Cloud Trial Account
You can create a Free Solace trial account using the following link: https://console.solace.cloud/login
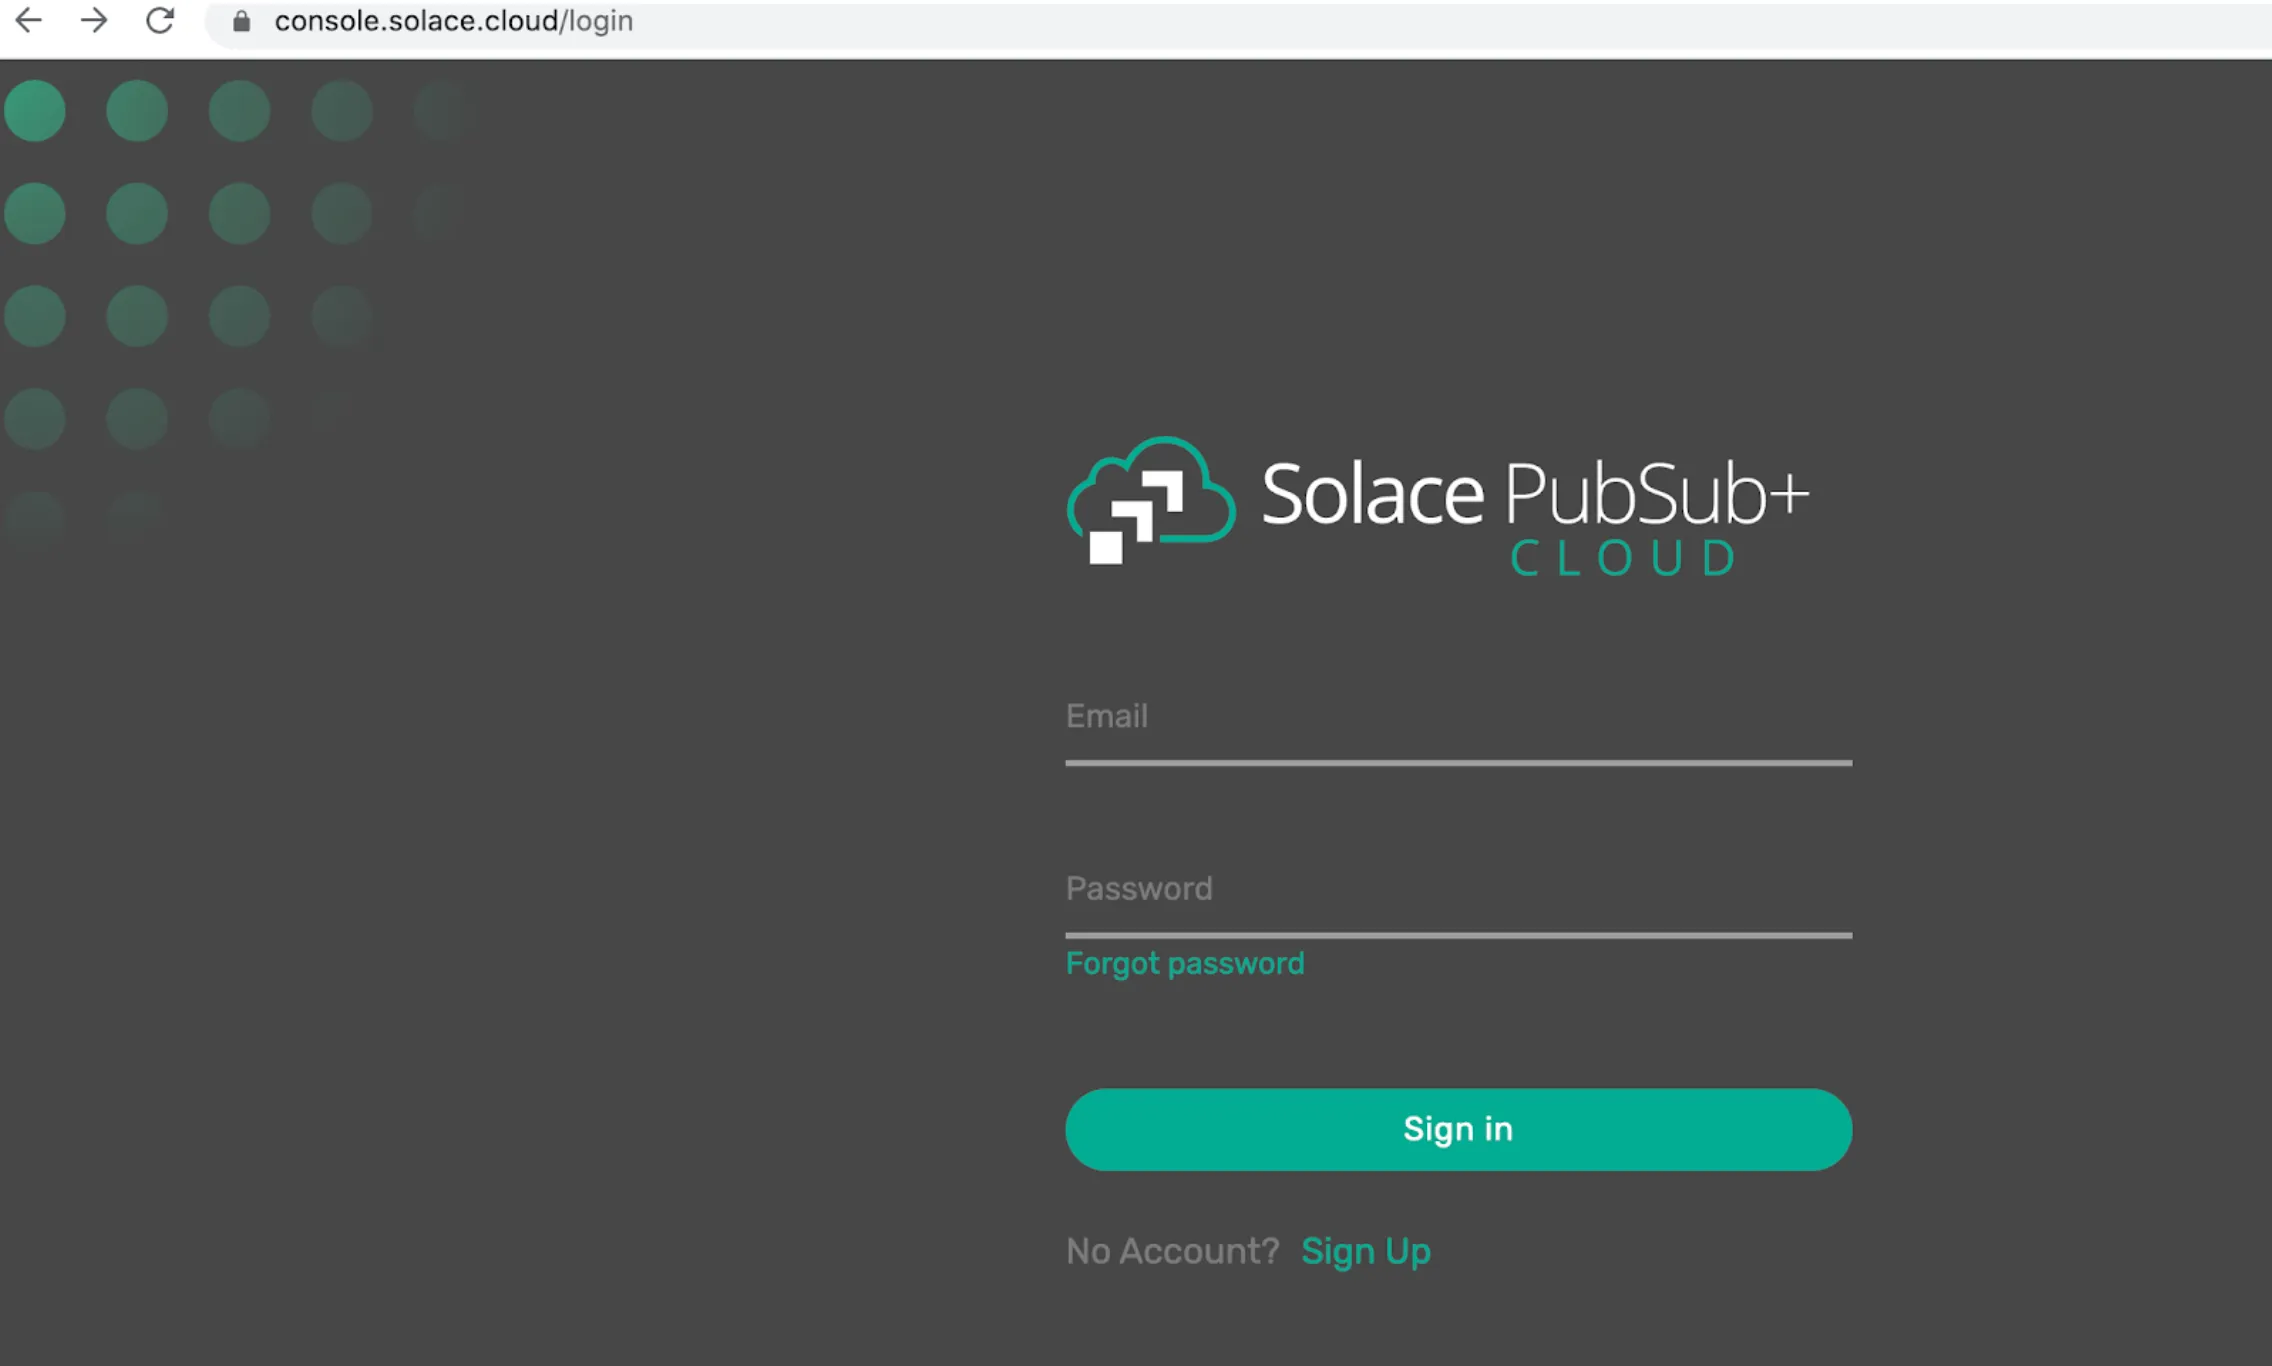
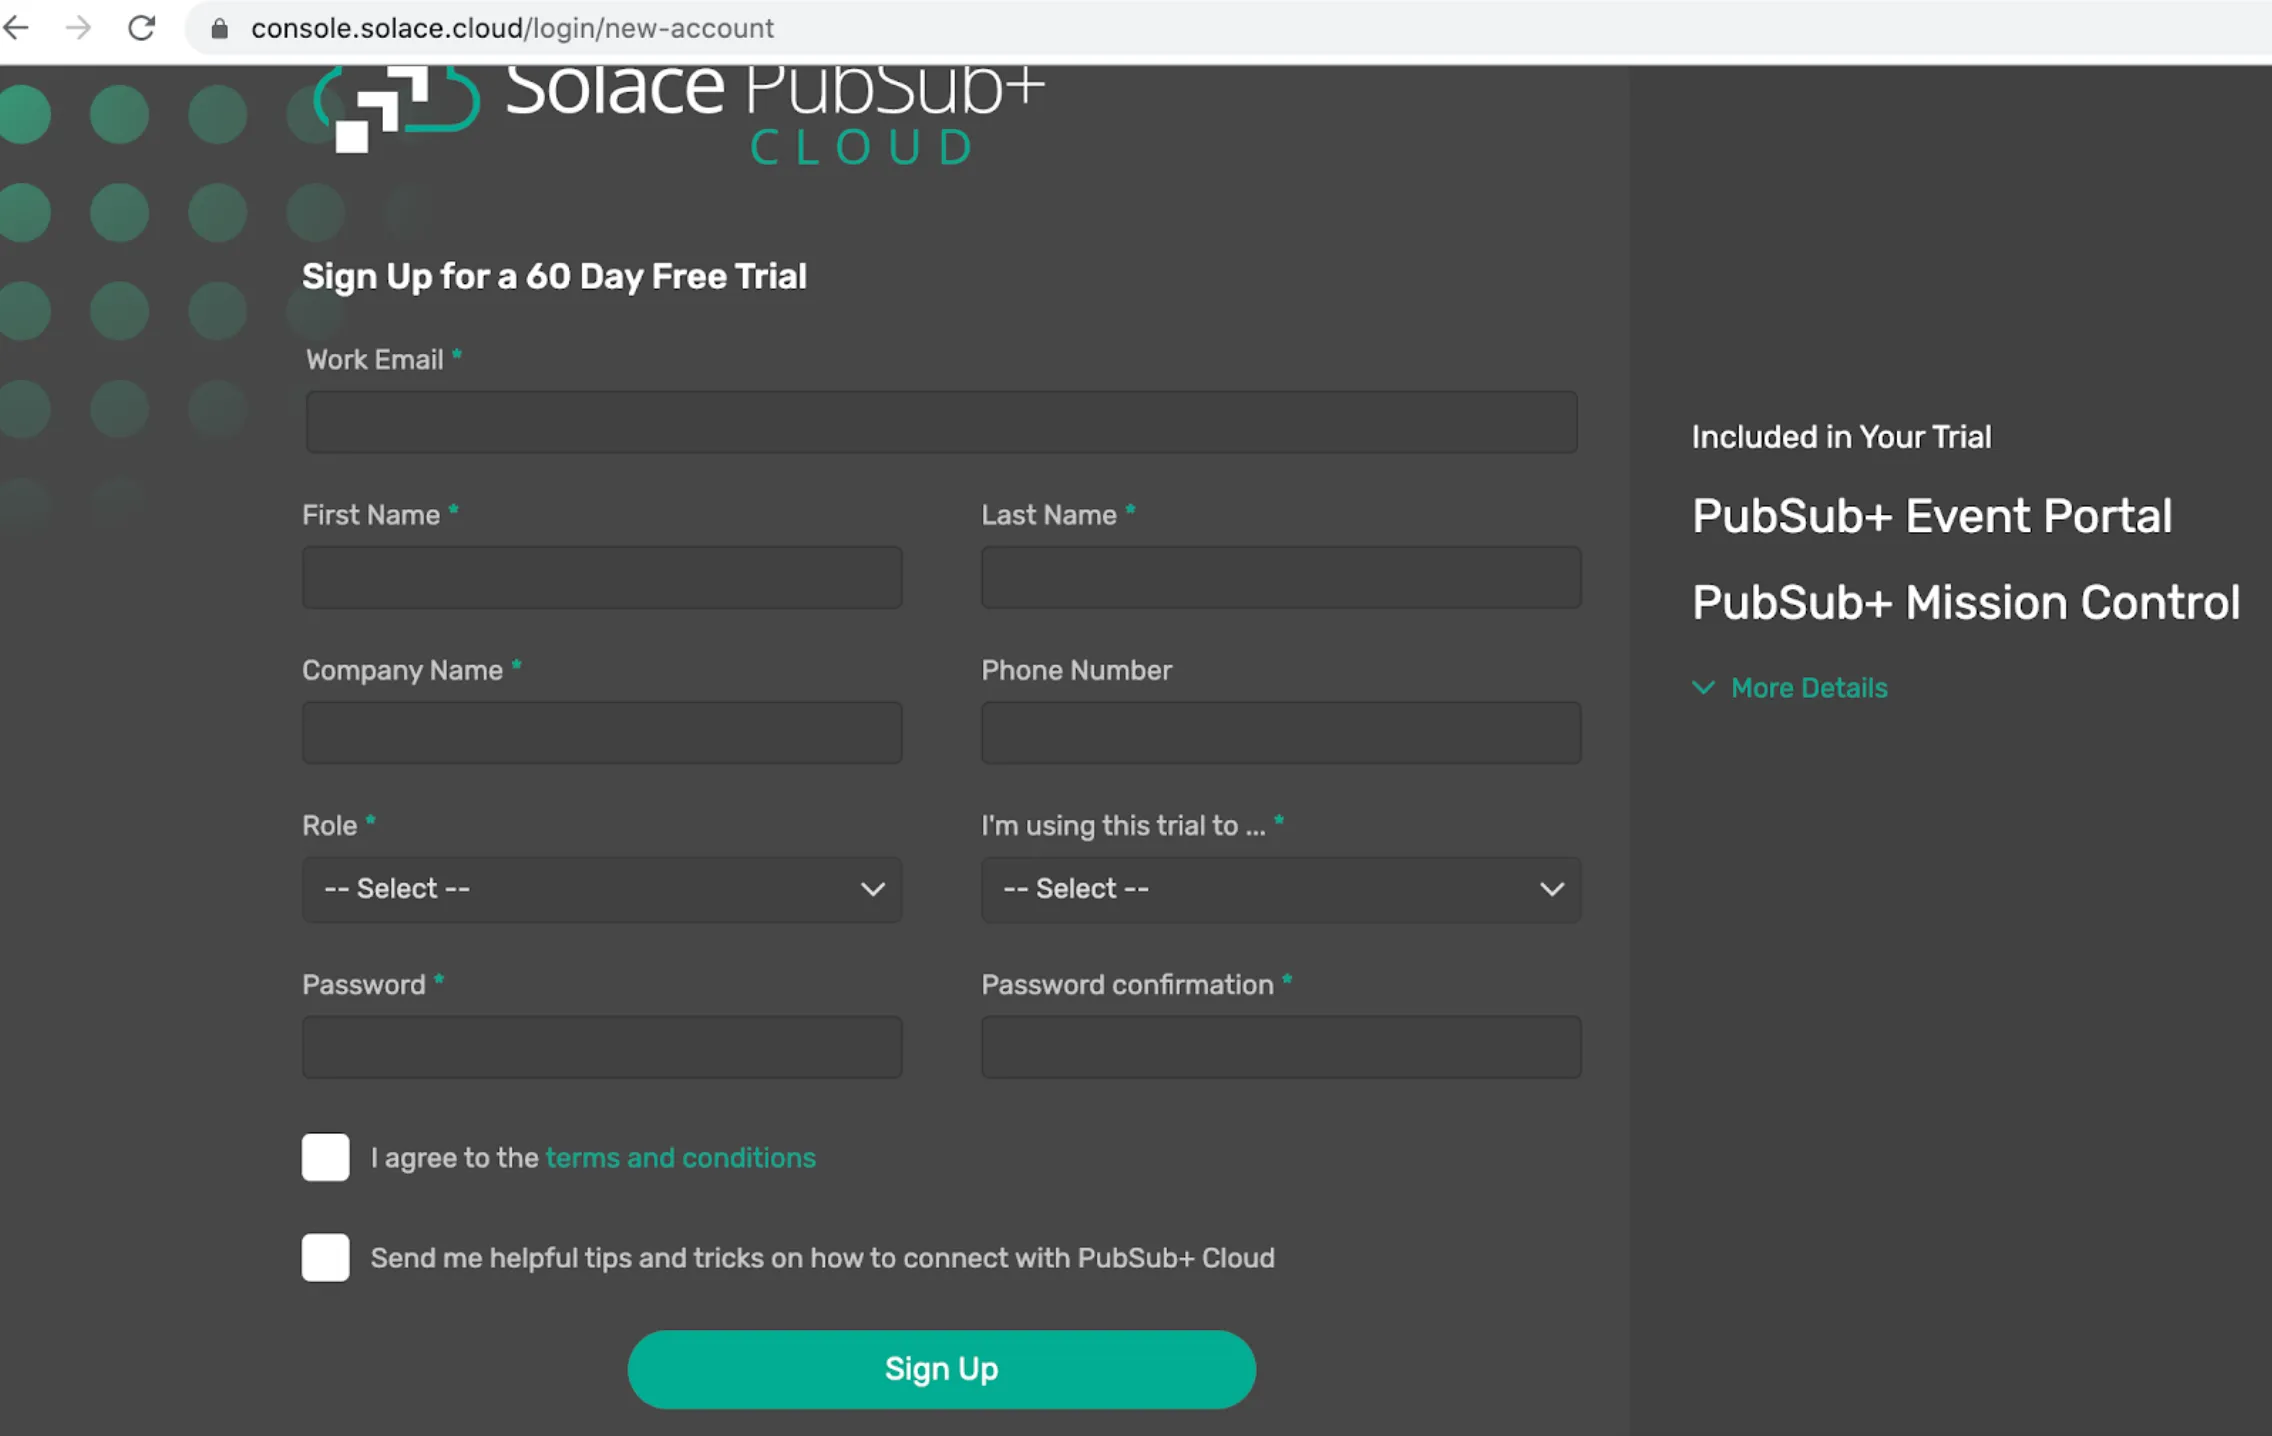
Click on “Sign Up” and fill in all the details. You will receive a welcome email in your inbox. Now you will be able to sign in with your credentials in the login page.
2. Creating the Messaging Service
Once you login with your credentials, you will see a welcome screen like the following one.
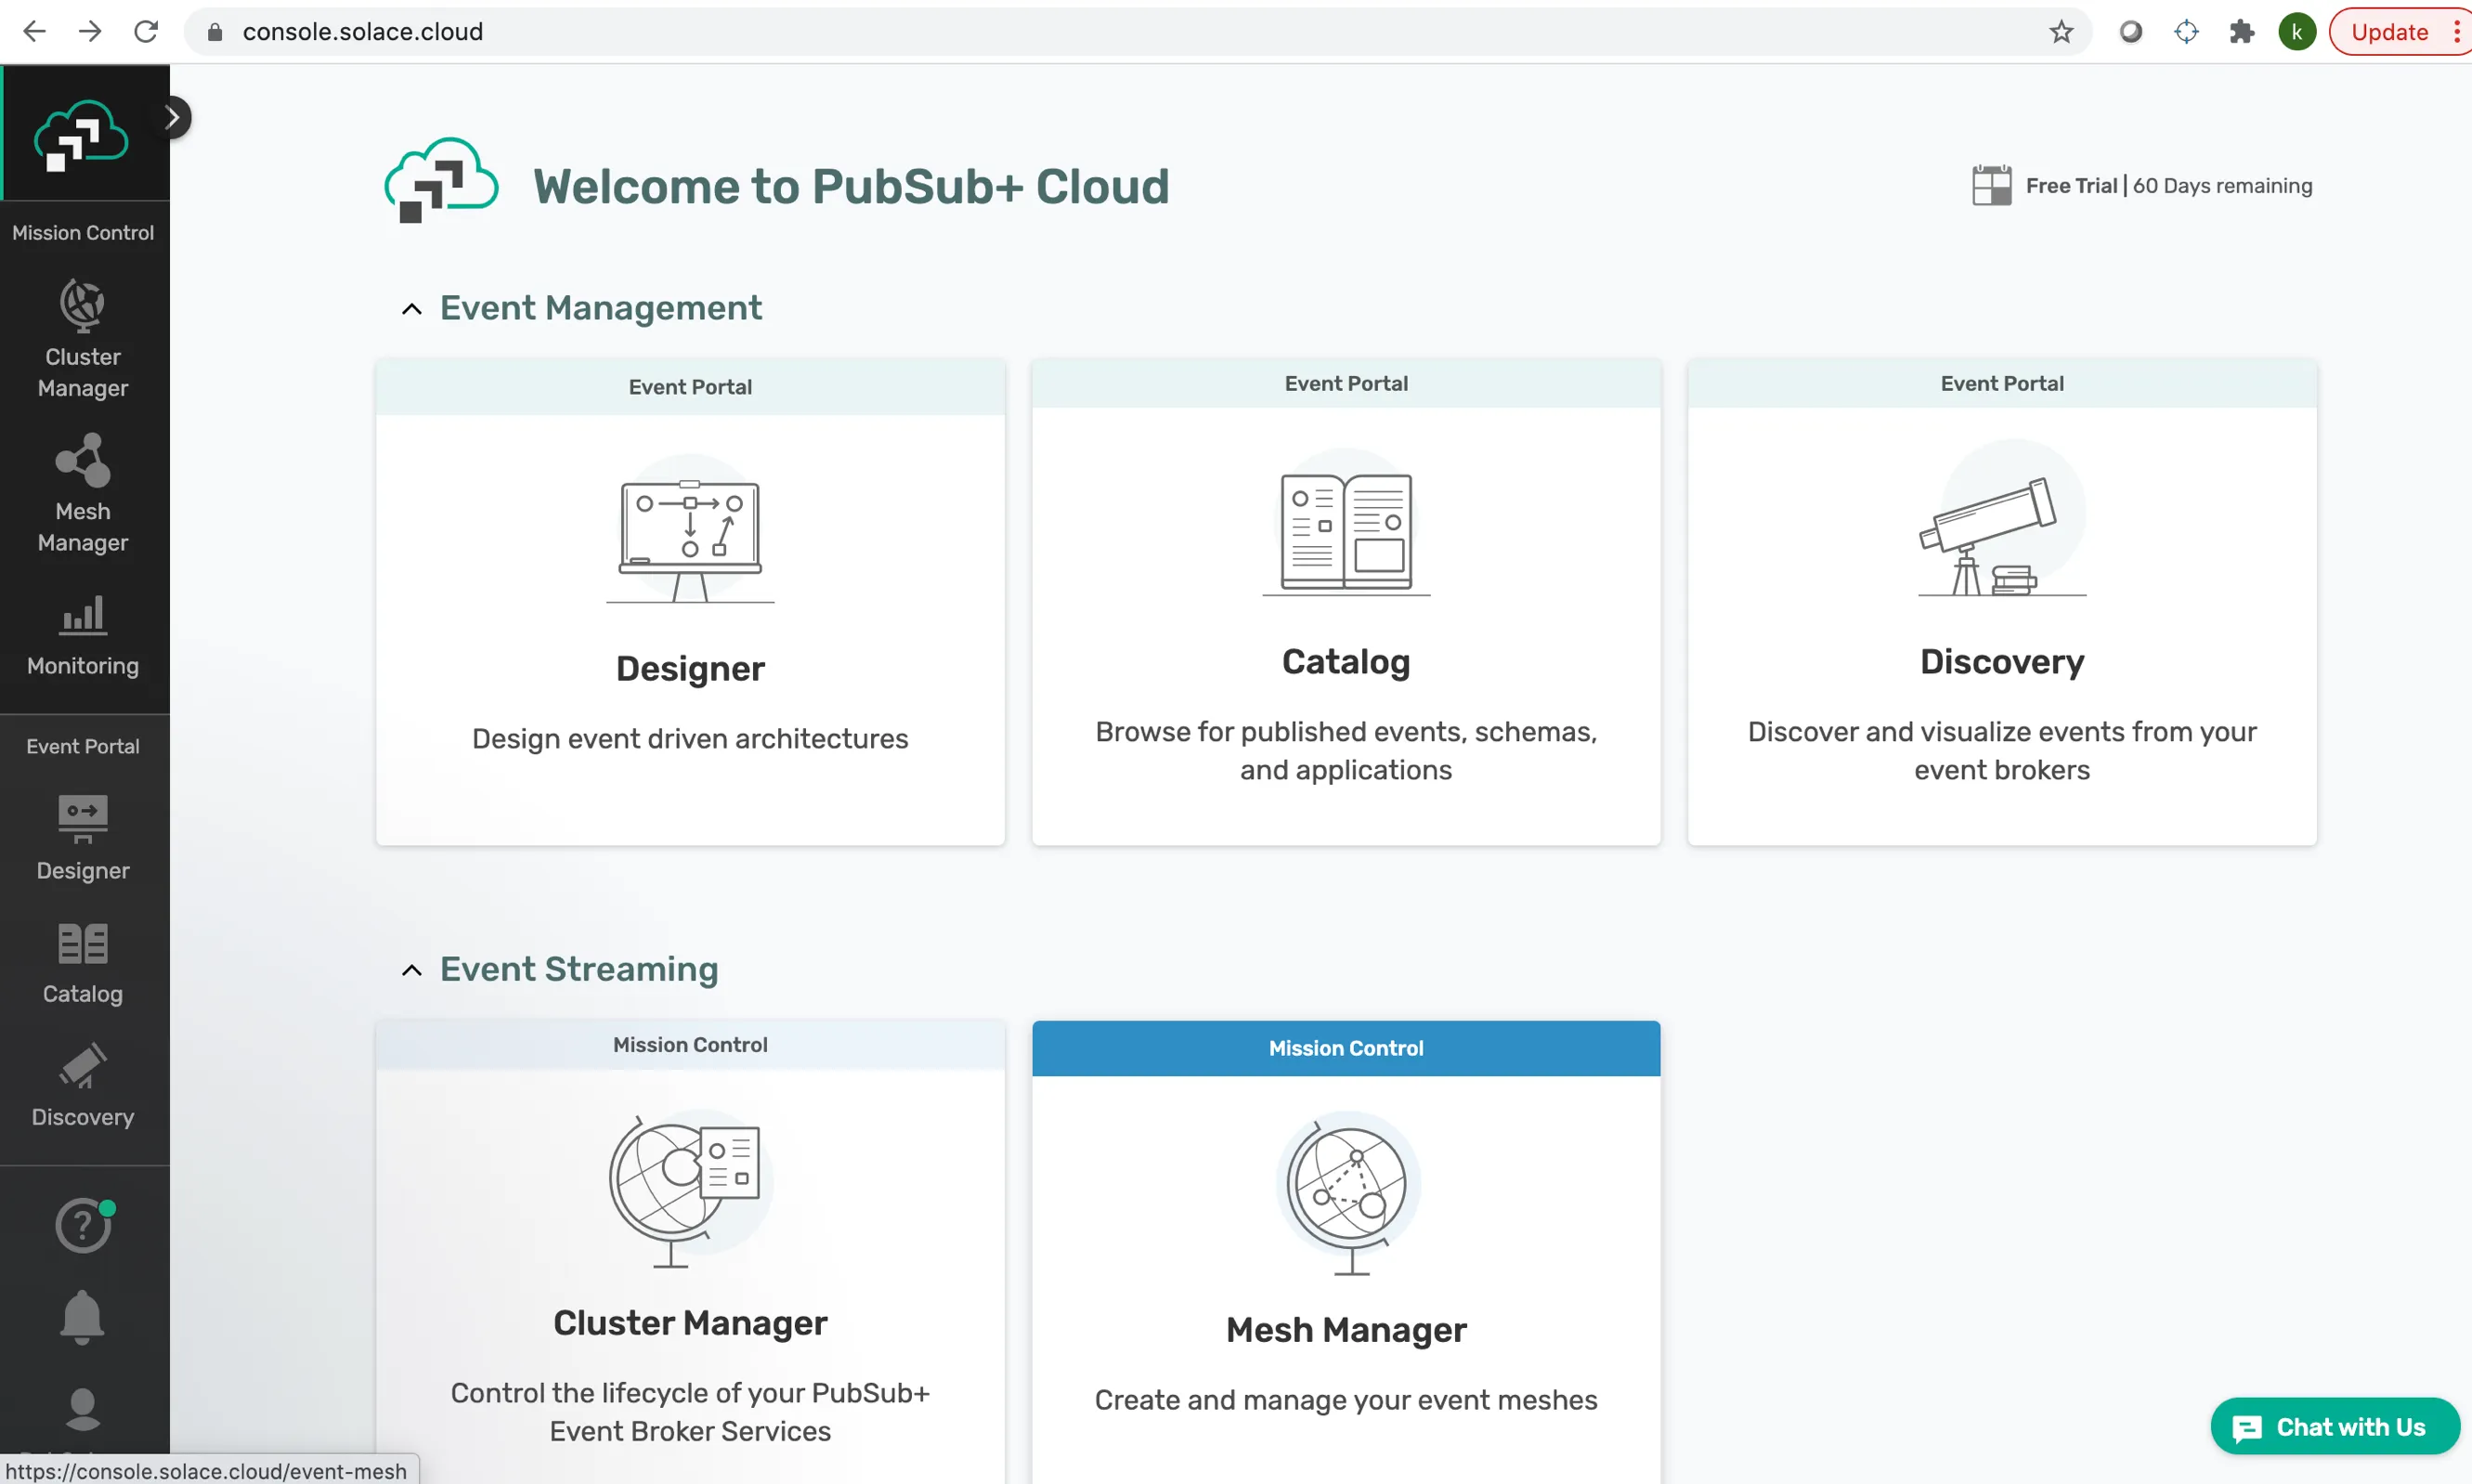
Now click on “Cluster Manager,” located at the left side of the screen to create a Service.
According to the official Solace documentation for Managing Services - Solace PubSub+ event brokers support the following Services:
- Solace Message Format (SMF)—This Service allows clients to communicate with an event broker on the Message Backbone interface.
- Solace Element Management Protocol (SEMP)—This Service allows management applications to communicate with an event broker on the Management interface.
- Web transport—This Service allows Web clients to communicate with an event broker.
- Solace Representational State Transfer (REST)—This Service allows REST clients to communicate with an event broker using standard HTTP requests.
- Message Queuing Telemetry Transport (MQTT)—This Service allows clients to communicate with an event broker using the MQTT messaging protocol.
- Advanced Message Queuing Protocol (AMQP)—This Service allows AMQP clients to communicate with an event broker using the AMQP open standard application layer protocol.
Let us spin up a Service.
First select the Service Type you want to use. There are two types of Services:
- Enterprise: A highly available Service on dedicated infrastructure with customizable connections
- Developer: A Service on dedicated infrastructure with 100 connections.
In this case, I have selected “Developer.”
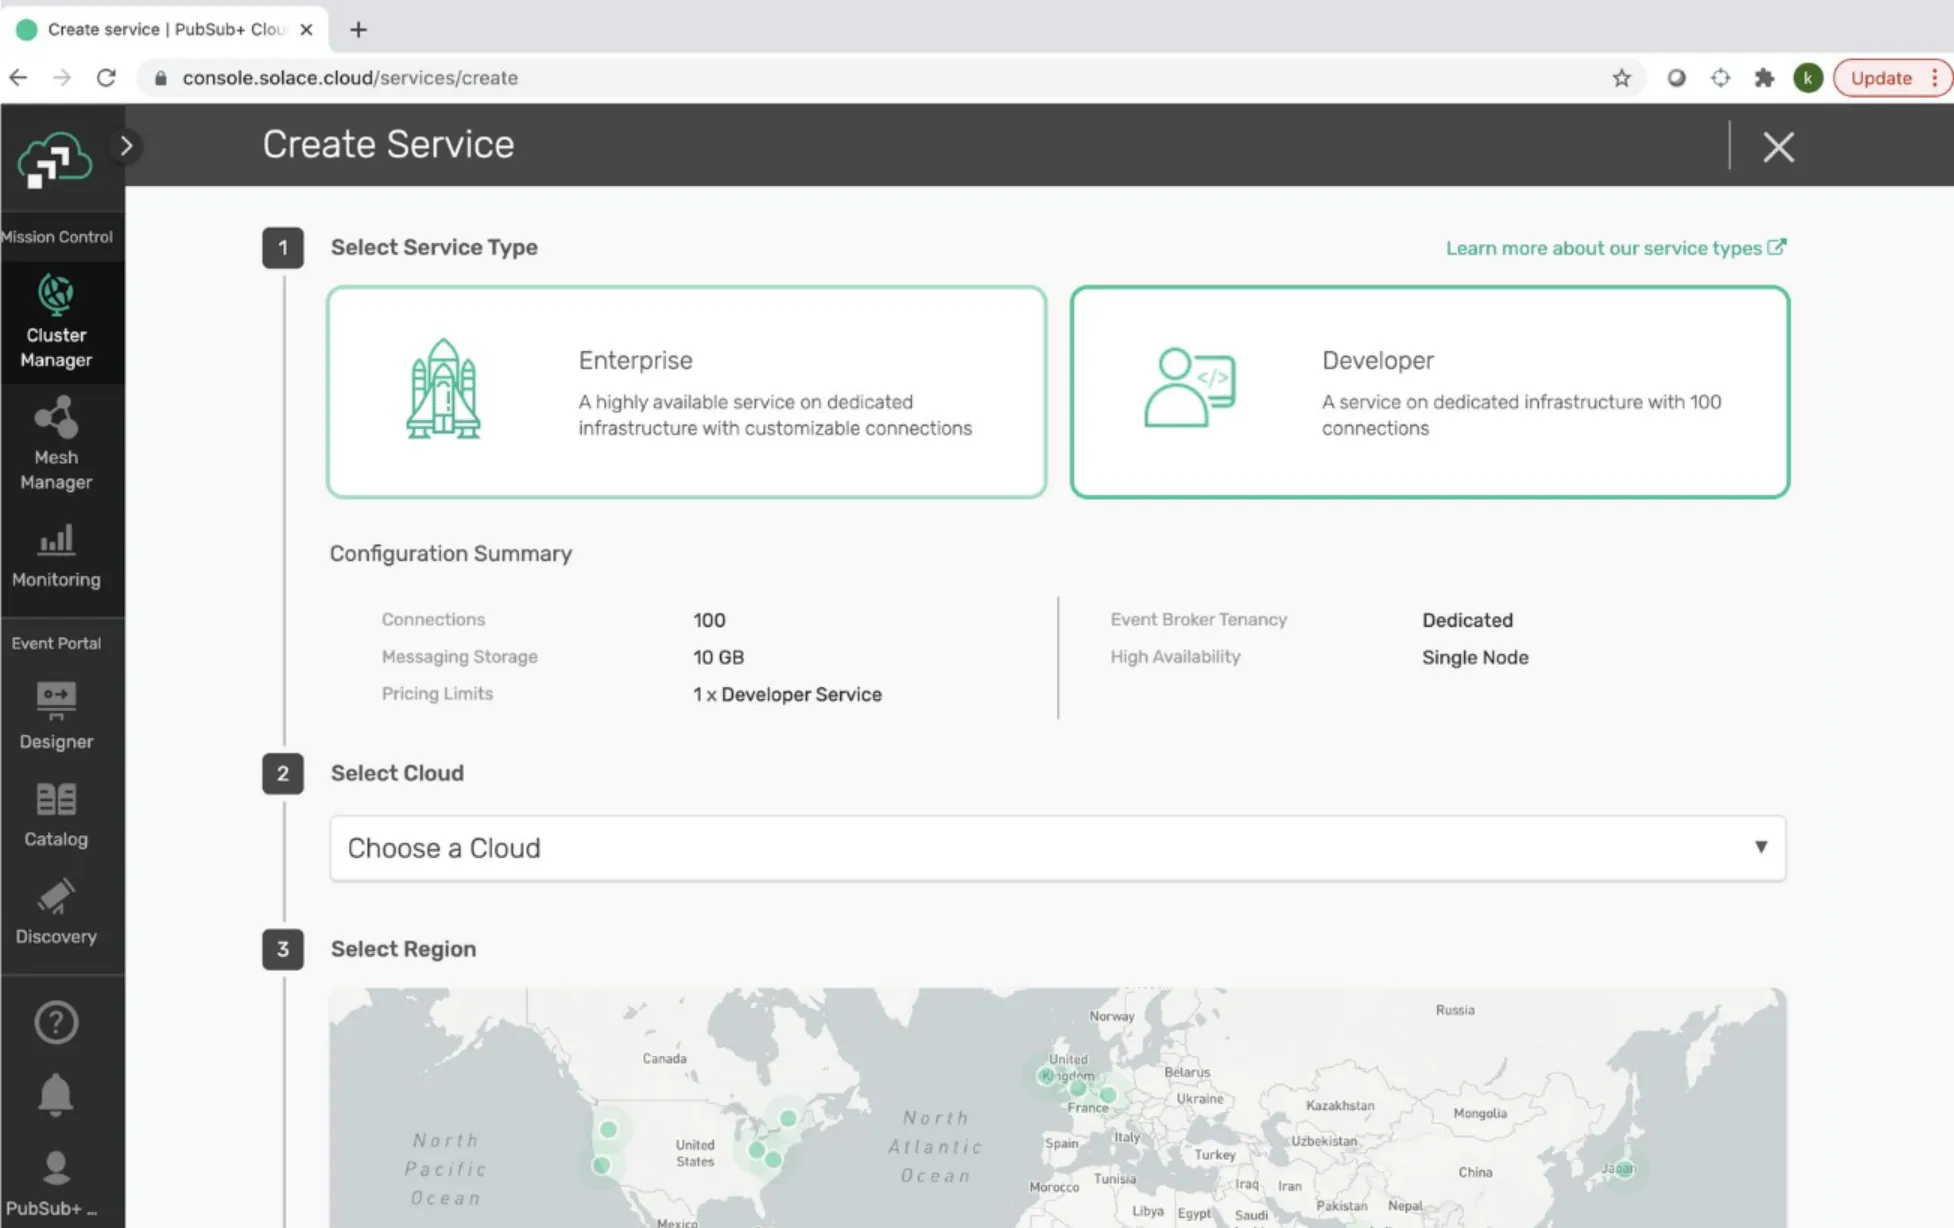
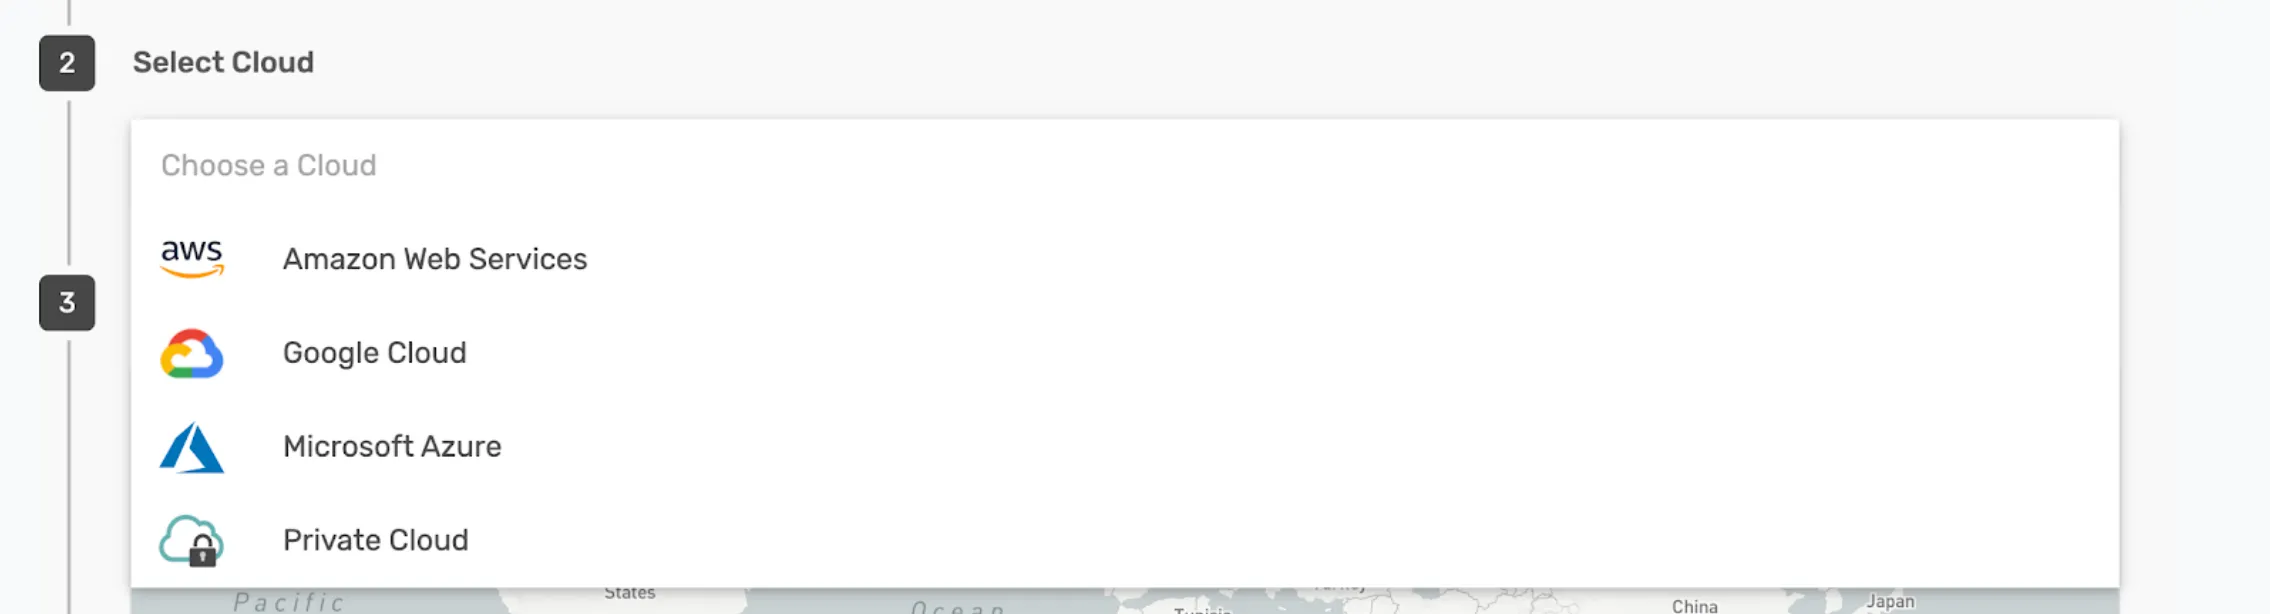
Then, select the Cloud. In my case, I chose “Amazon Web Services,” or “AWS” for short. As you can see from the following screenshot, there are different clouds that you can choose from. Select any cloud depending on your need.
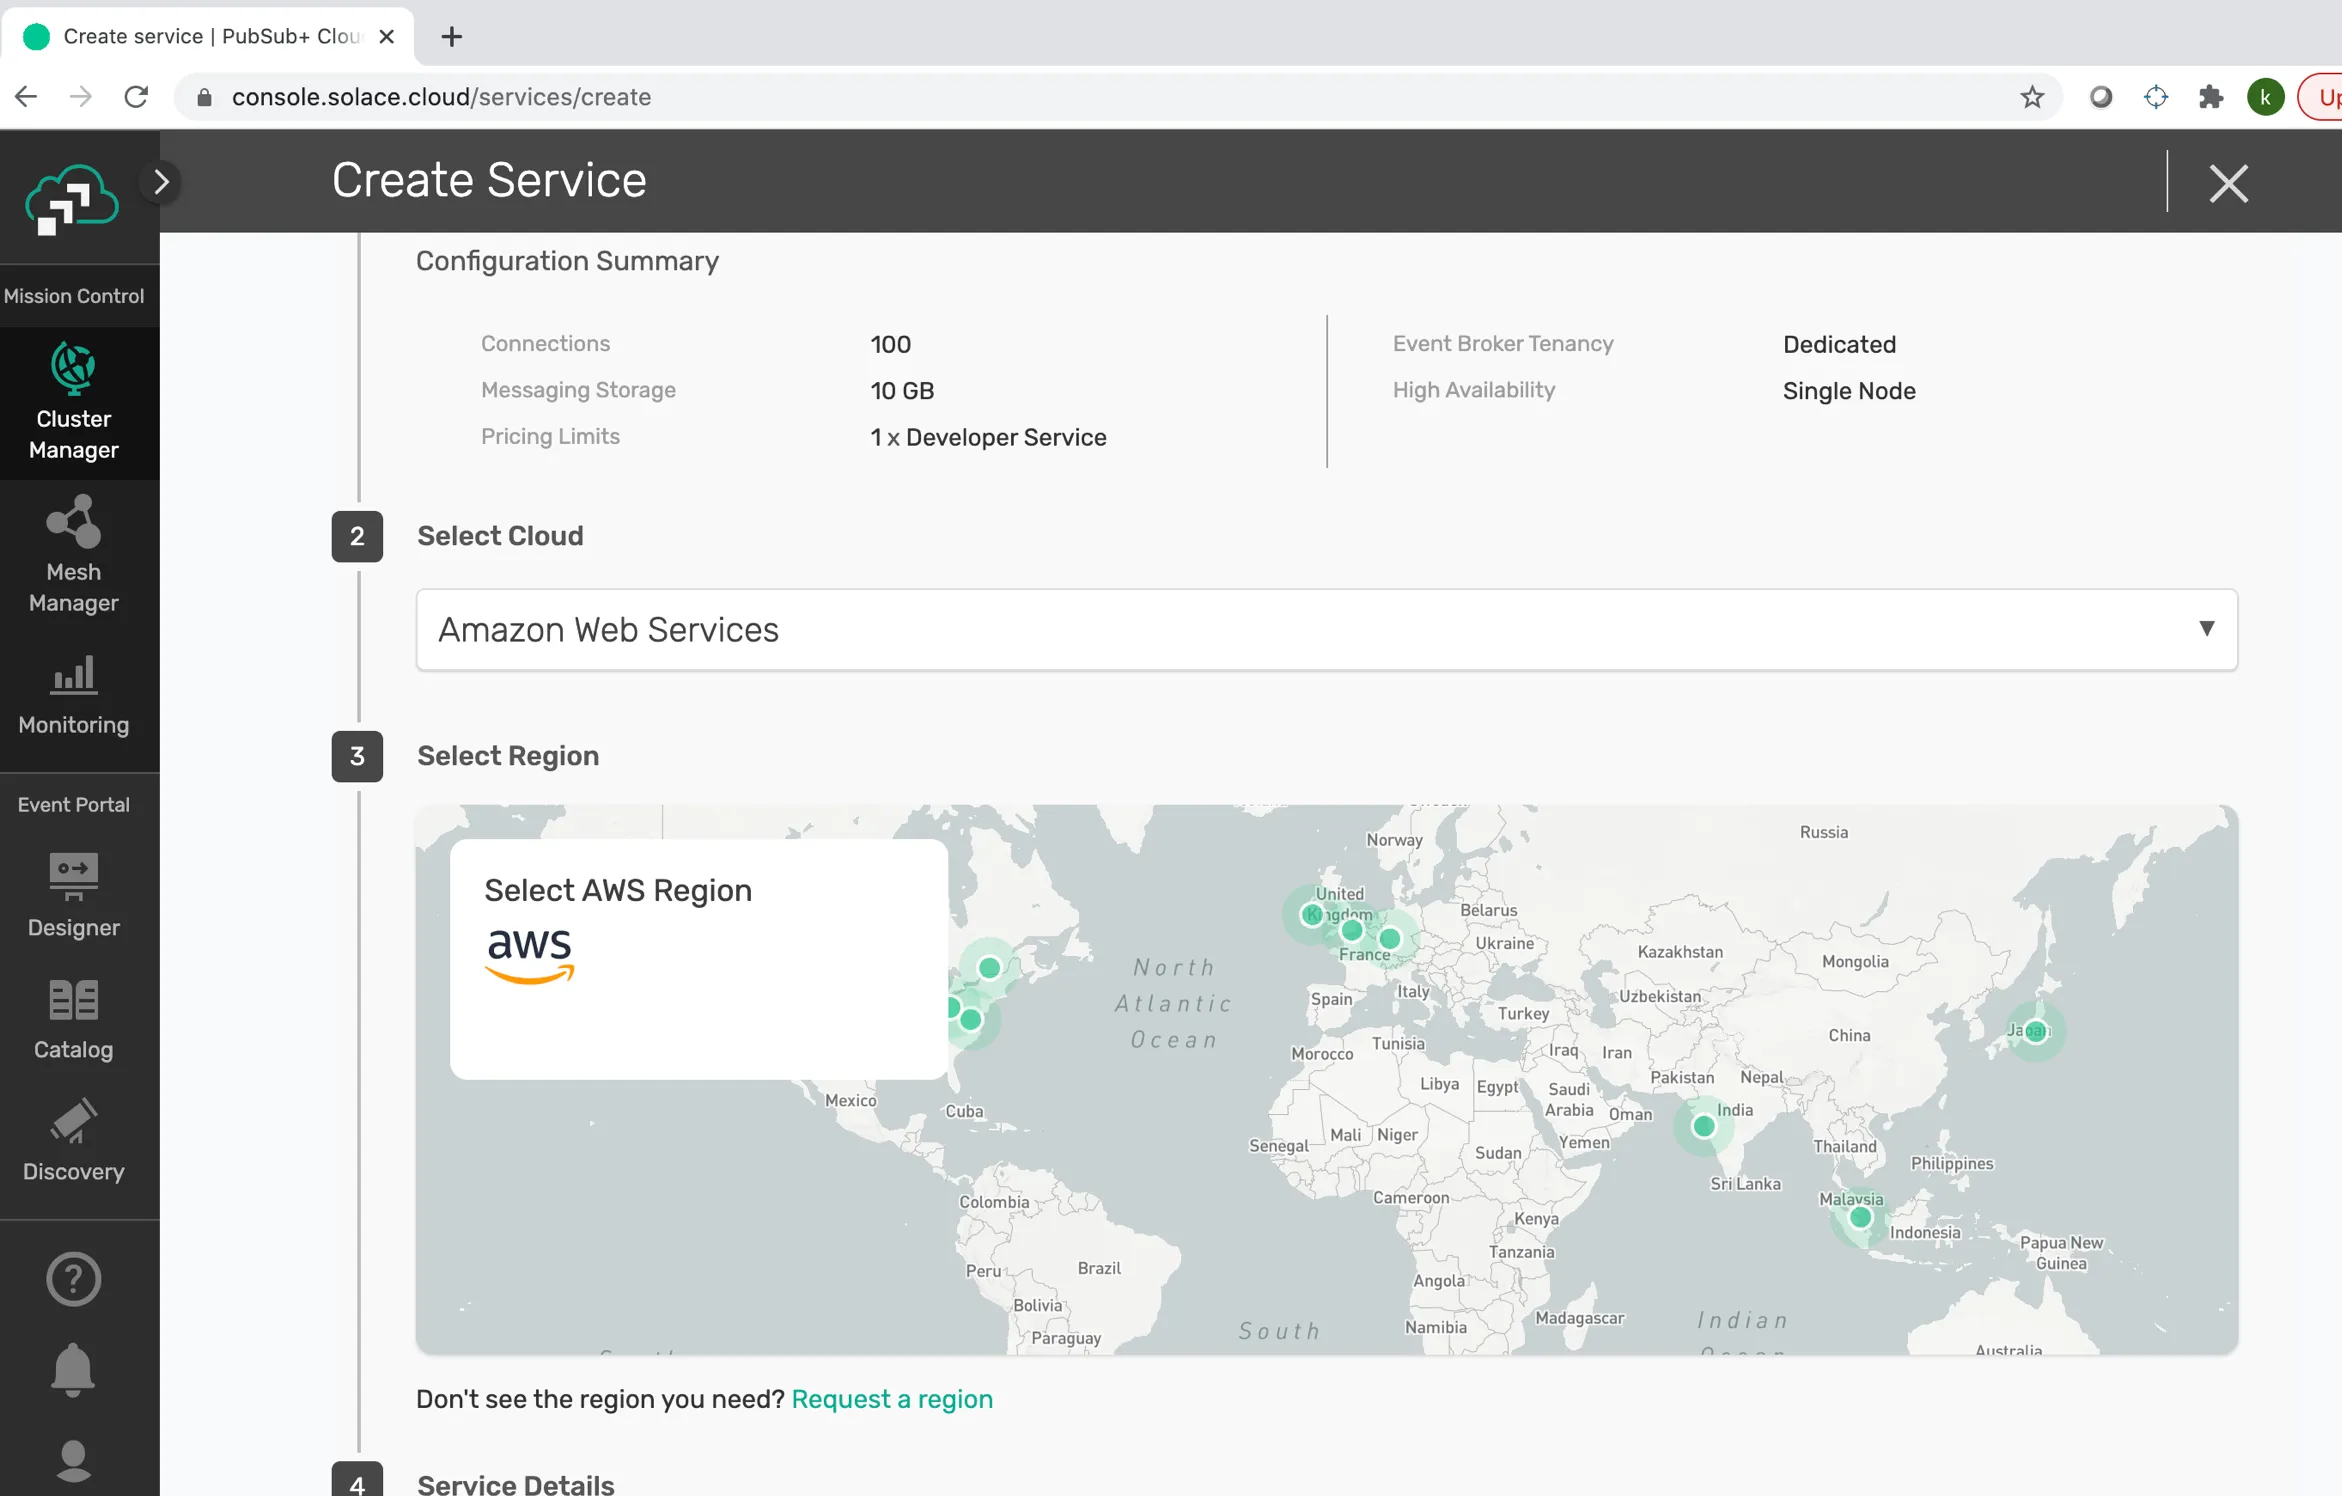
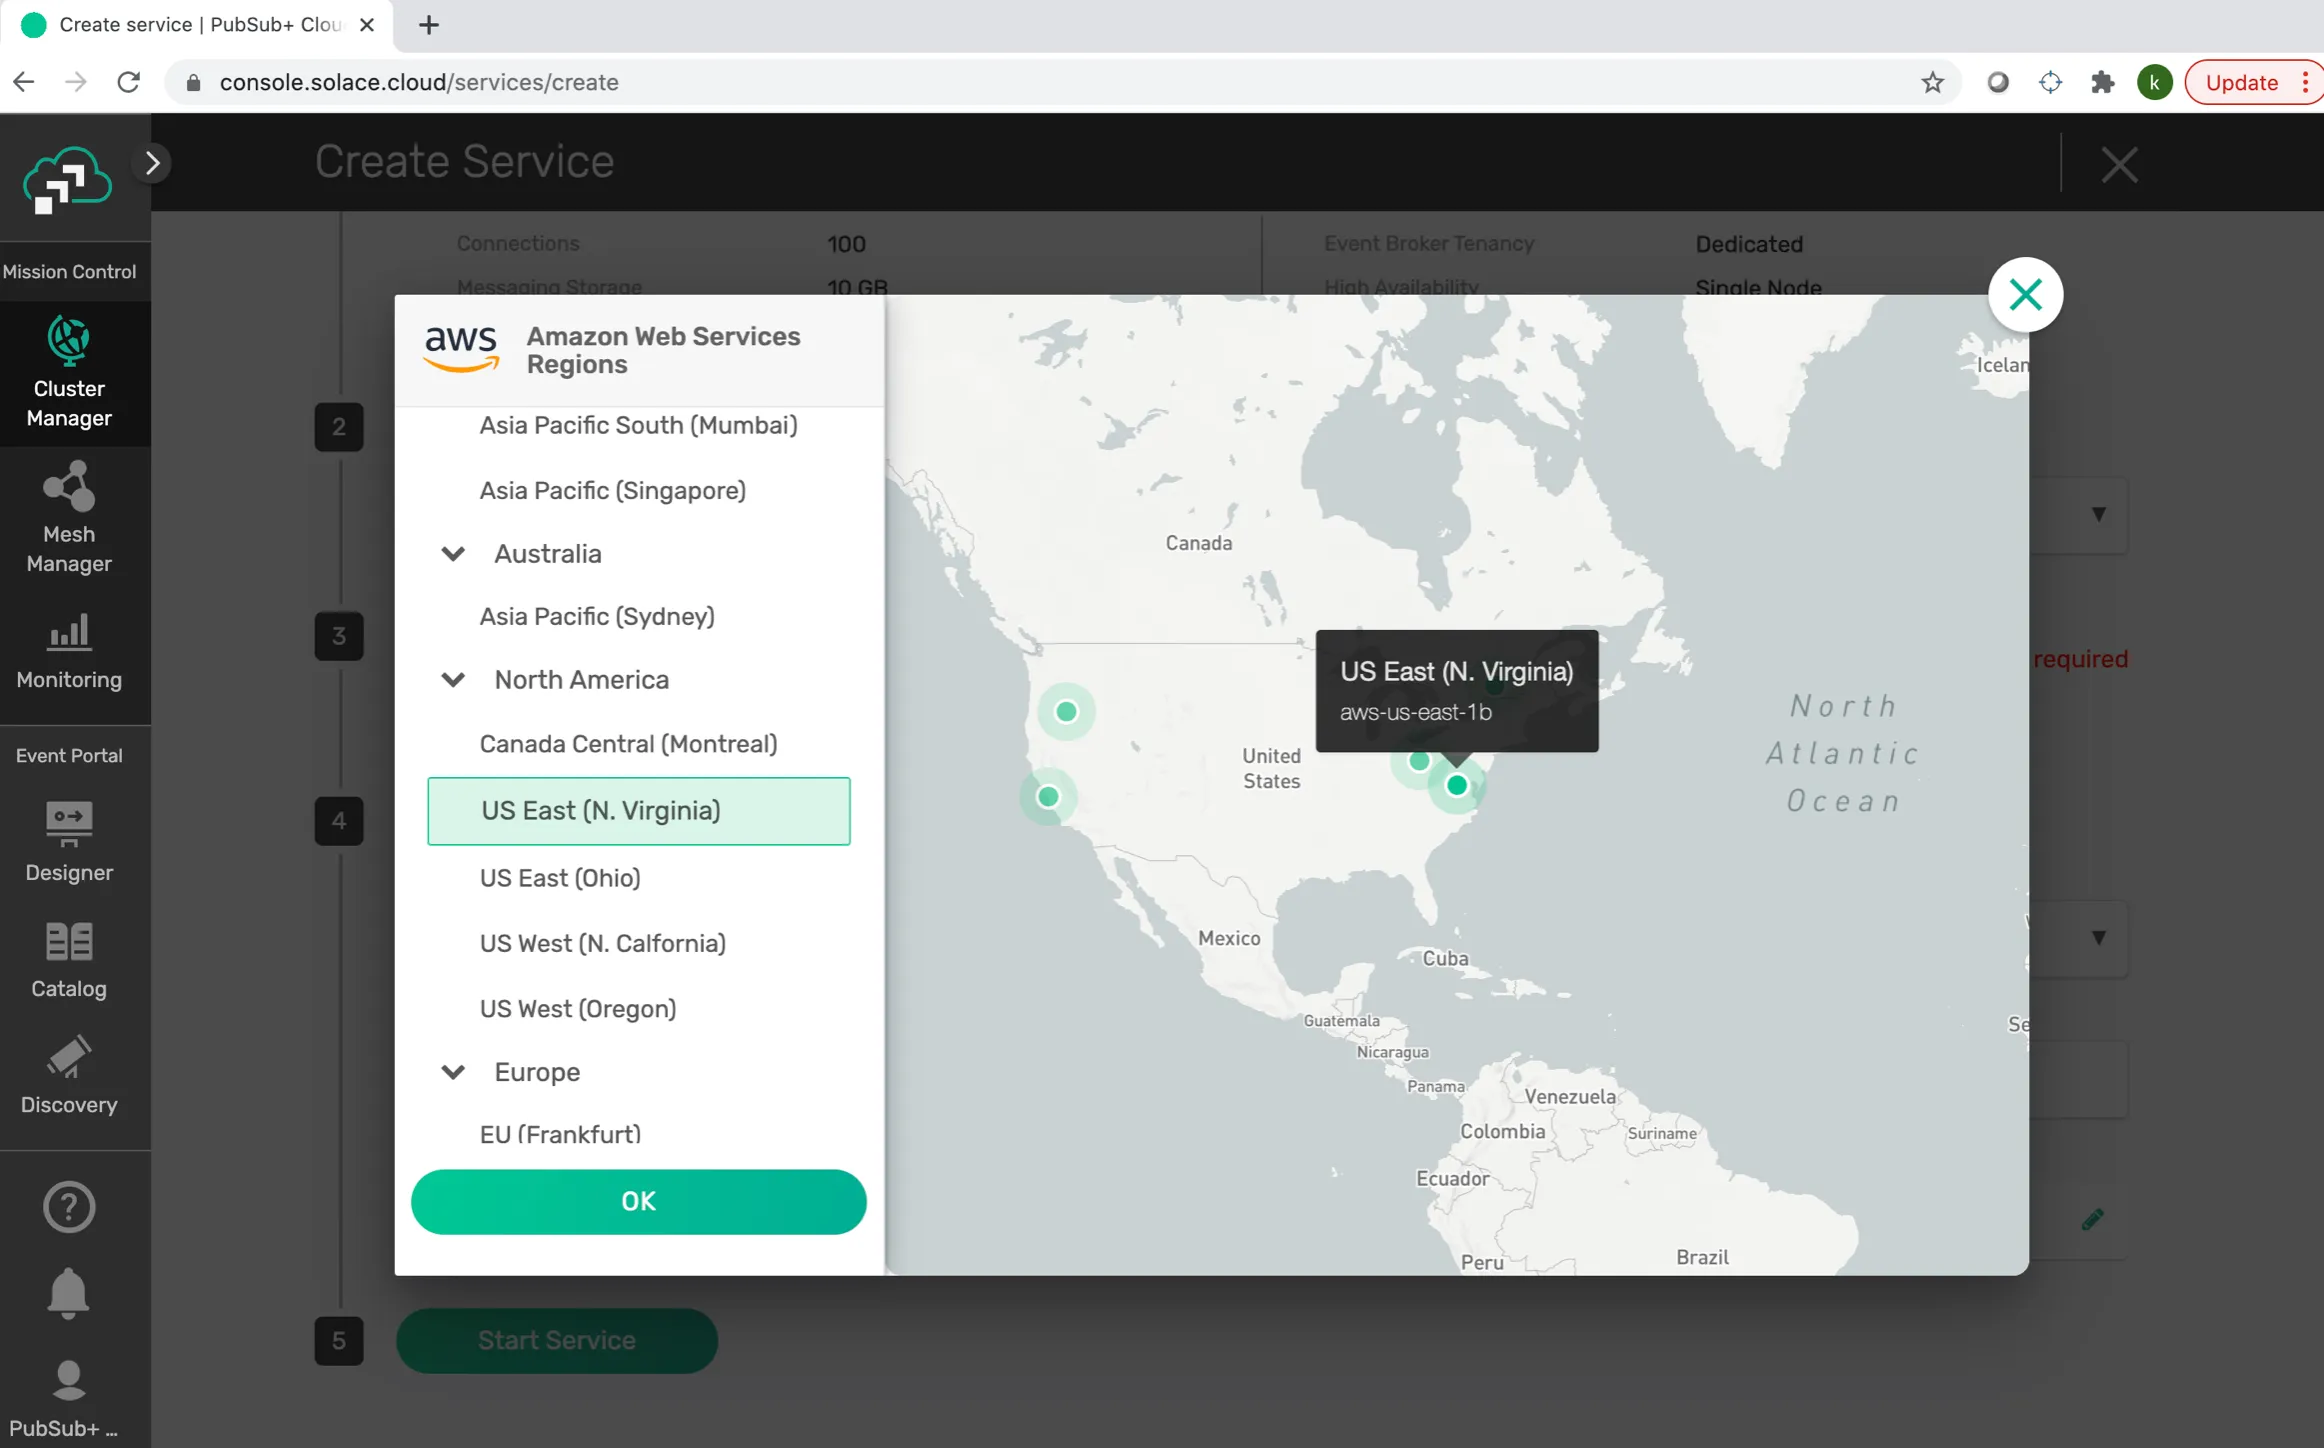
Select the Region. In my case, I chose “US East (N. Virginia)” because it’s closer to me.
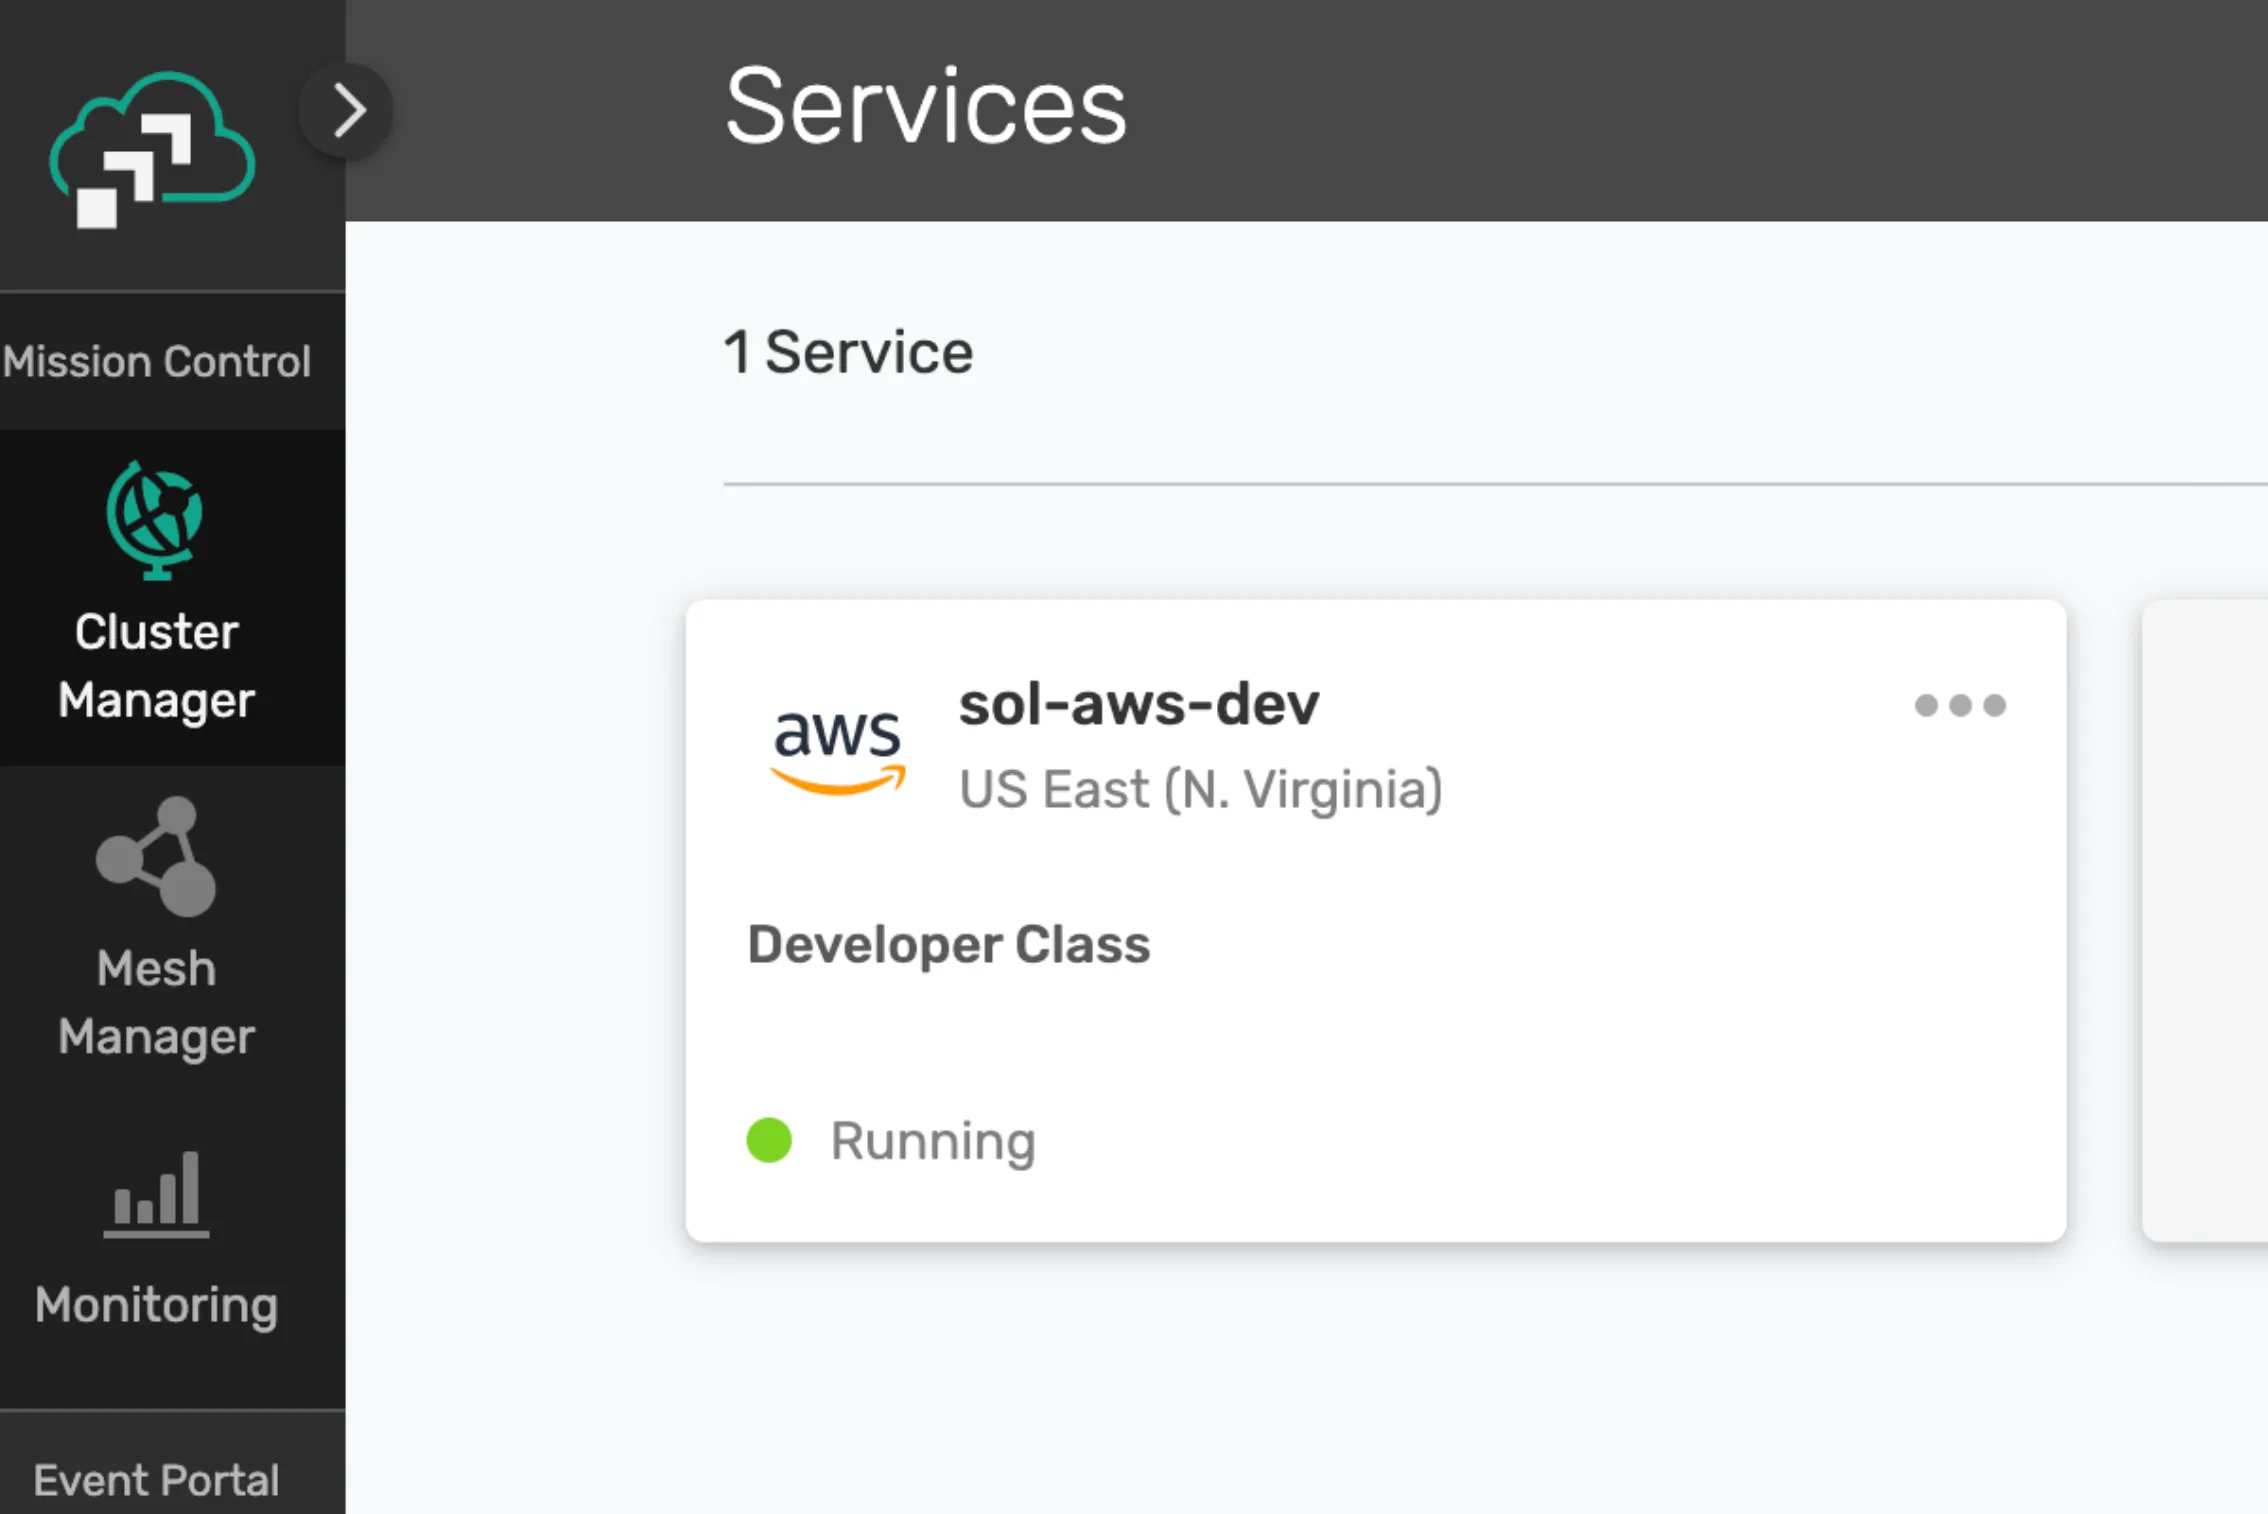
Give the Service a name. A good naming convention is to create it using the Cloud and the Environment name, like “sol-aws-dev.” You can check with your team if there are any standards to name the Messaging Services.
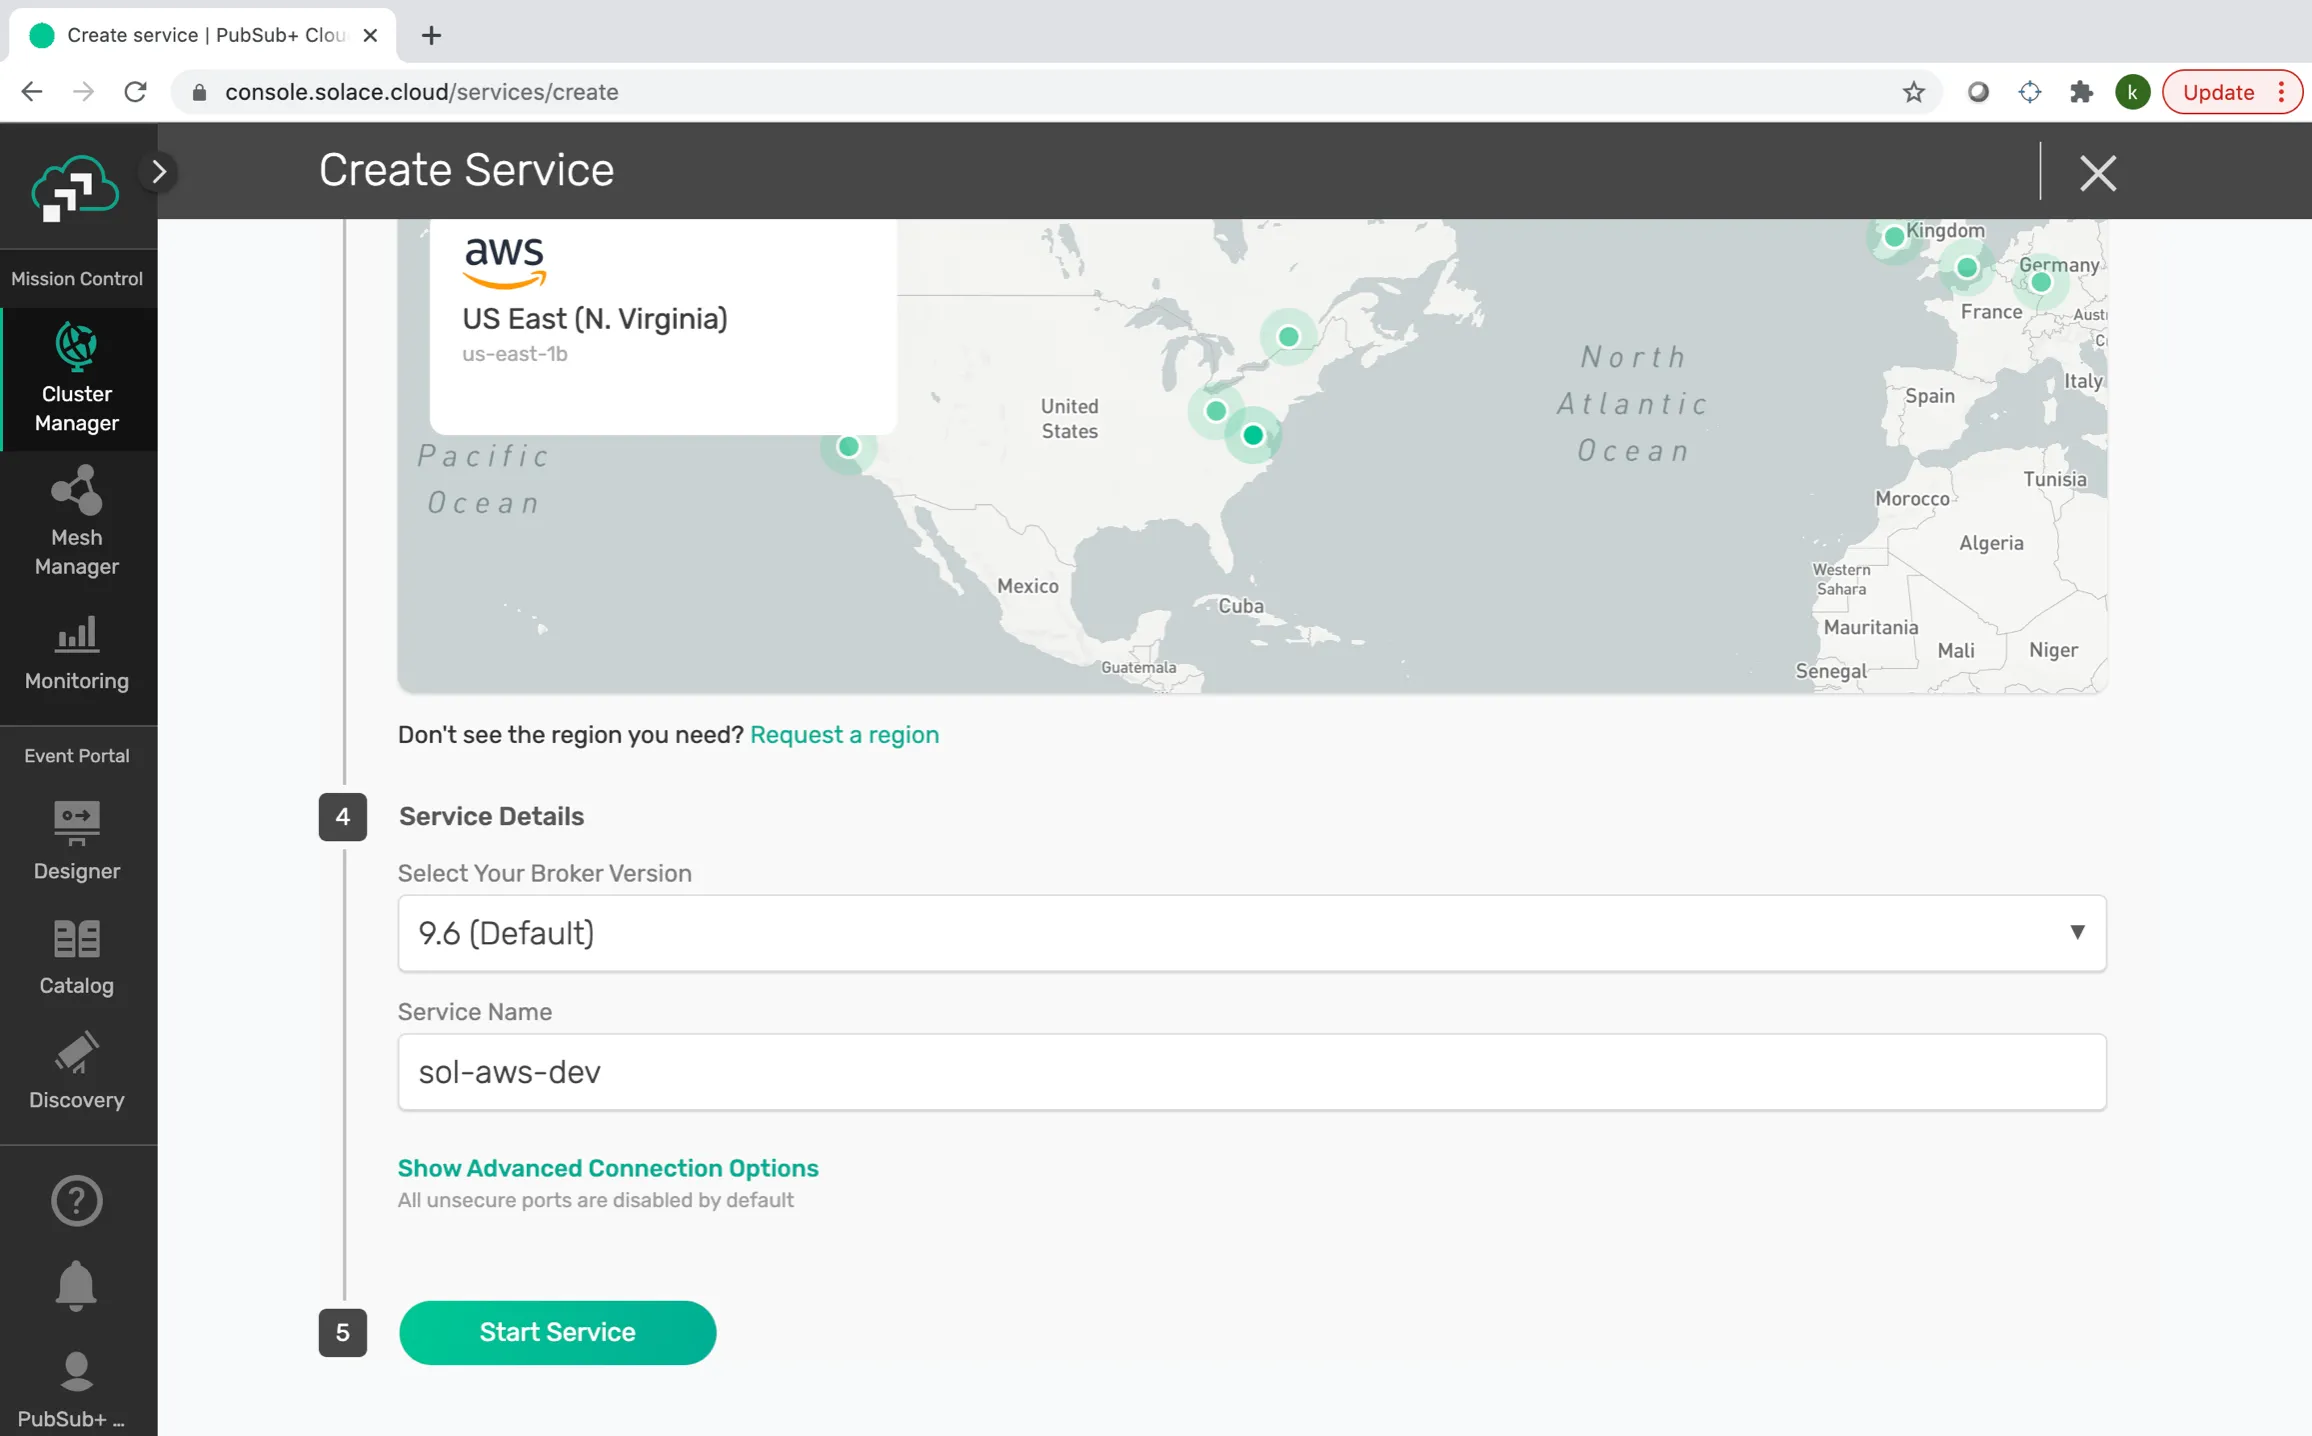
After that, select the Message VPN name and start the Service by clicking “Start Service.”
Your Service should now be up and running.
3. Configuring the Solace KeyStore in MuleSoft
Once we have a Messaging Service, we’ll need to configure the KeyStore in MuleSoft in order to connect to the Service.
Click on the Messaging Service to open the Services’ settings.
Once inside, click on the “Connect” tab, located at the top of the screen, and select the protocol you want to use to connect the Service. In our POC, we use the “Solace Messaging” option.
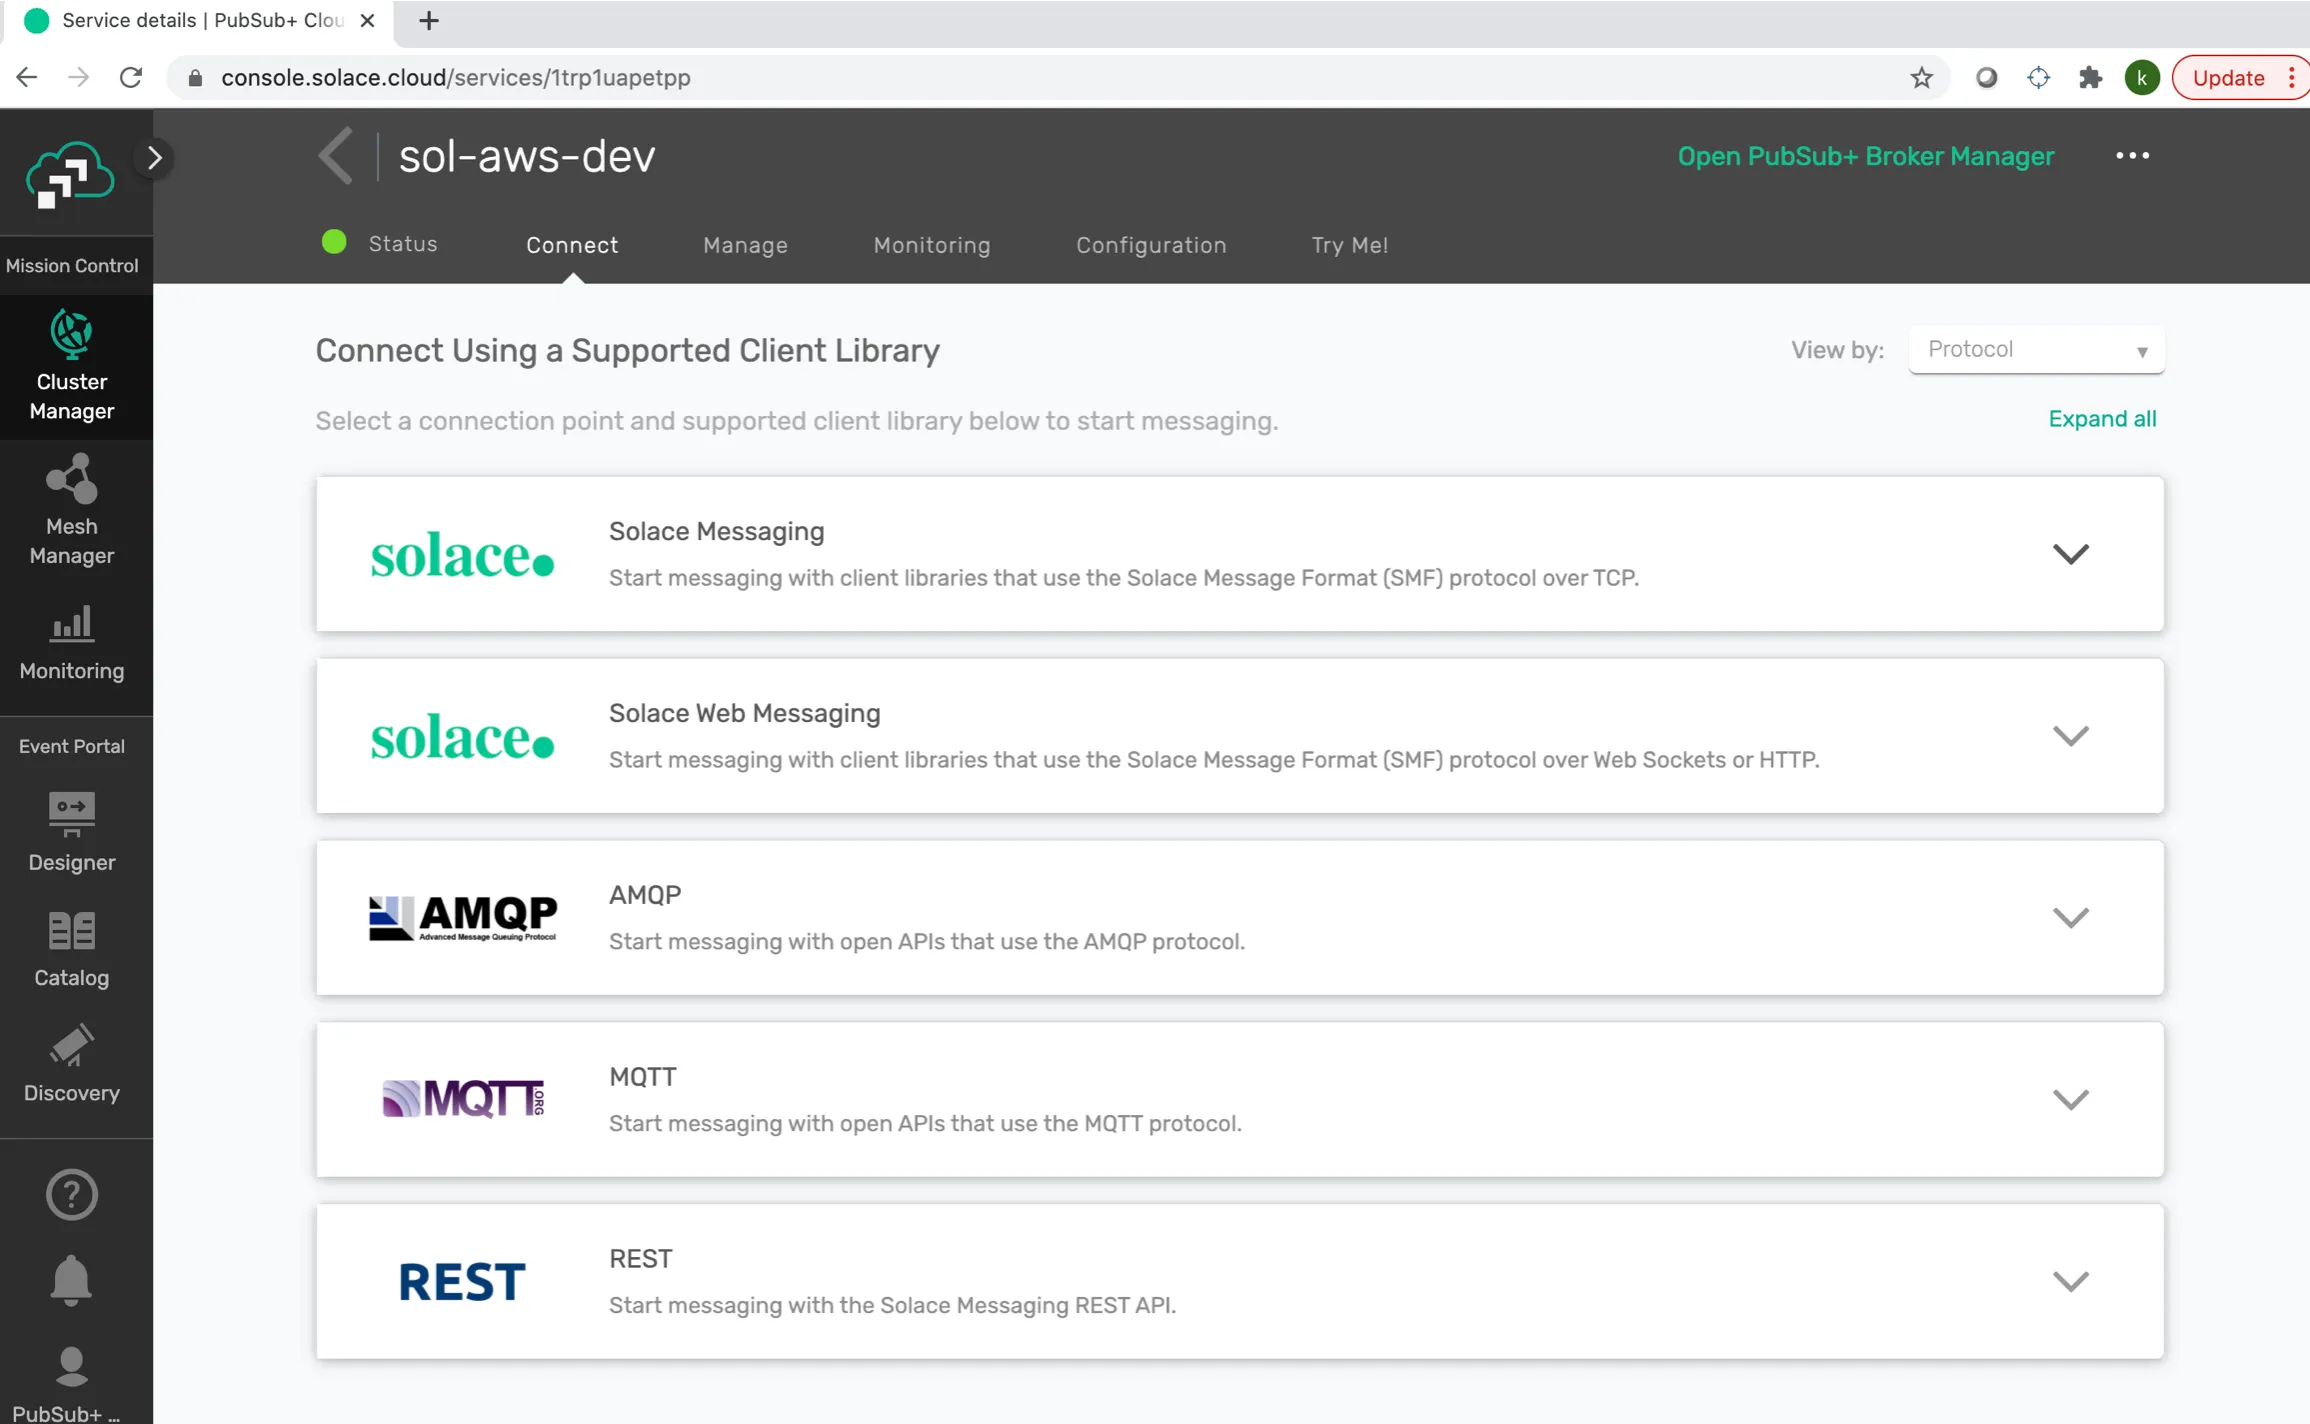
After you select the protocol, you will see all the Connection Details, which will be used in MuleSoft (JMS Config) in order to connect to Solace.
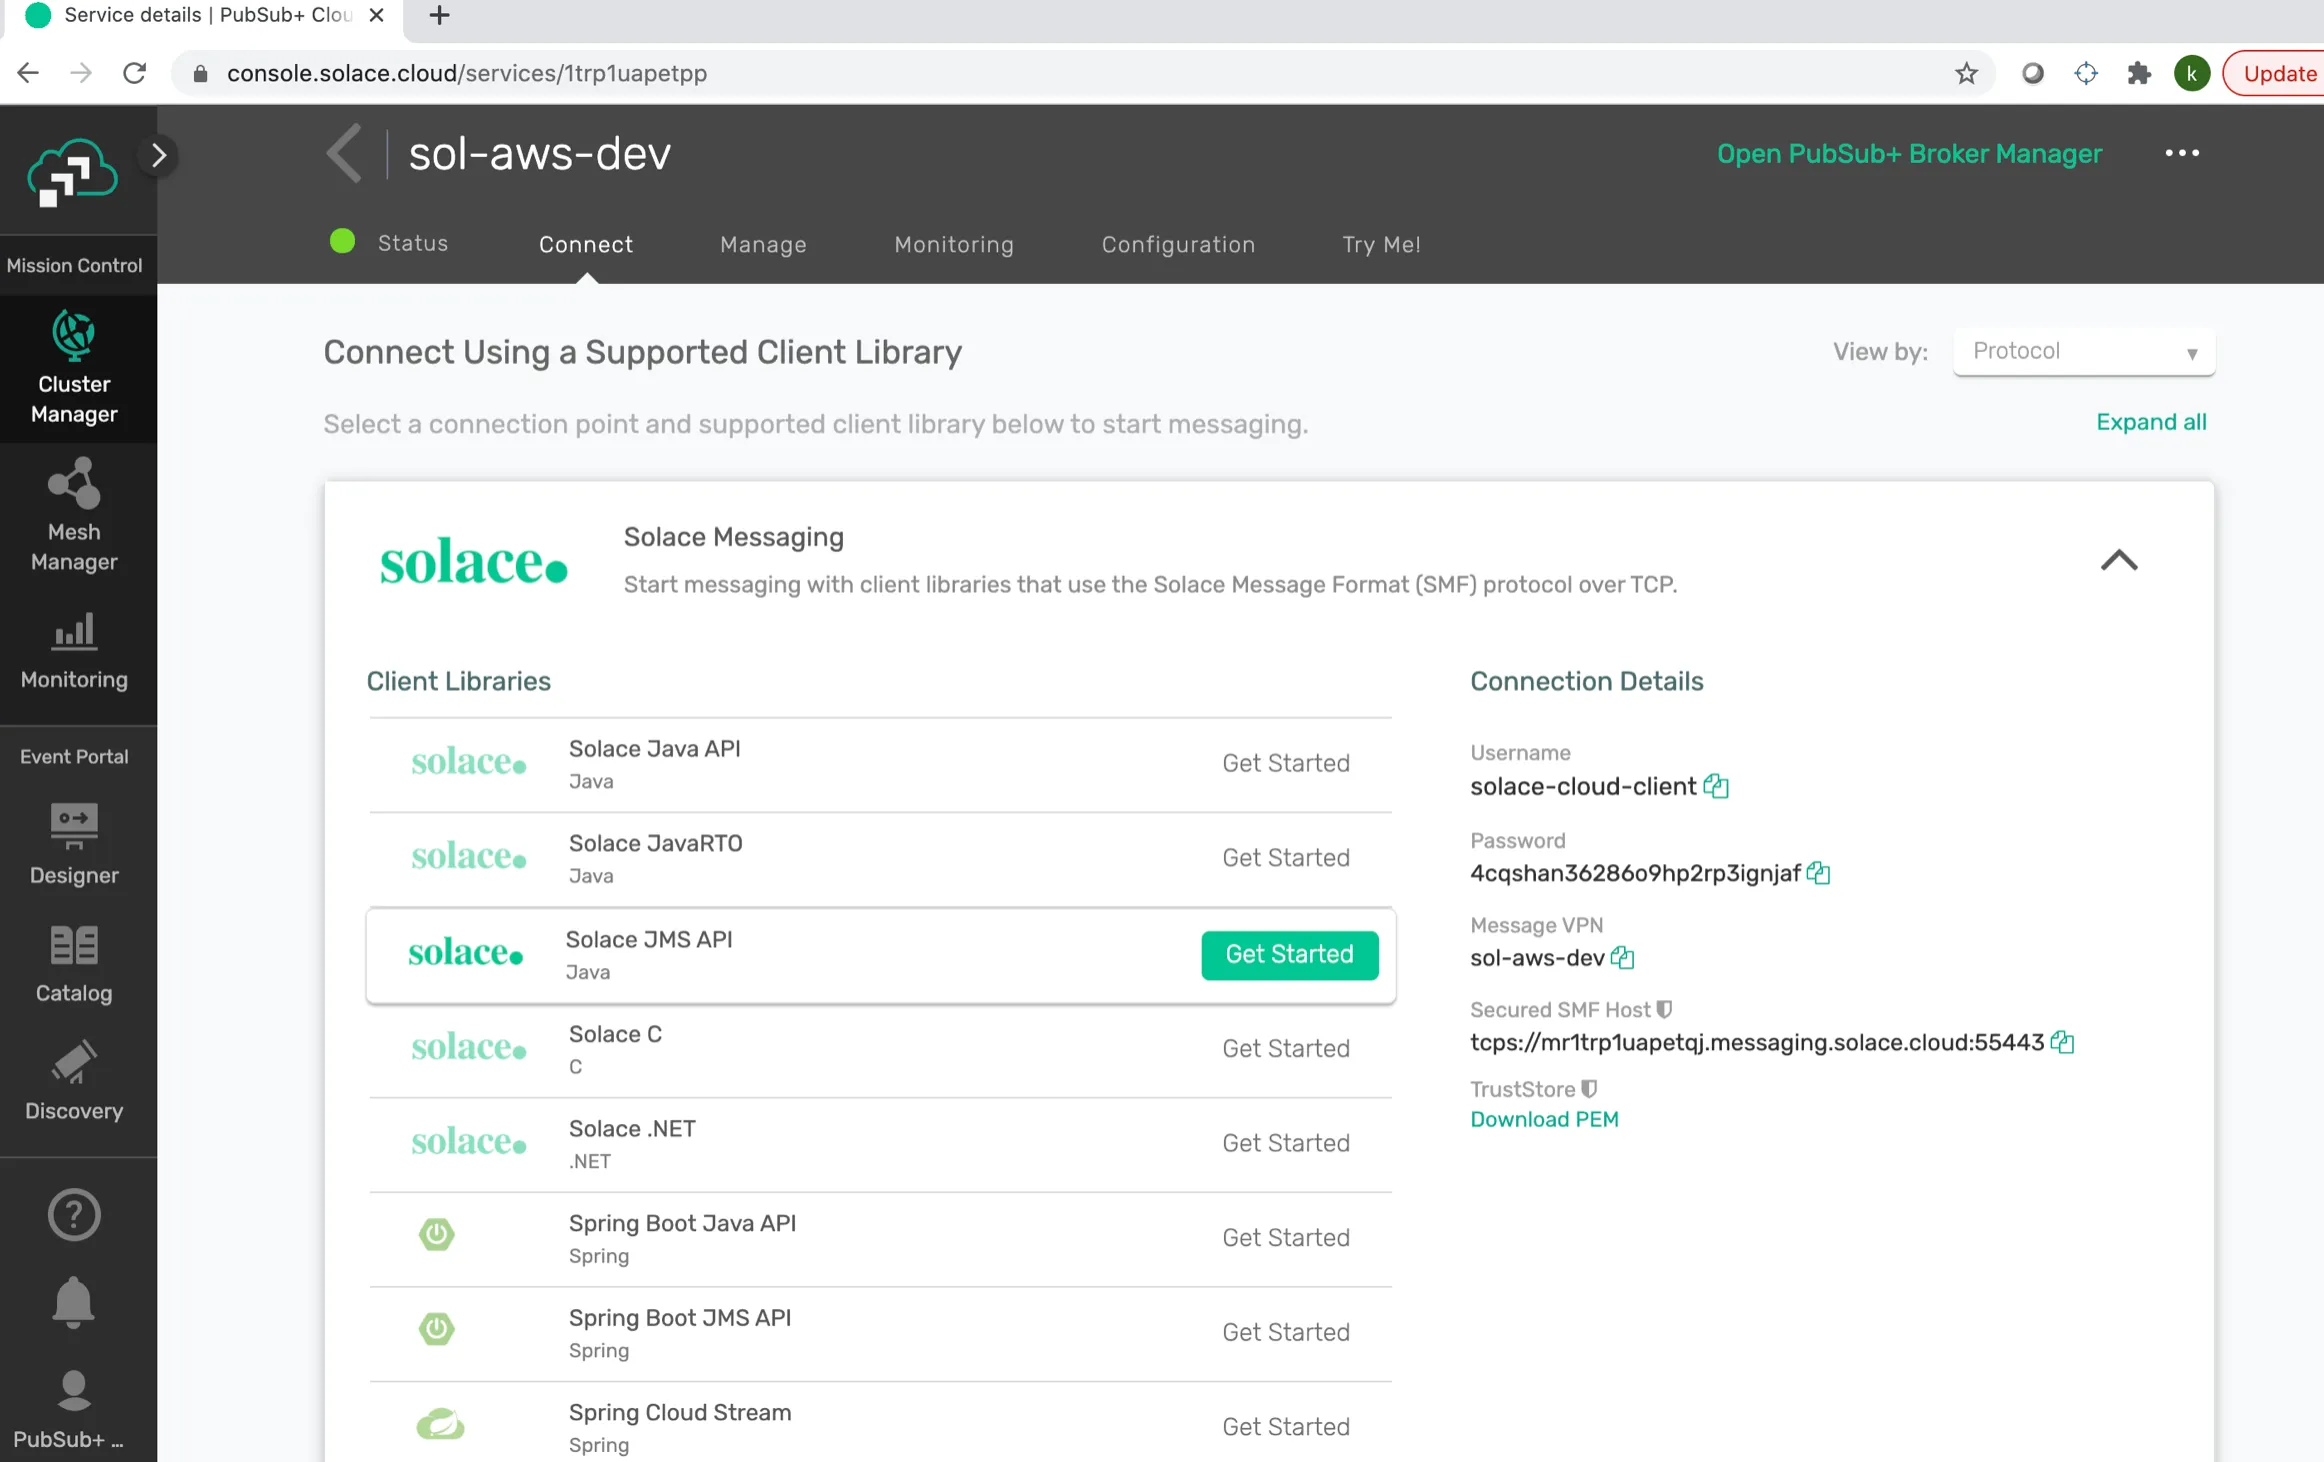
As you can see from the screenshot above, you can download the TrustStore certificate by clicking on the “Download PEM” link.
This PEM file must be converted to a JKS format.
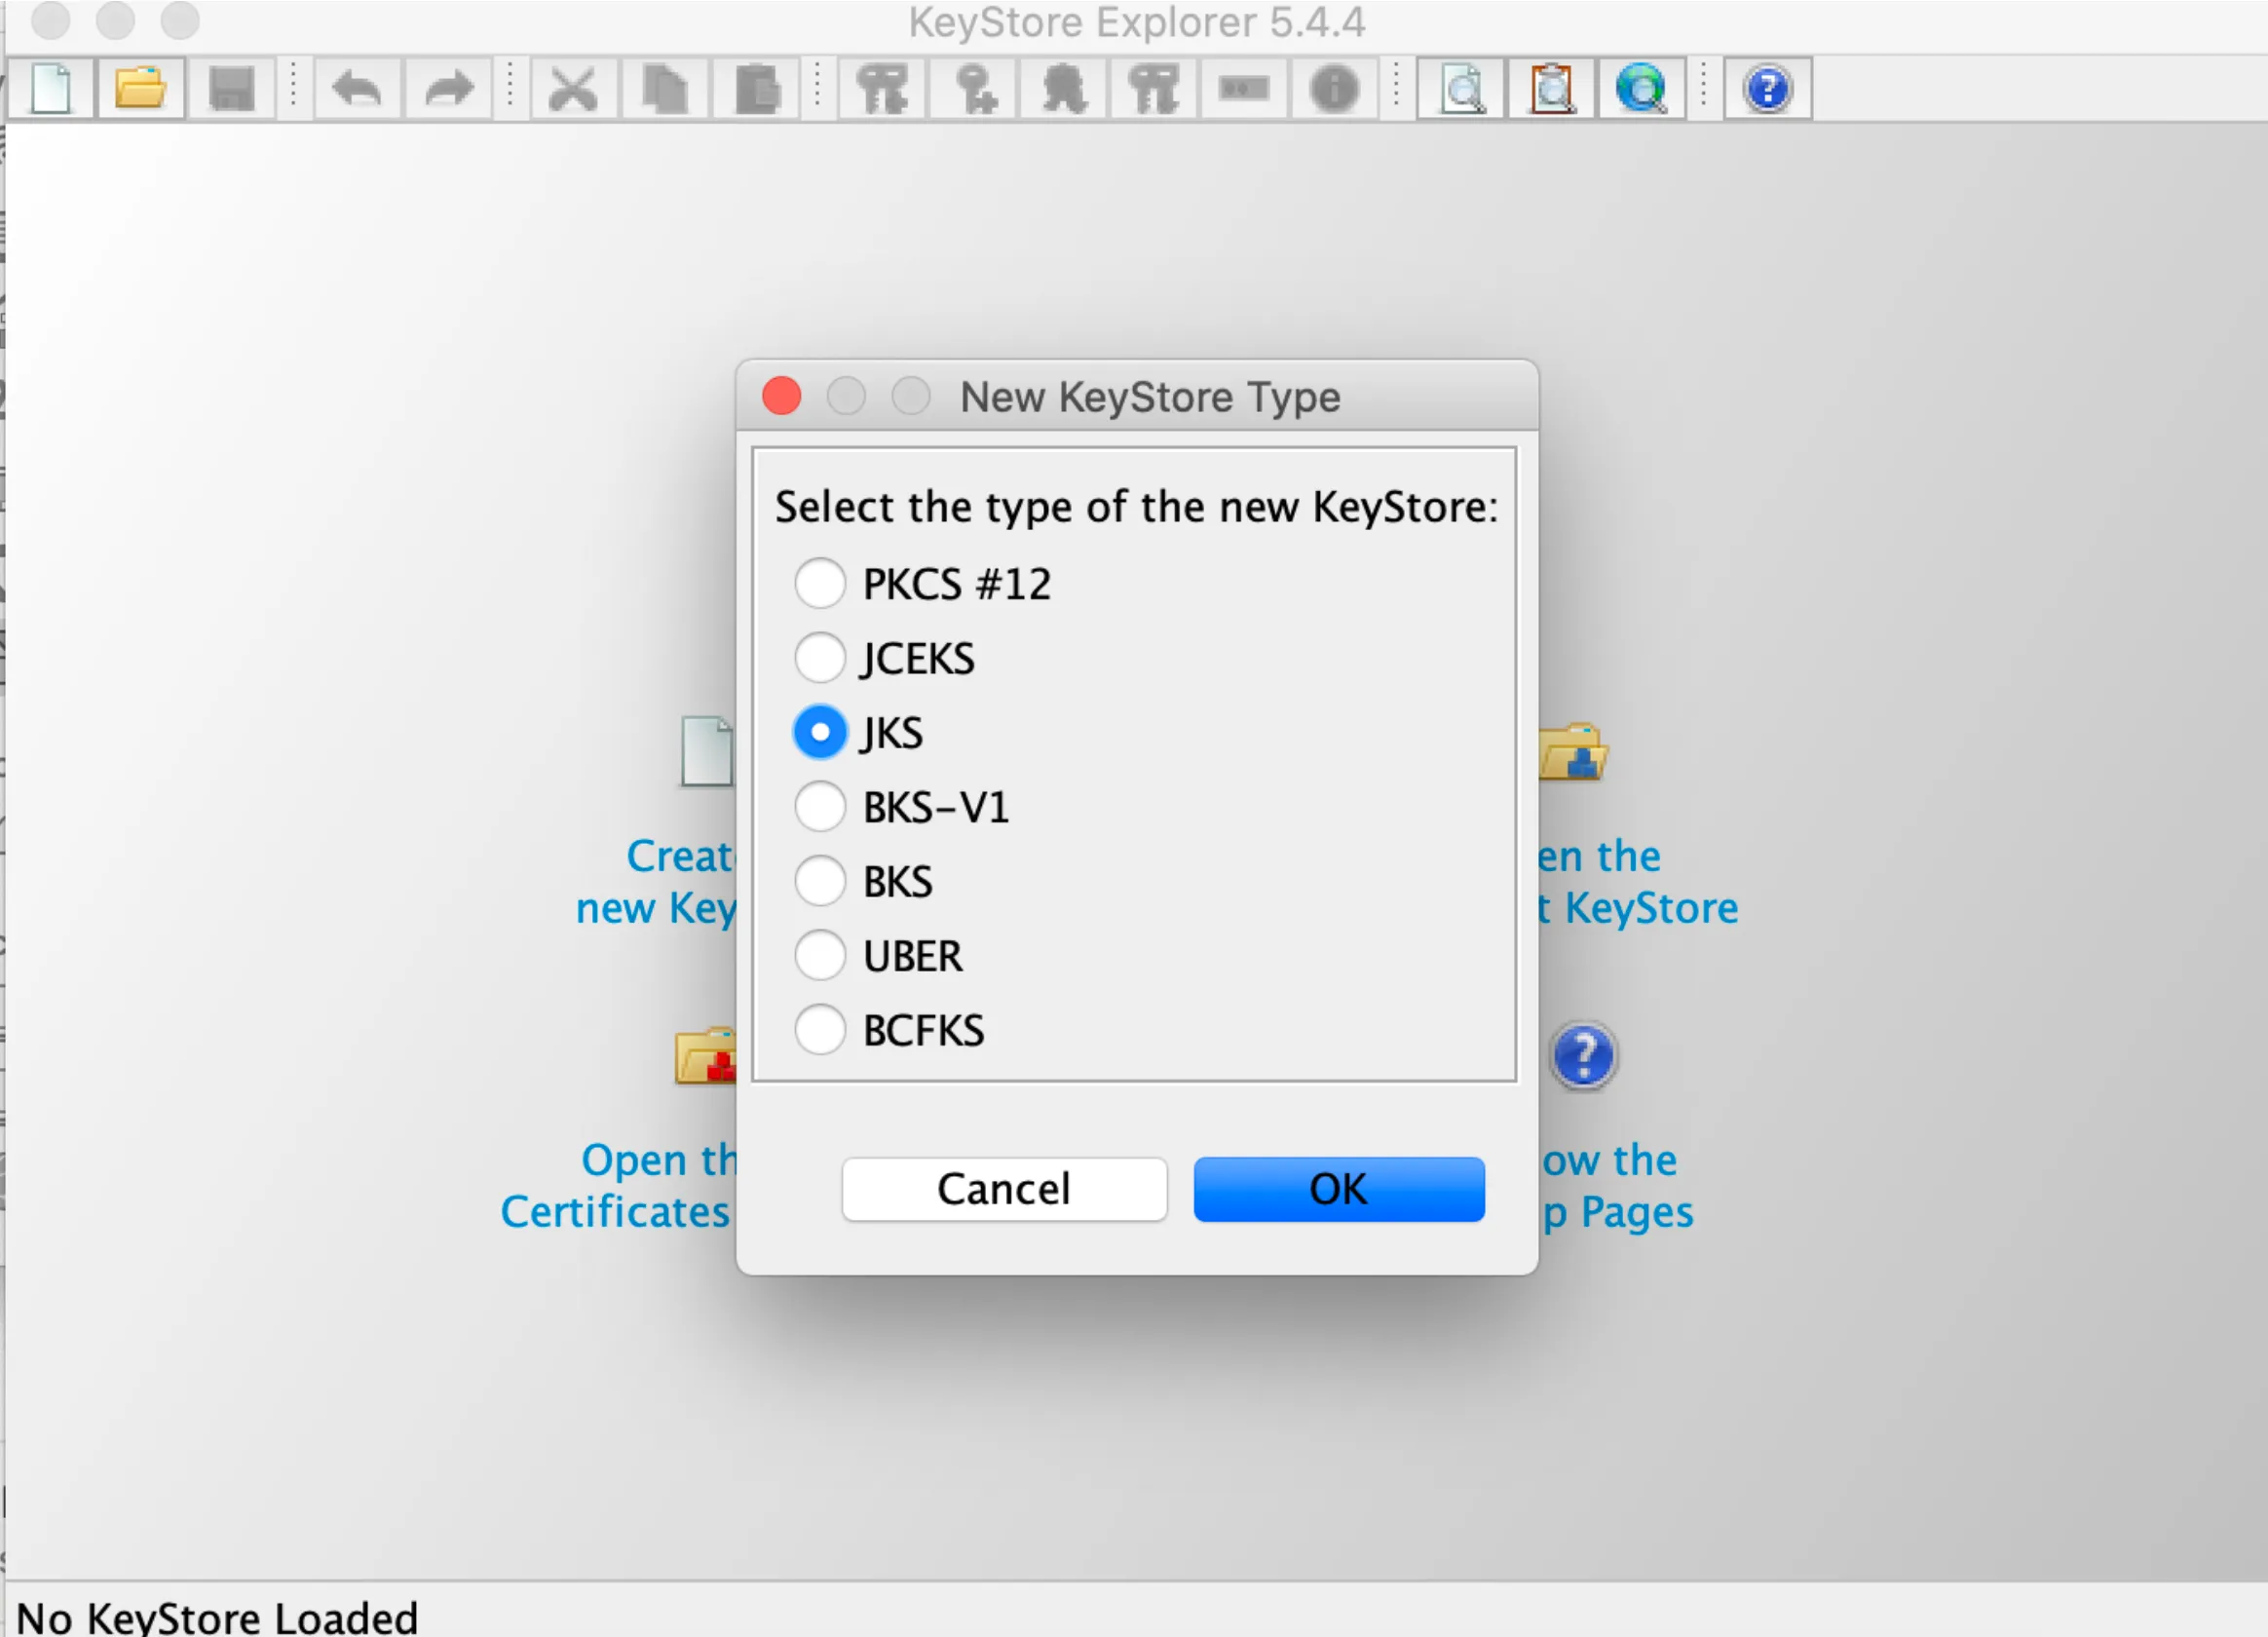
In order to convert this file, we’ll use the KeyStore Explorer tool (you can download it here - https://keystore-explorer.org/downloads.html).
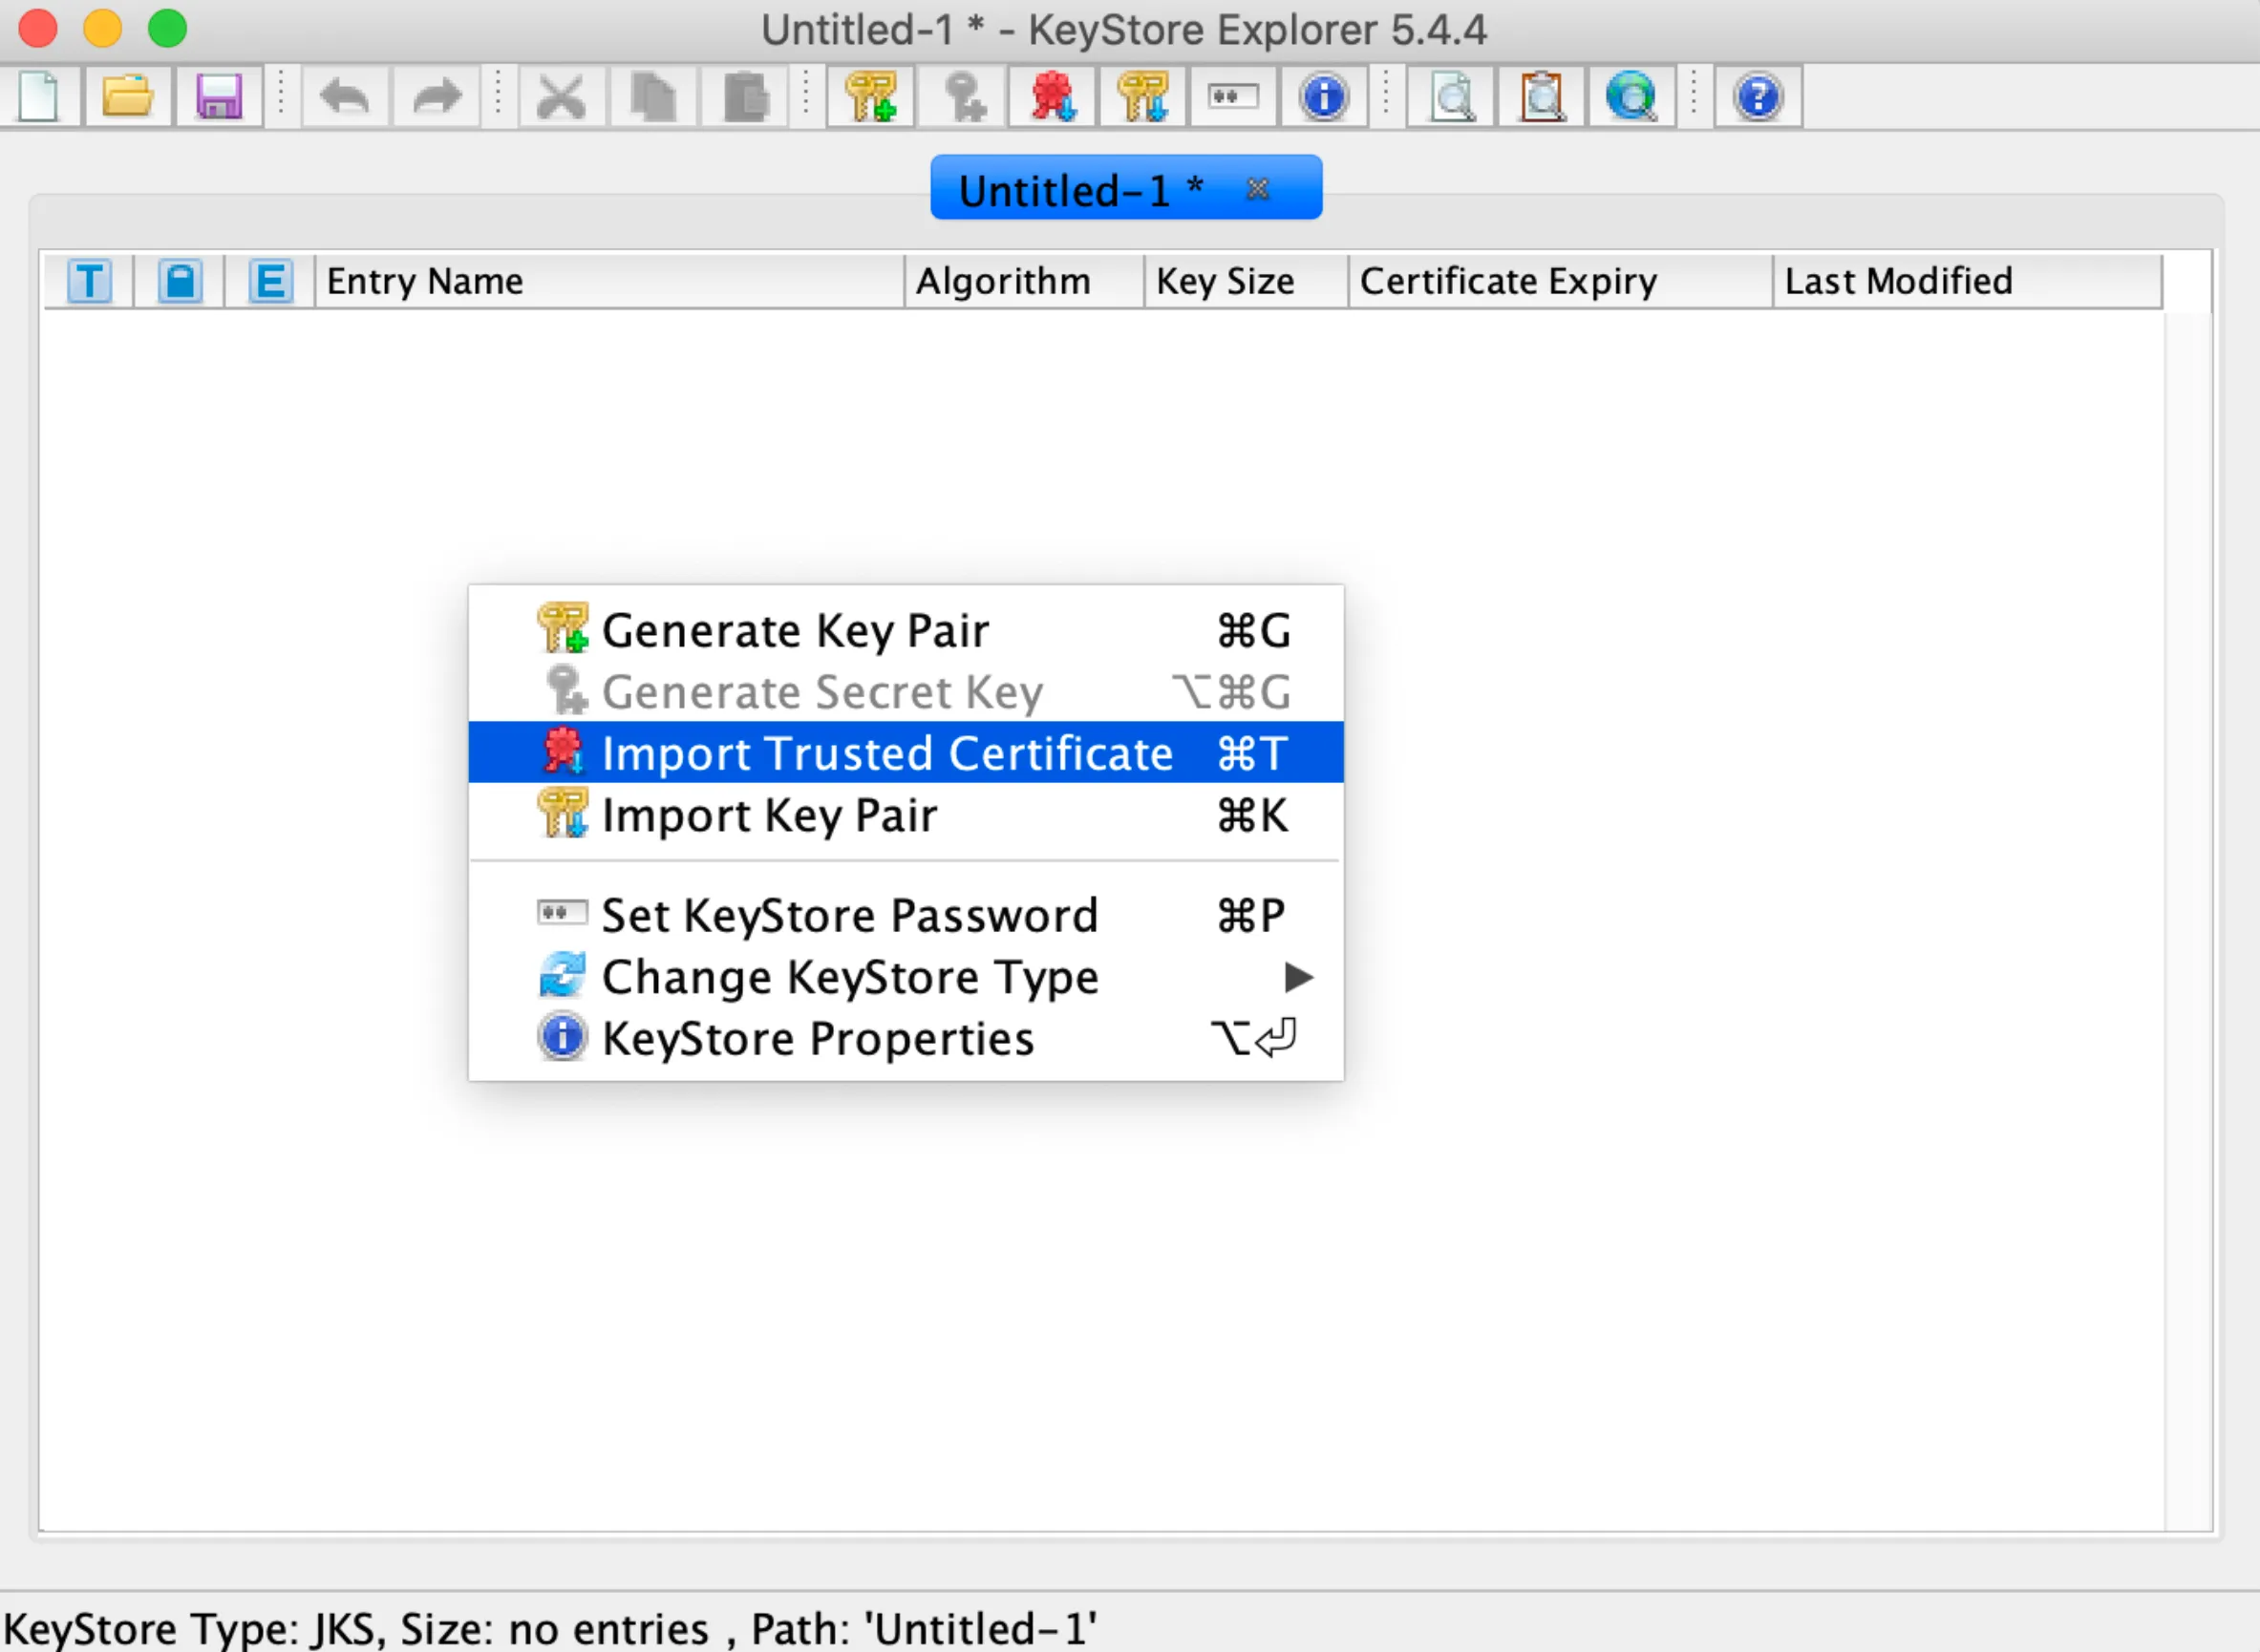
Open KeyStore Explorer and create a new JKS KeyStore Type as shown in the following screenshot.
To import the PEM certificate, select the “Import Trusted Certificate” option (command+T or Ctrl+T).
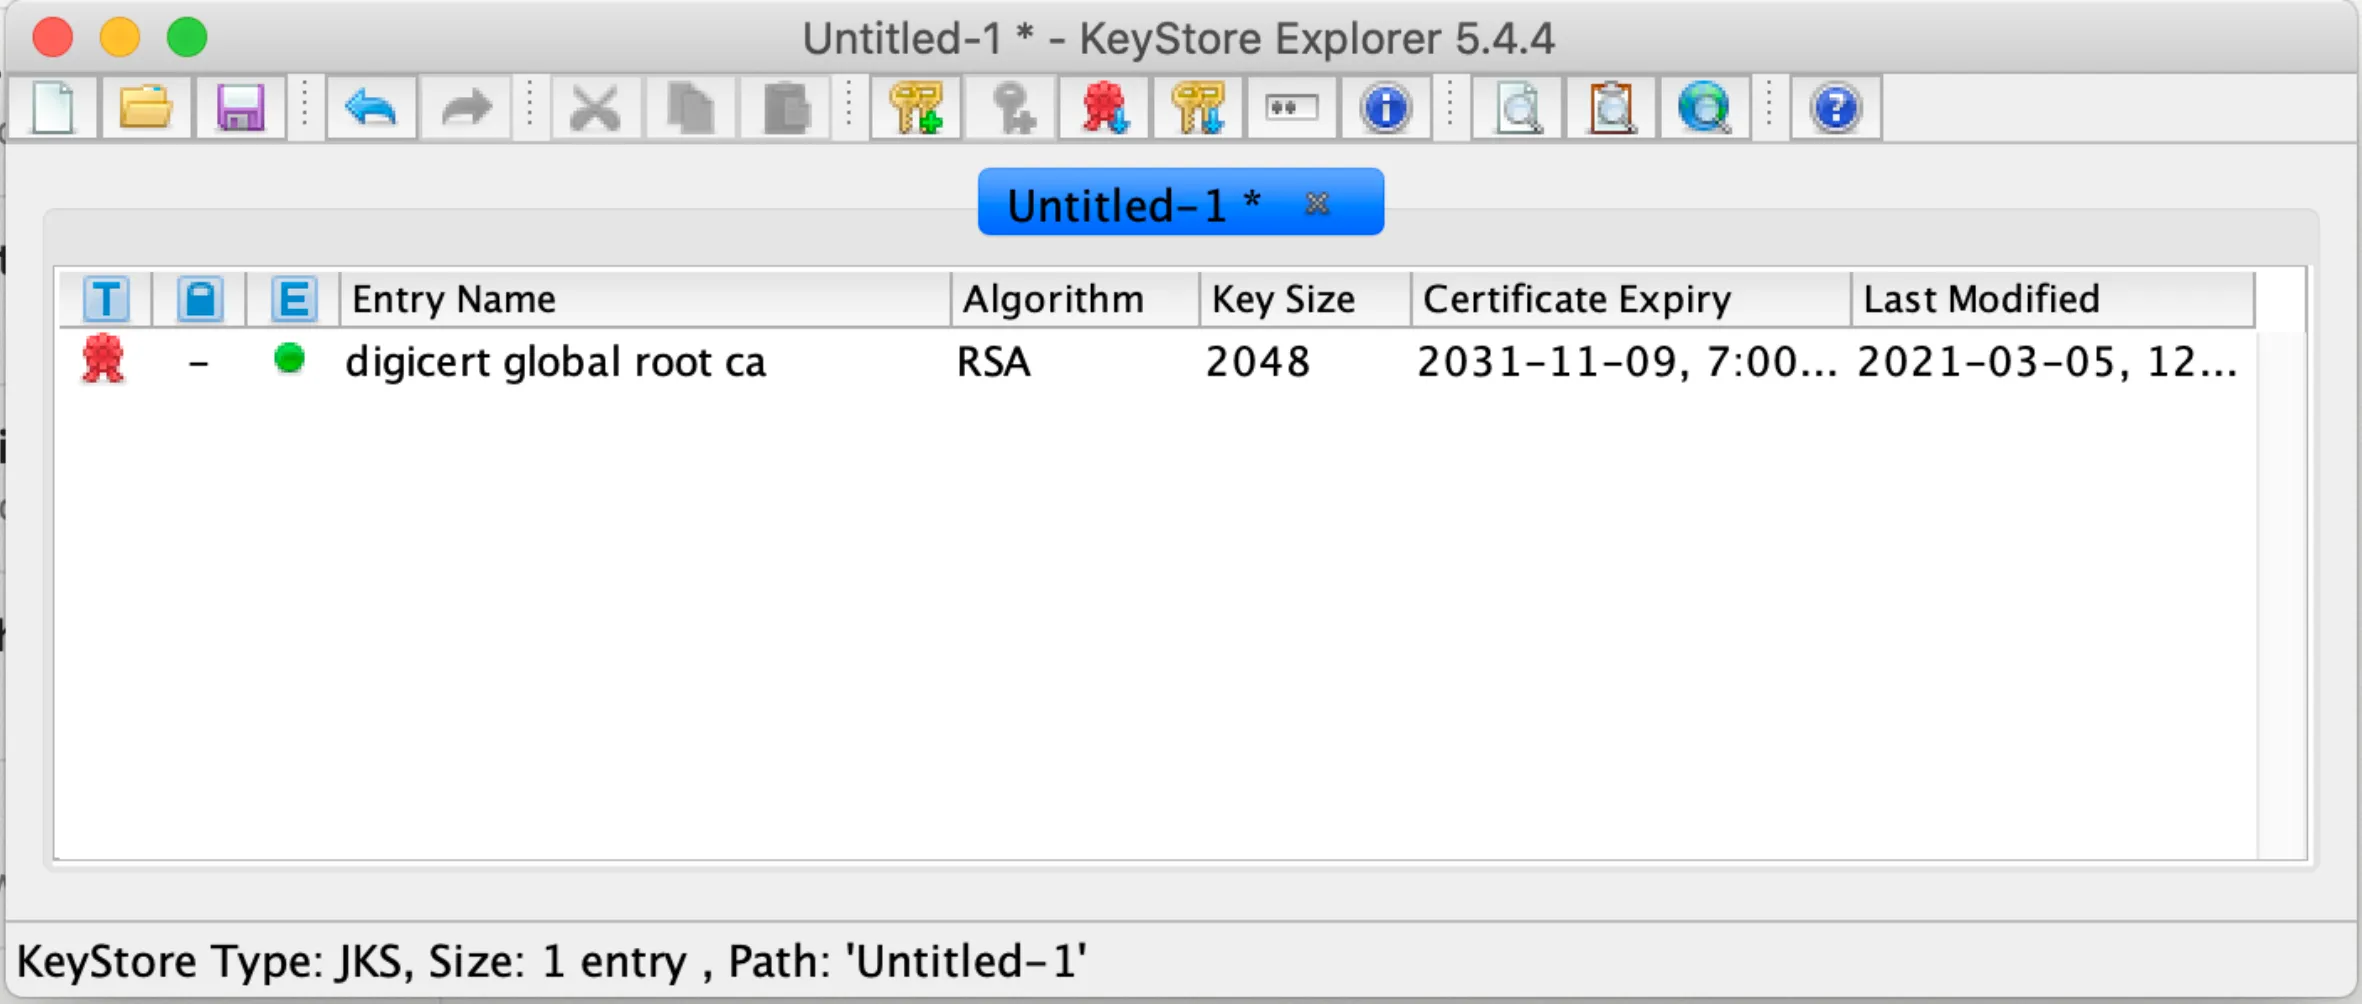
Select the downloaded PEM certificate from Solace and give it a name to import it.
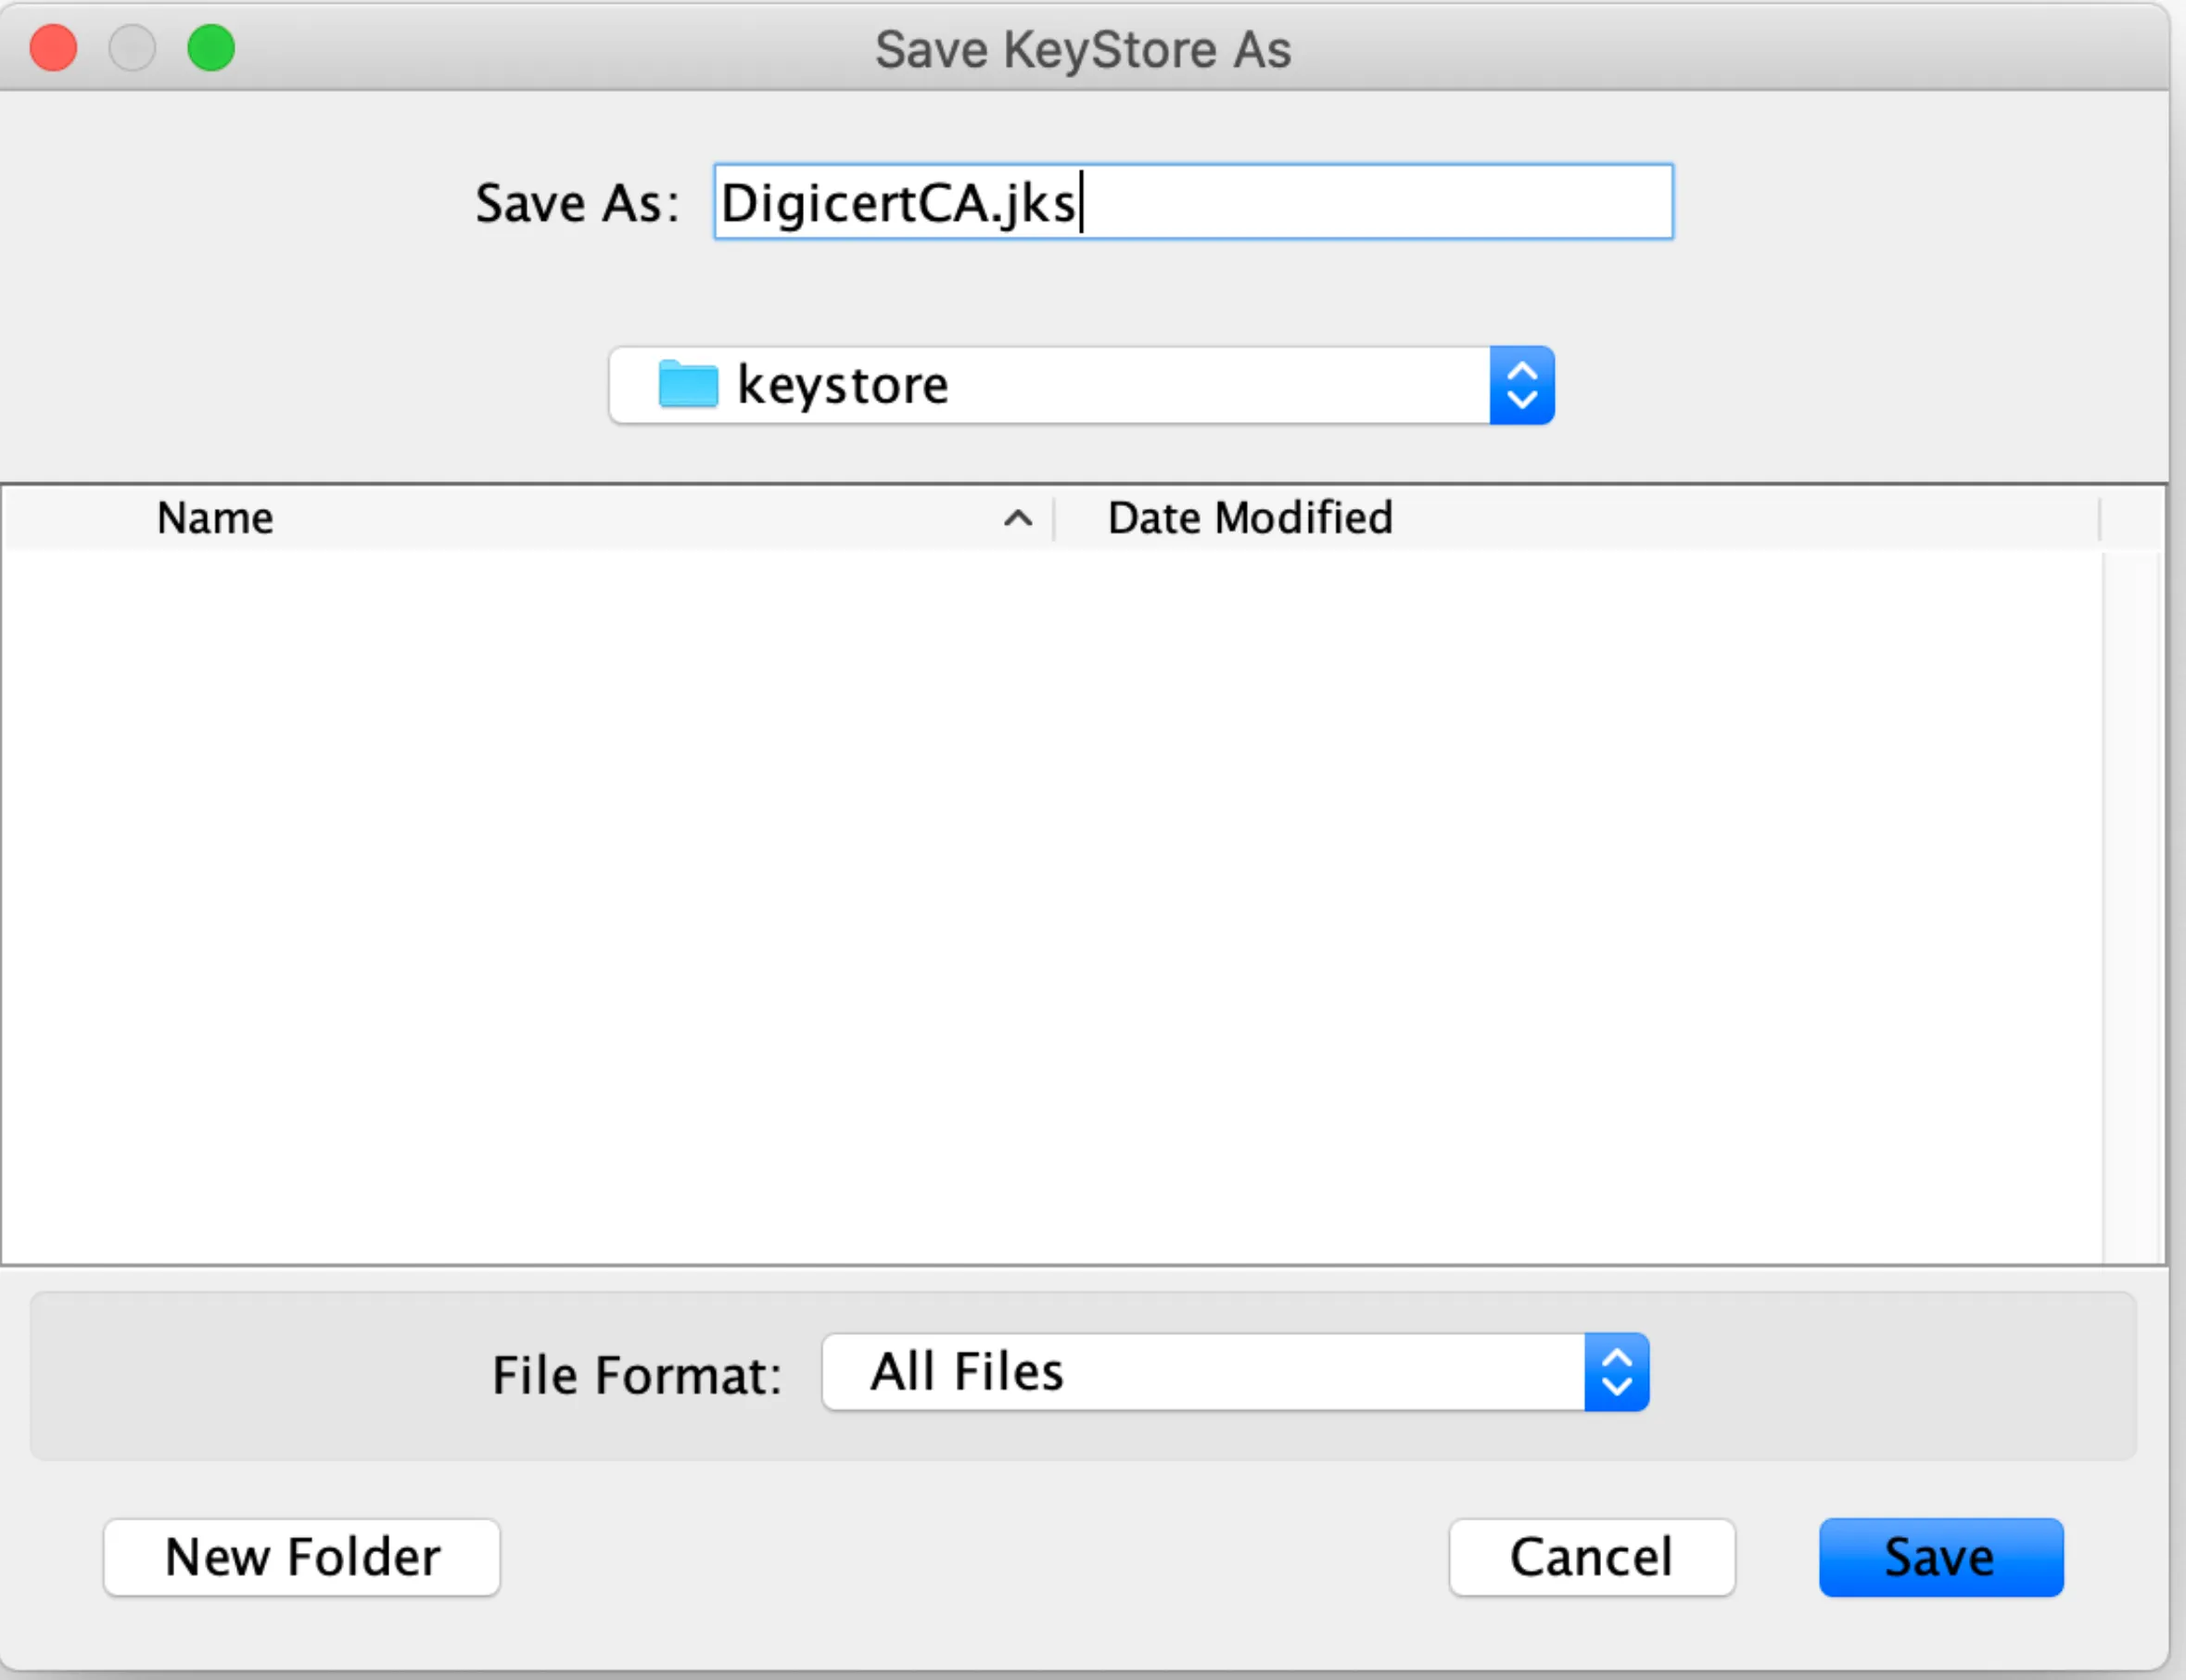
Click on “File” and “Save As.”
Enter the password of your choice and confirm. Please keep a note of the password you entered as you have to use this in the MuleSoft Configuration (JMS Config). You will see a screen similar to the next one to save the converted JKS file to your system.
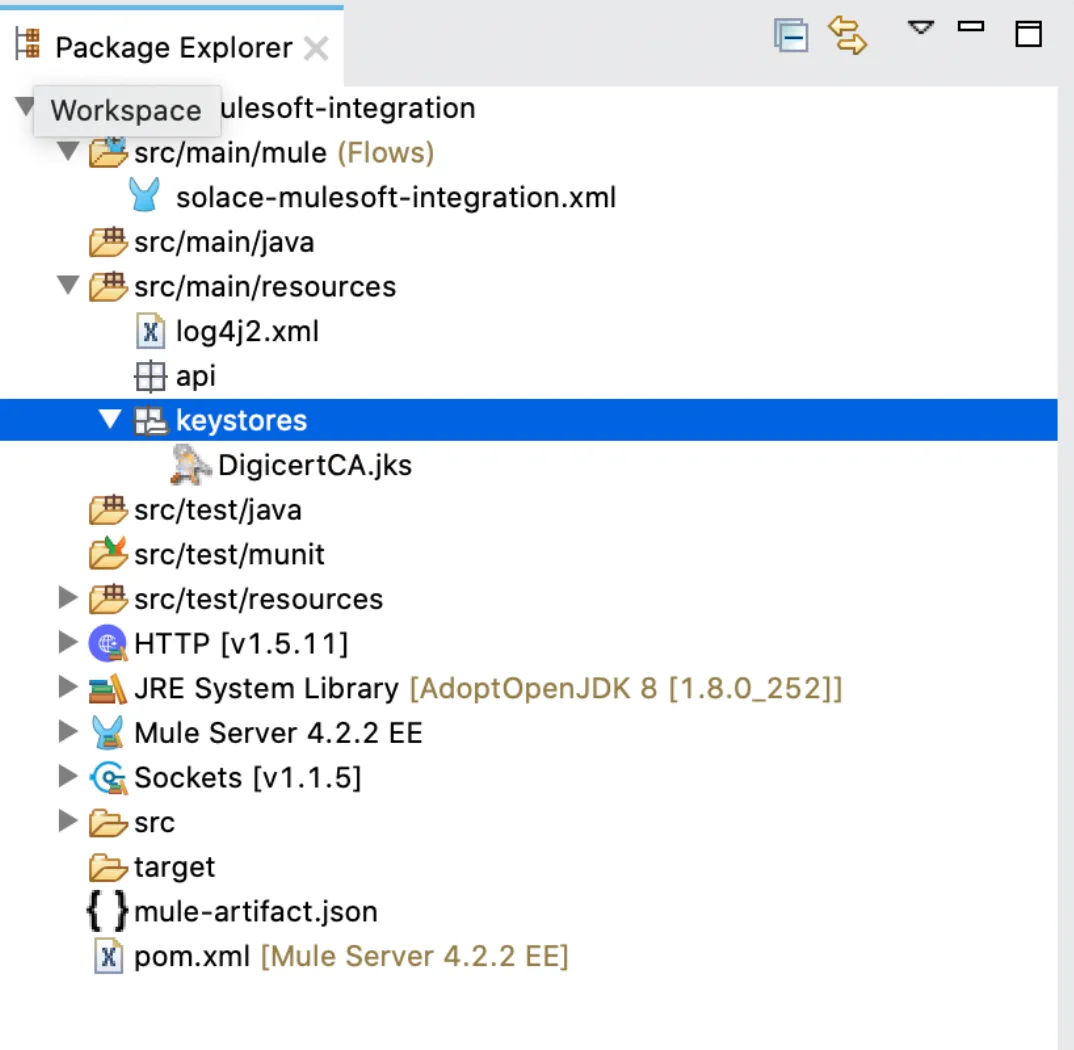
Now all you have to do is import this JKS file into your Mule Project. I put it under src/main/resources/keystores/ but you can use it as long as it’s under src/main/resources.
4. Configuring the Message Service
In order to establish a connectivity between the clients and the event broker, we need to configure the Messaging Service as per our needs.
Click on the “Manage” tab at the top of the screen, or next to the “Connect” tab that we just used.
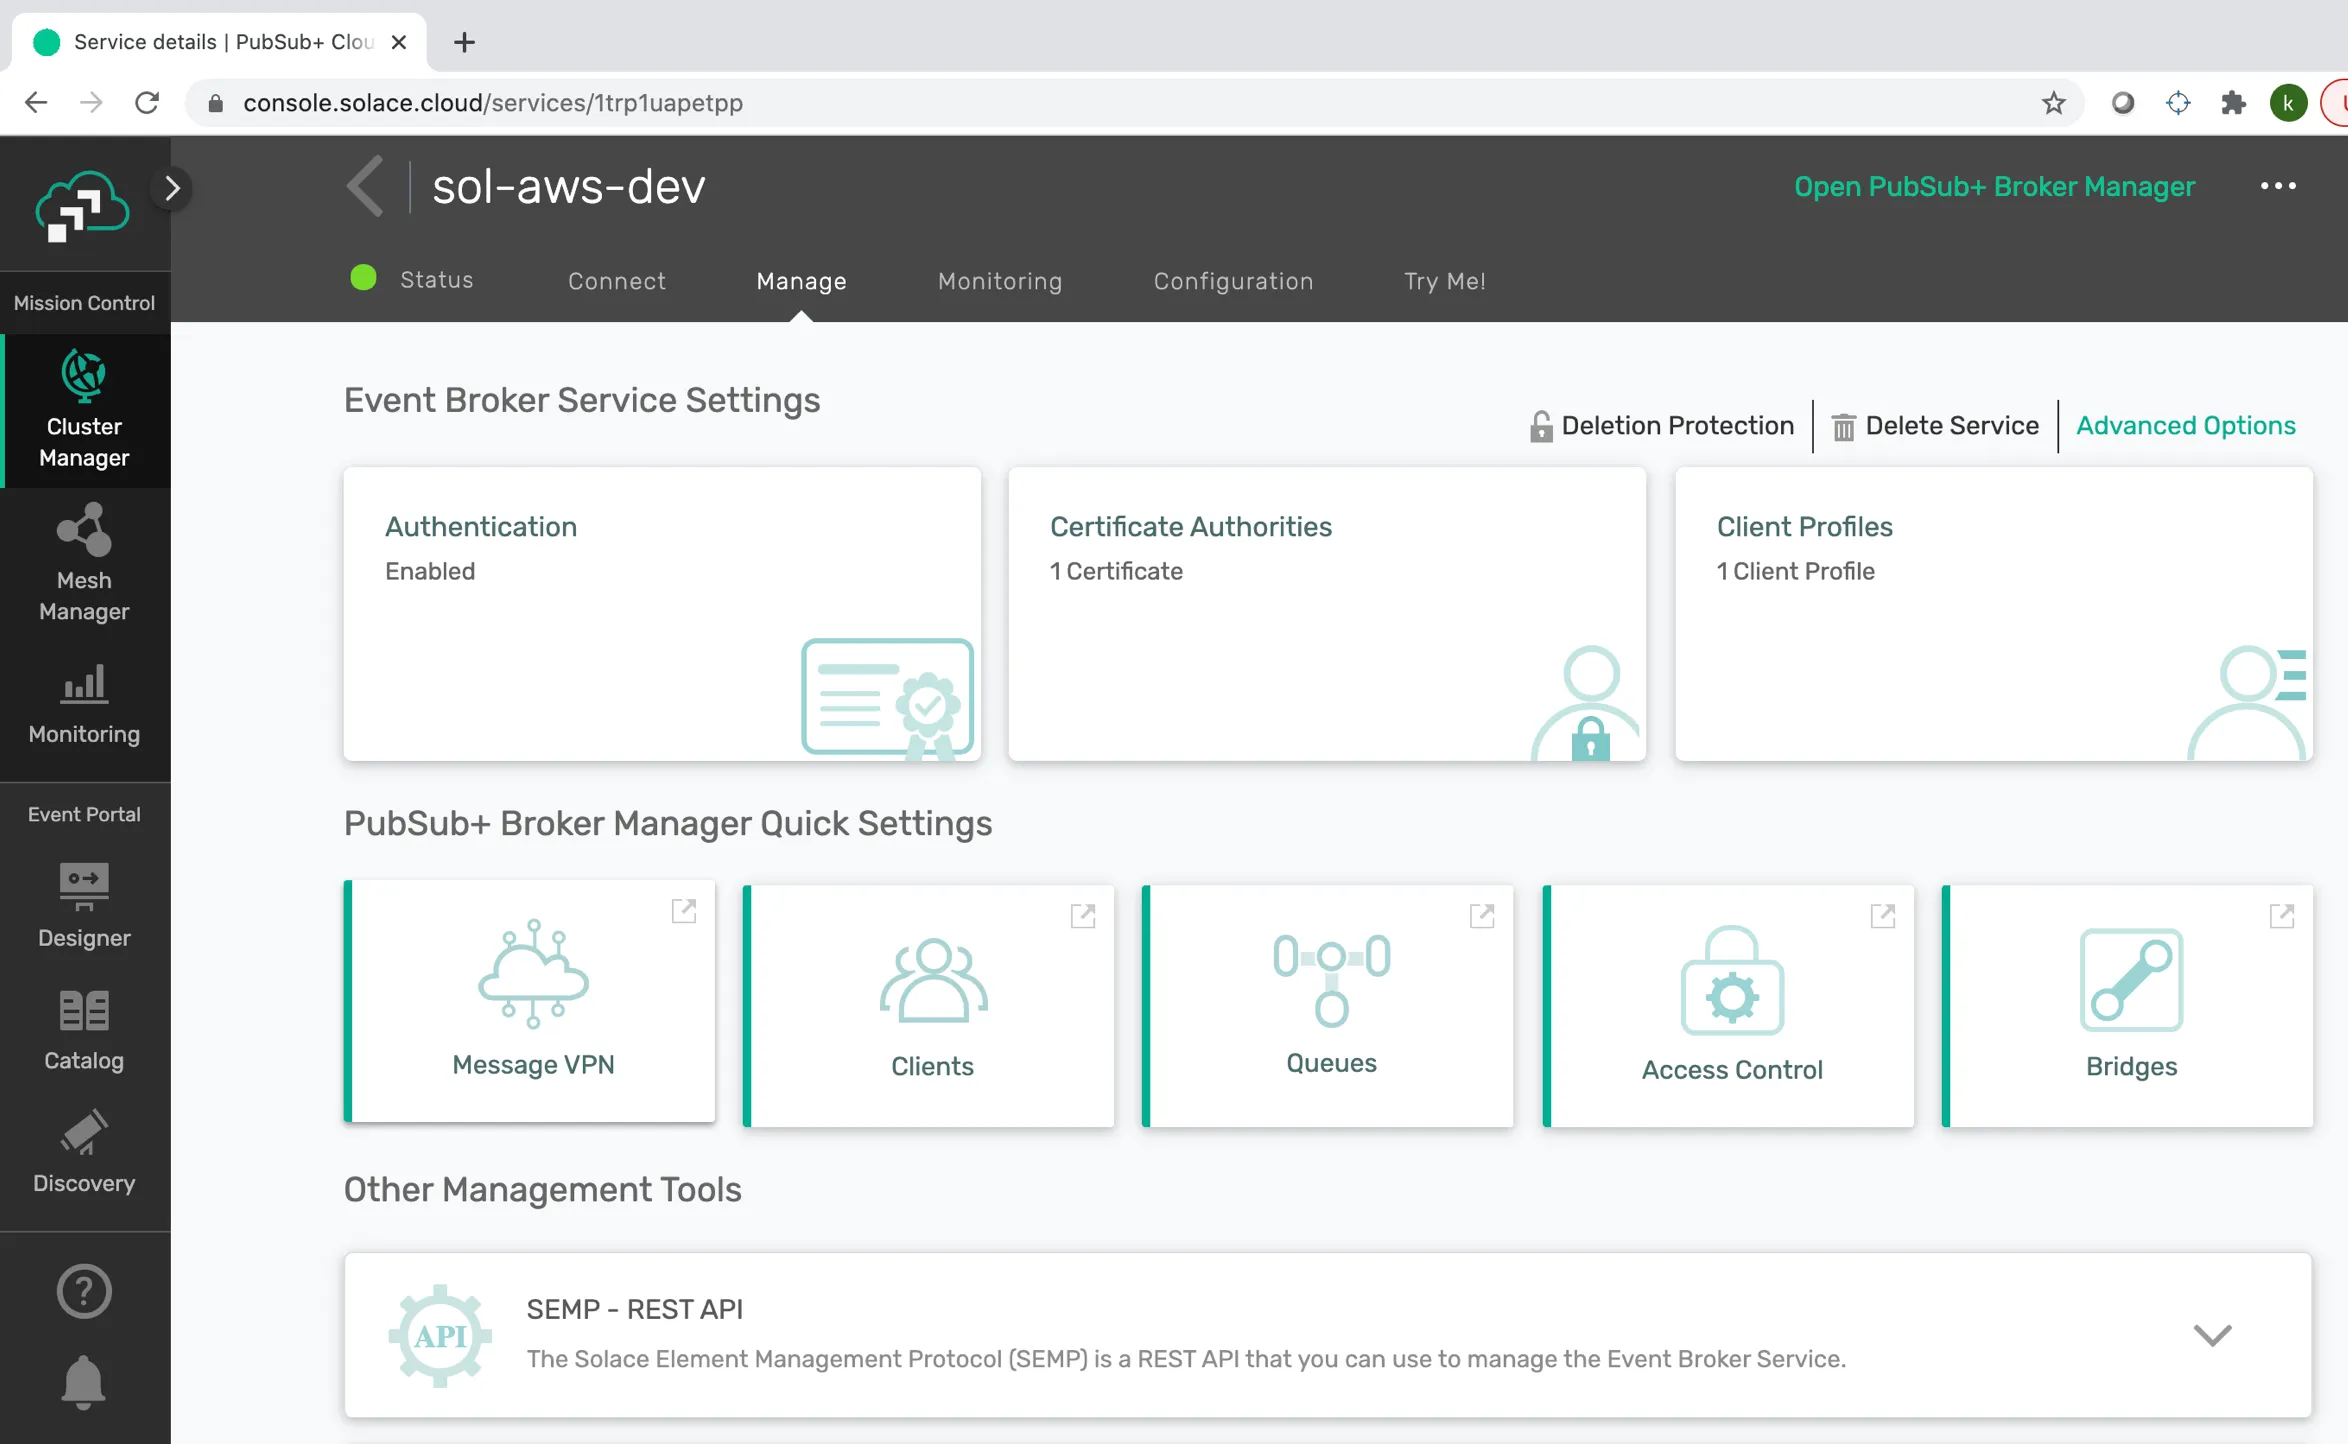
Locate and click the “Message VPN” button in the middle, under the PubSub+ Broker Manager Quick Settings label. A new window will open.
If you click on the “Services” tab, you will see all the Services that are enabled.
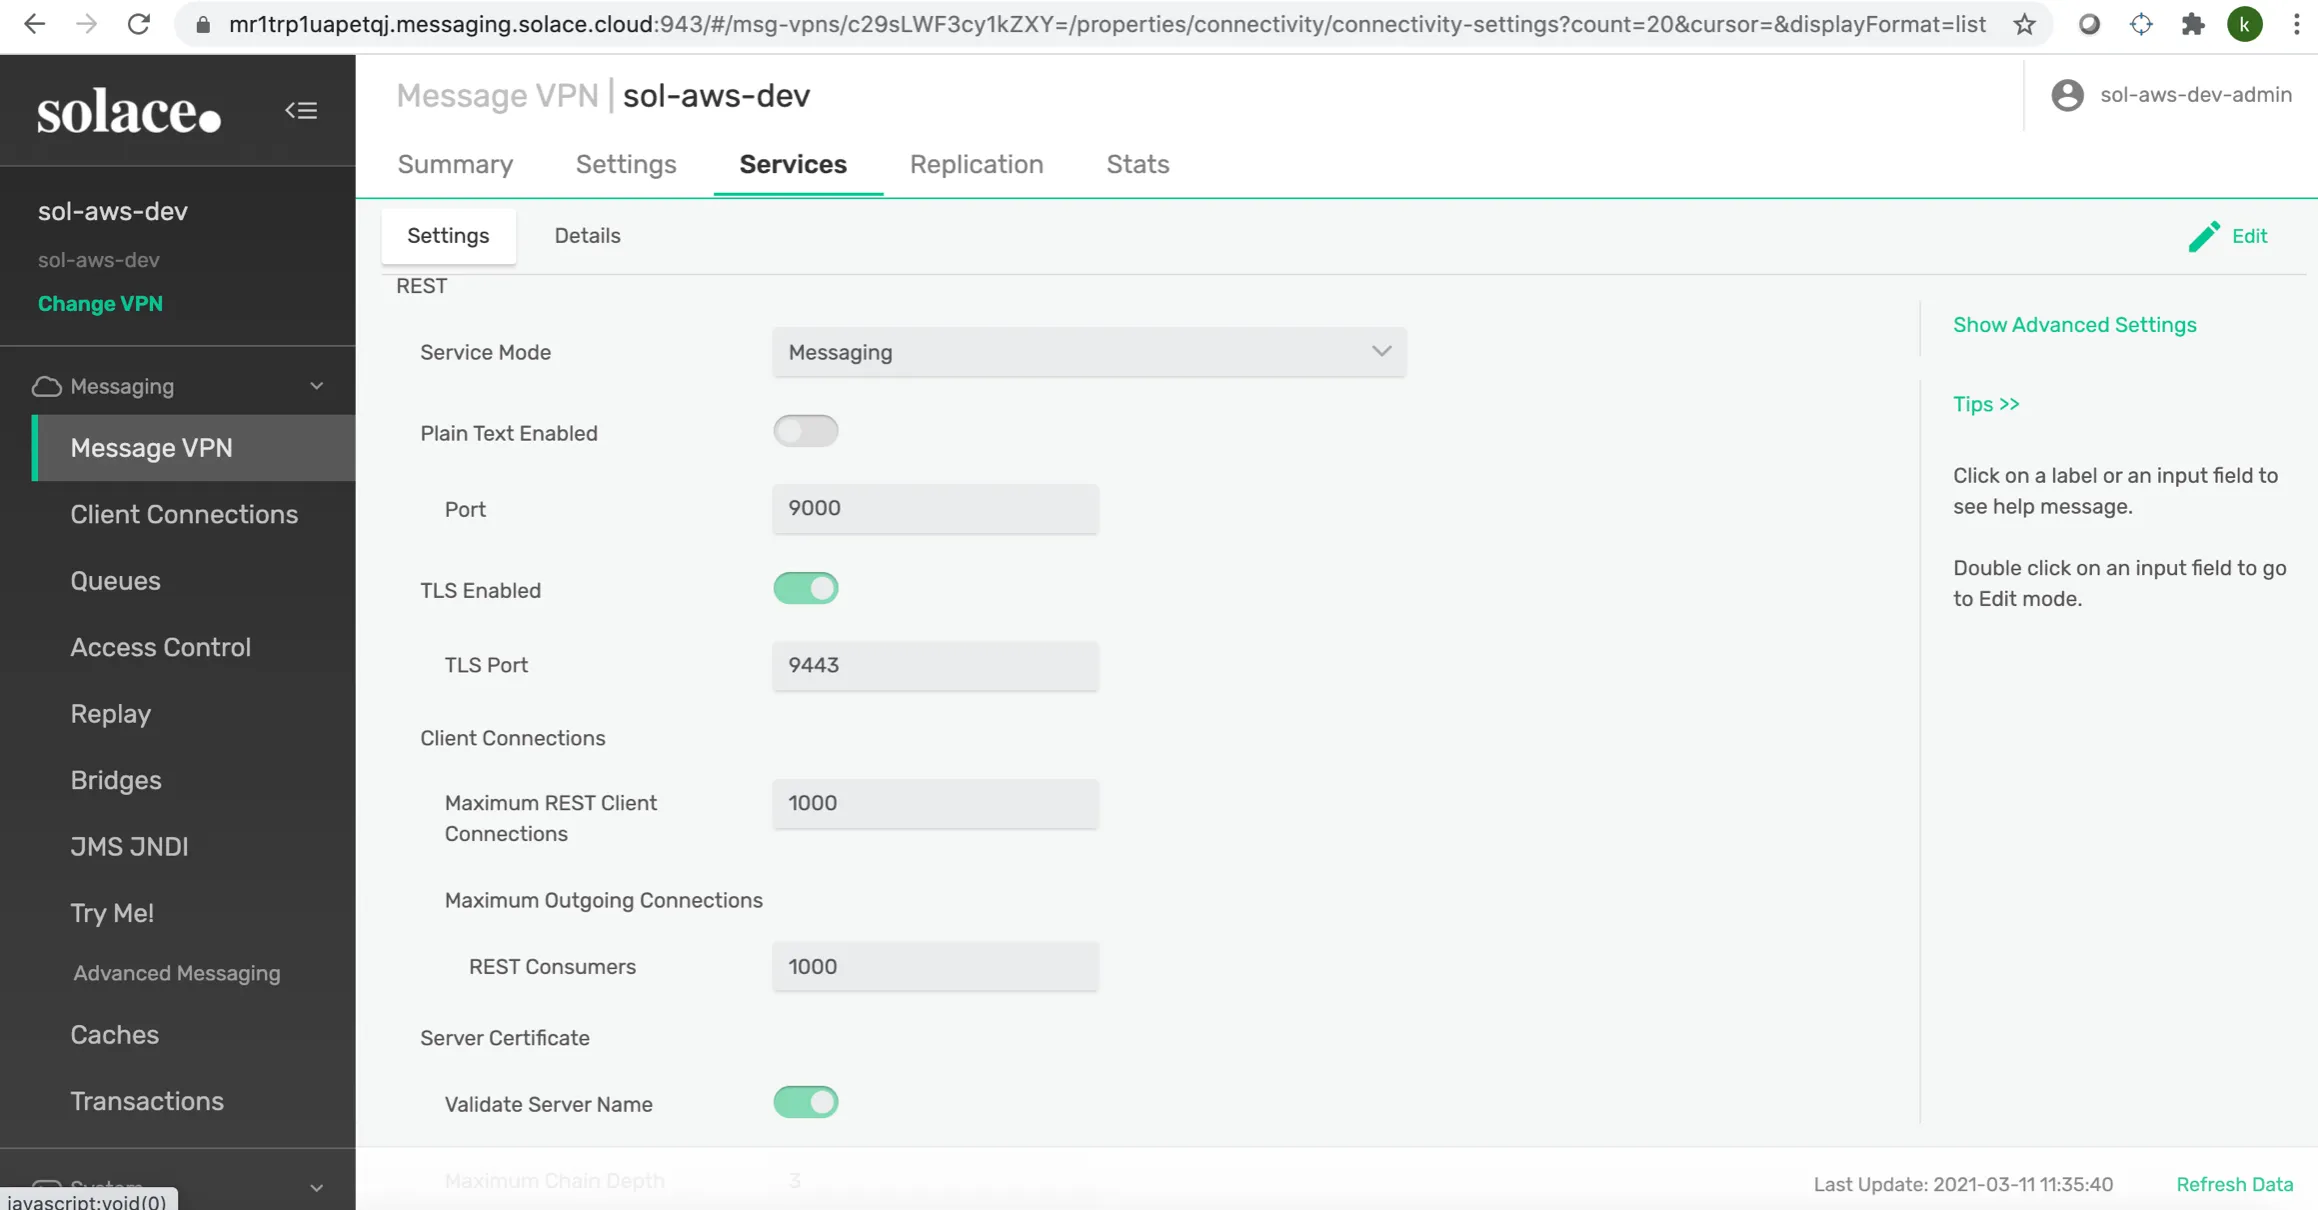
Here are the settings that I created for the Proof of Concept. You can configure your own settings or based on mine if you’re experimenting.
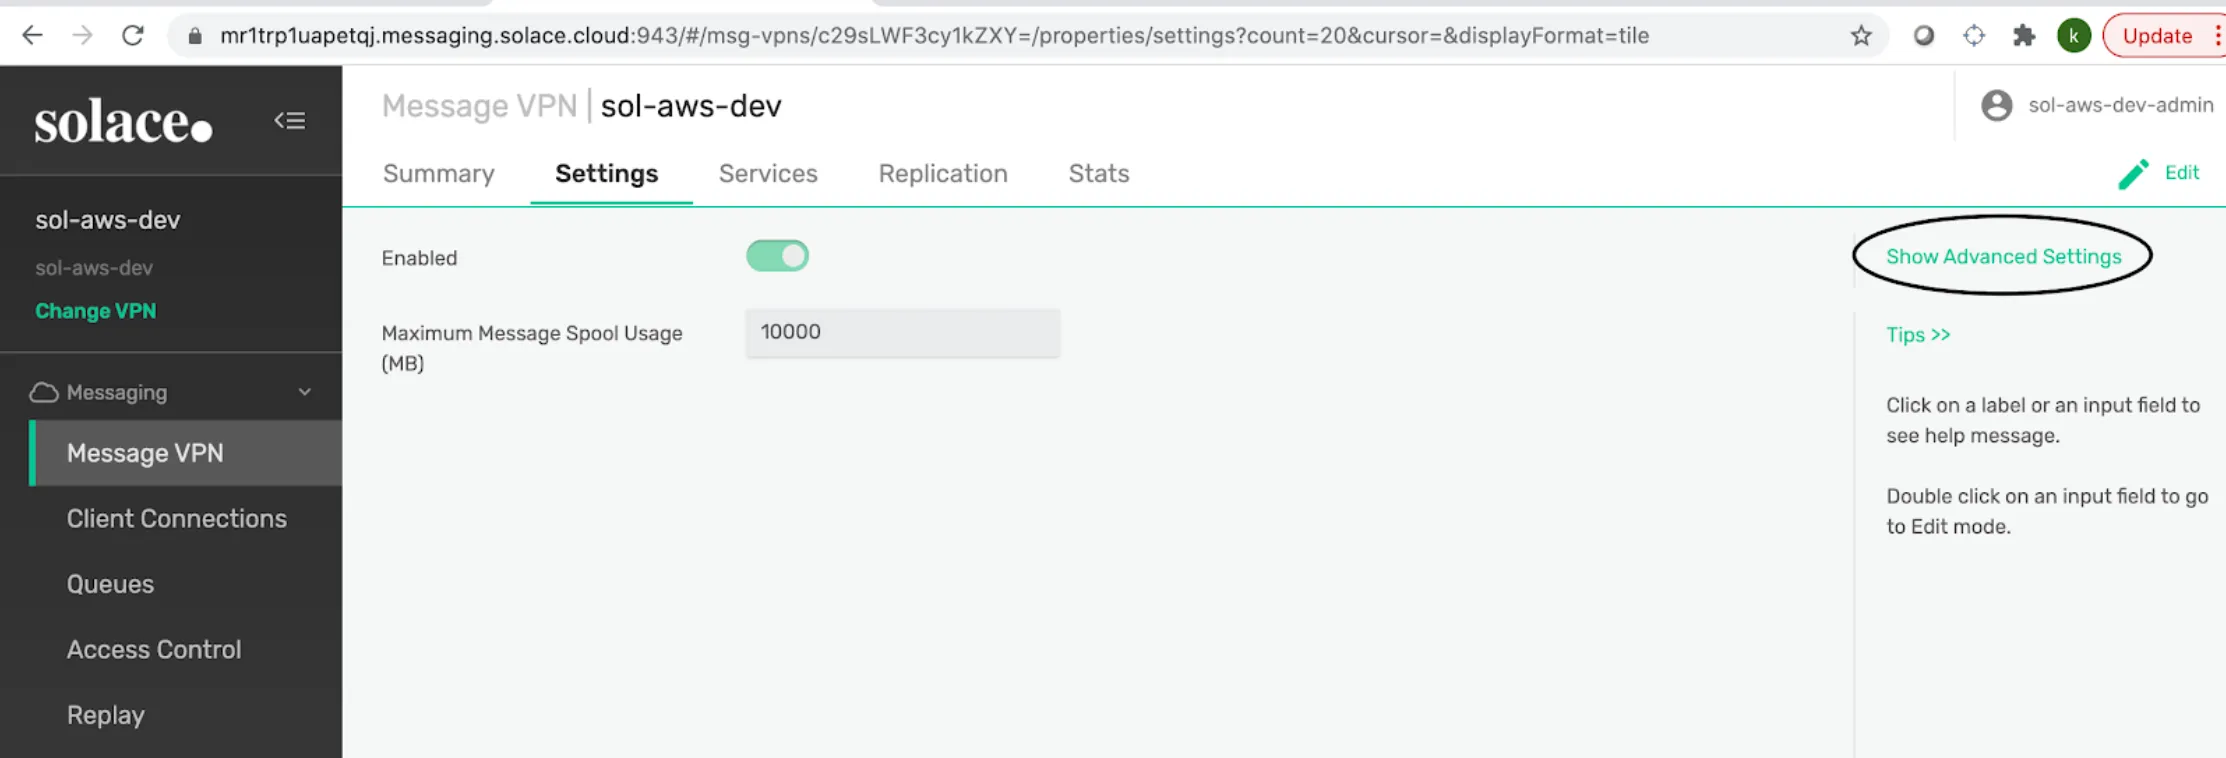
You can also modify the message VPN settings by clicking on the “Show Advanced Settings” as shown in the following screenshot.
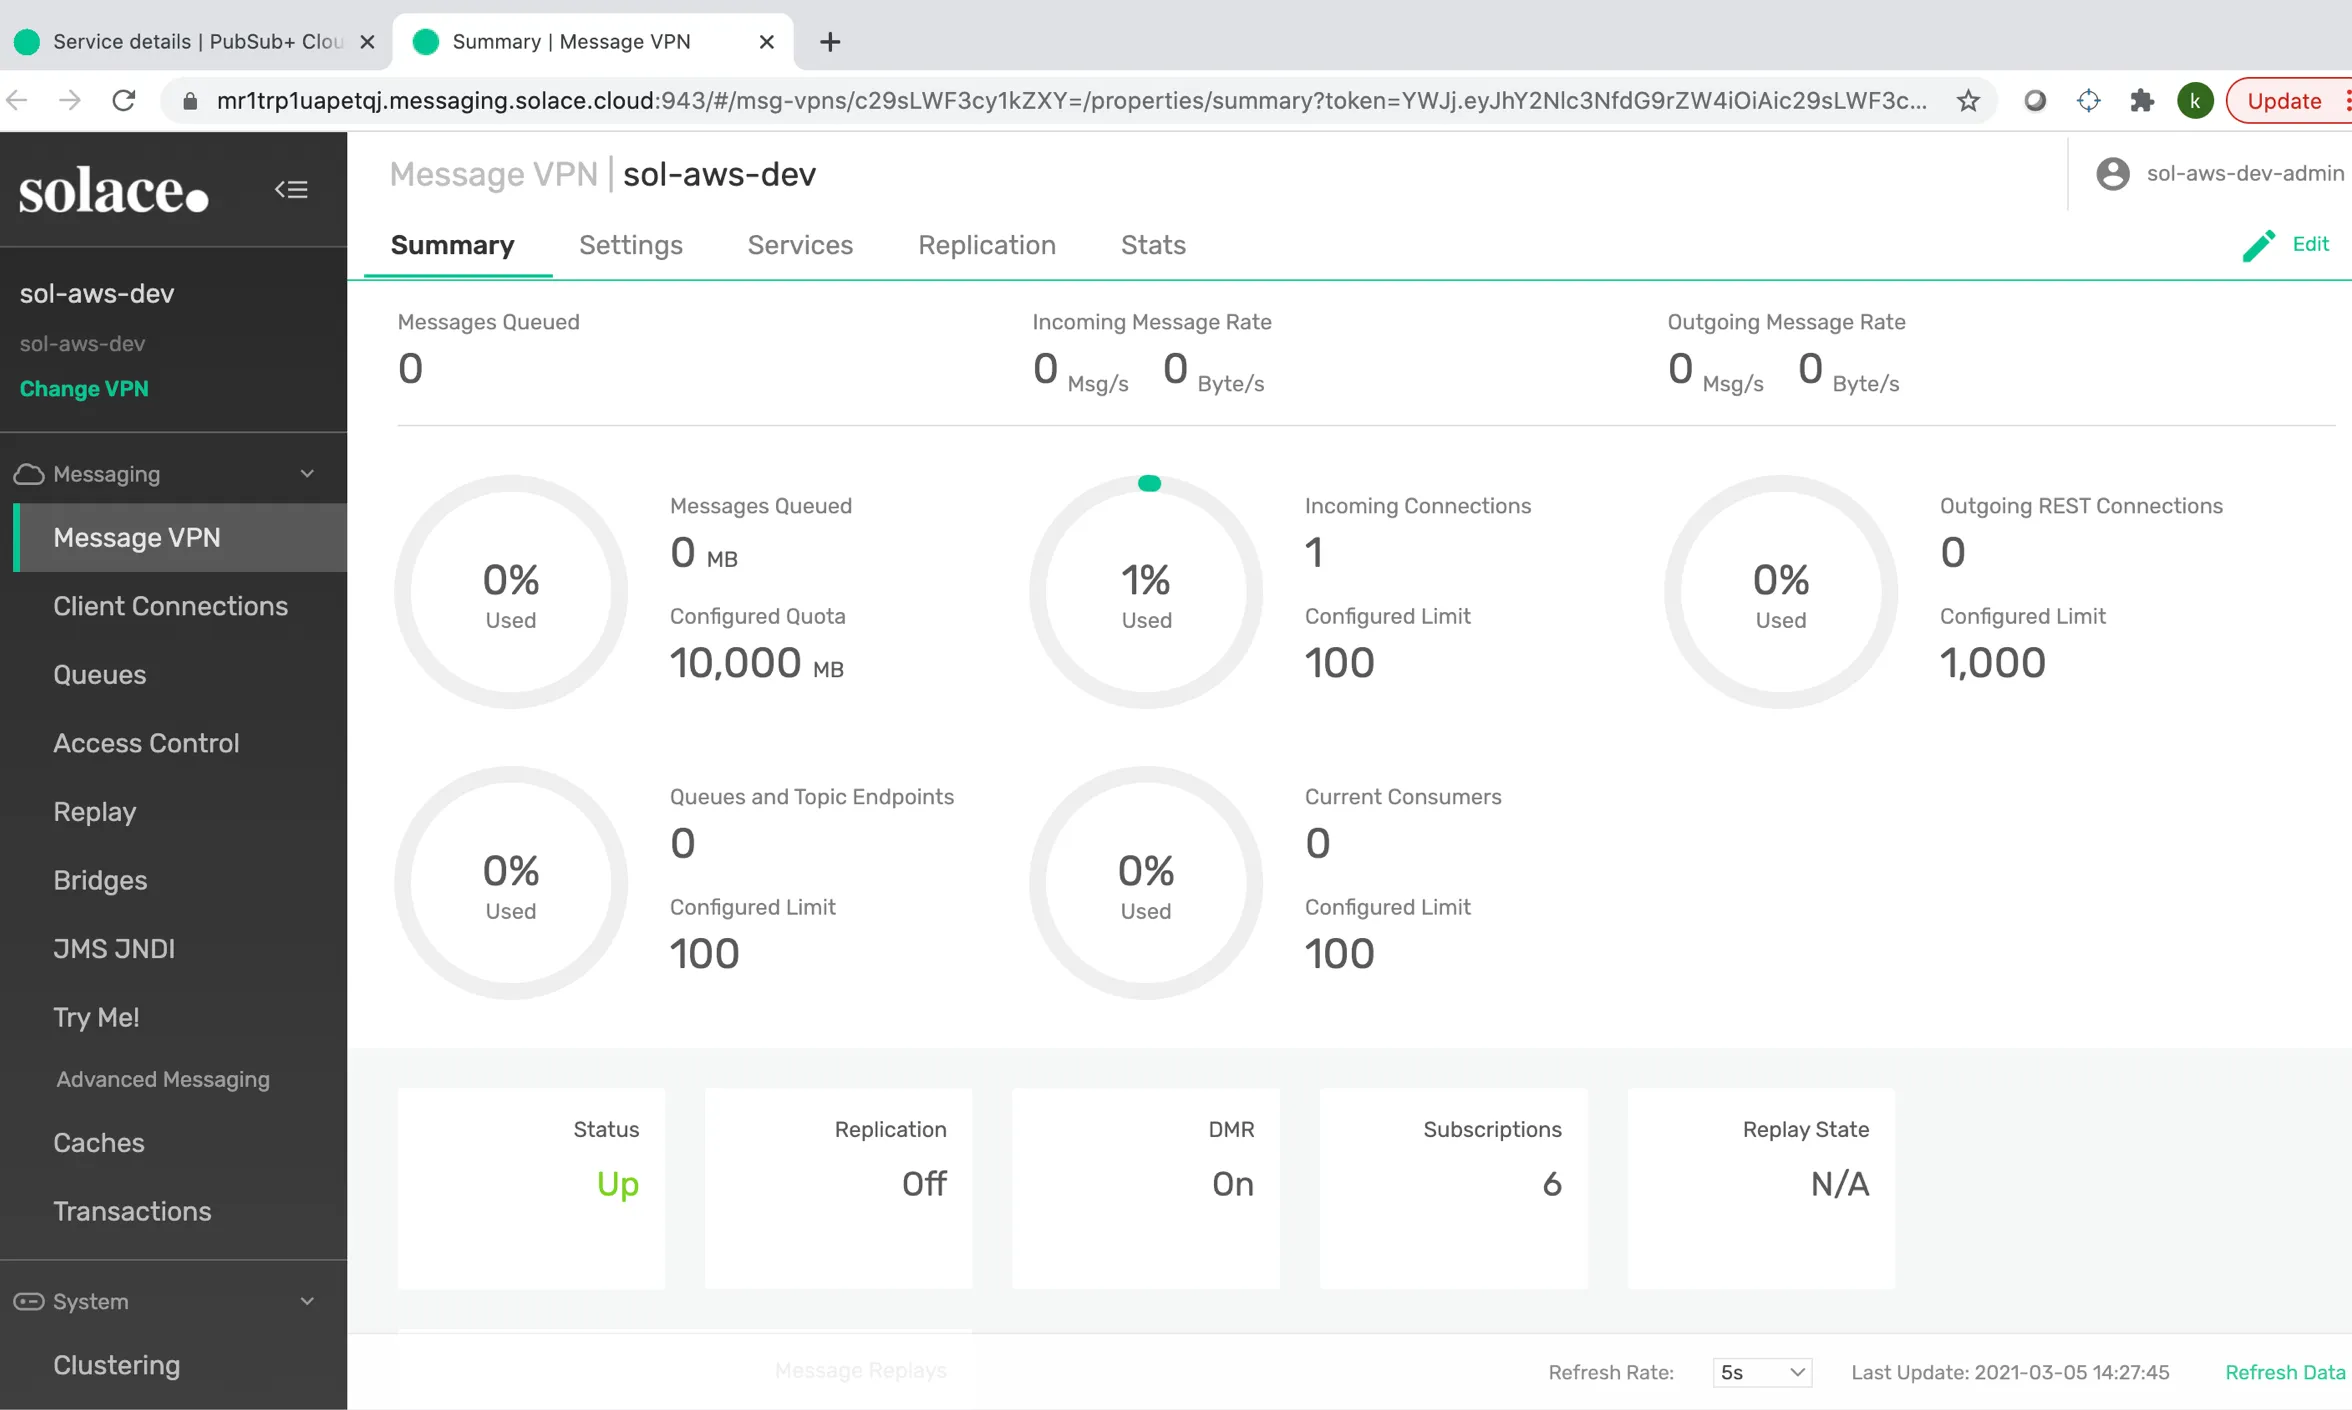
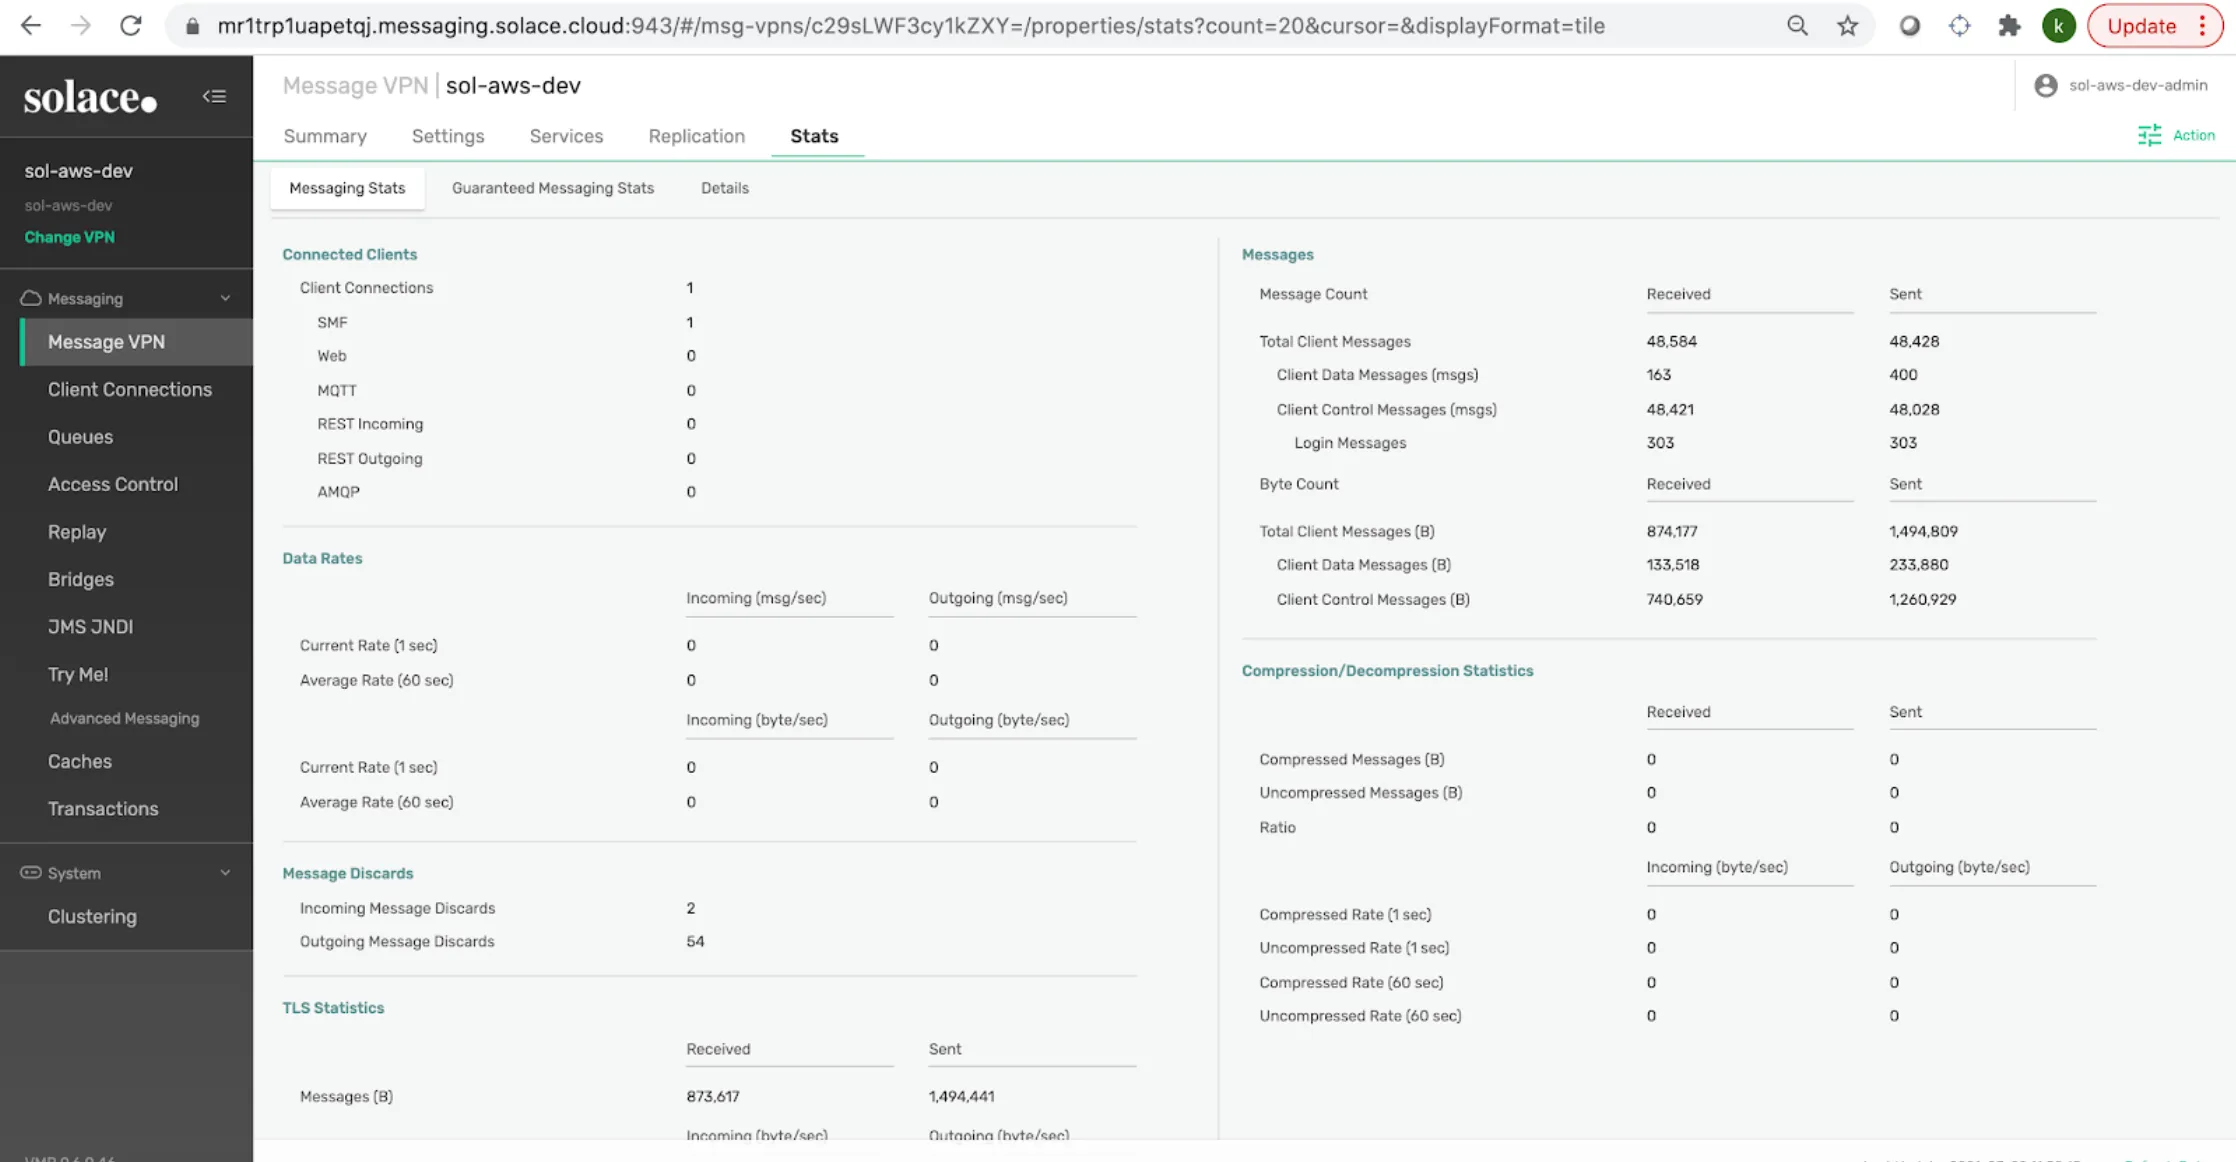
In the “Stats” you will be able to see the number of messages published in your message VPN, the number of messages received, etc.
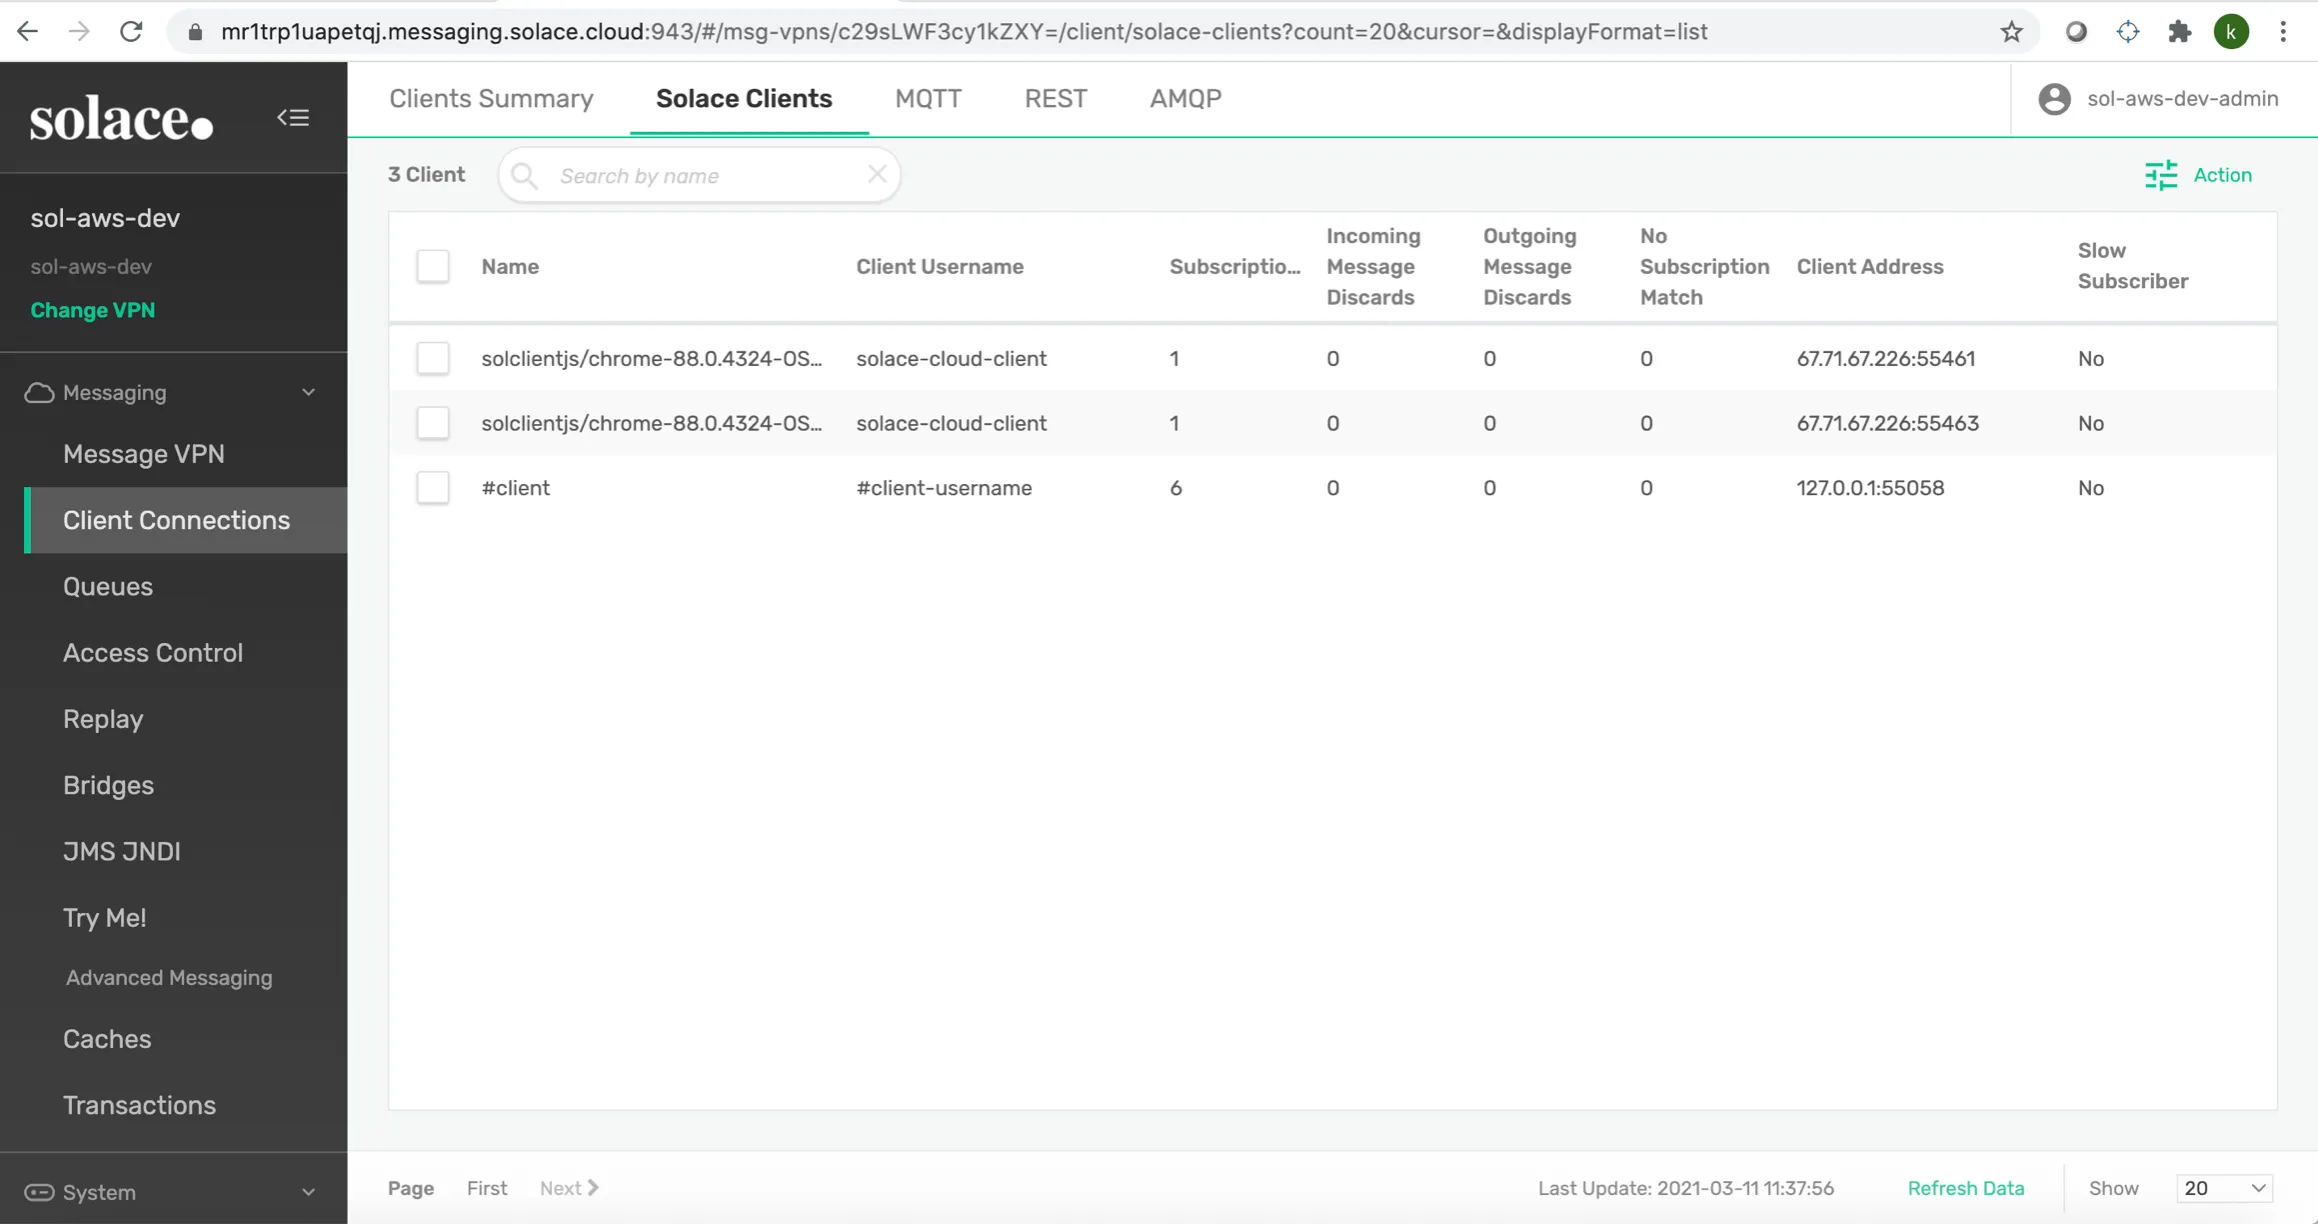
Client Connections
There is no need to explicitly set the client connections since all these settings are pre-filled.
Access Control - Client Authentication
This tab contains details about what authentication method you wish to use. By default “Basic Authentication” is enabled. If you want to use the “Client Certificate Authentication,” you could enable that. In my case I am using “Basic Authentication.” You could also see the settings of “Client Profiles,” “ACL Profiles” and “Client Usernames” as shown in the following screenshots.

Access Control - Client Usernames

5. Configuring Queues
Guaranteed messages in Solace PubSub+ are stored in event broker endpoints. There are two types of endpoints: queues and topic endpoints. Topic endpoints are used by JMS (that is, durable topic subscriptions).
To understand the basics of Messaging, exchange Patterns, Queues and Topics, please refer to this site: https://docs.solace.com/PubSub-Basics/Message-What-Is.htm.
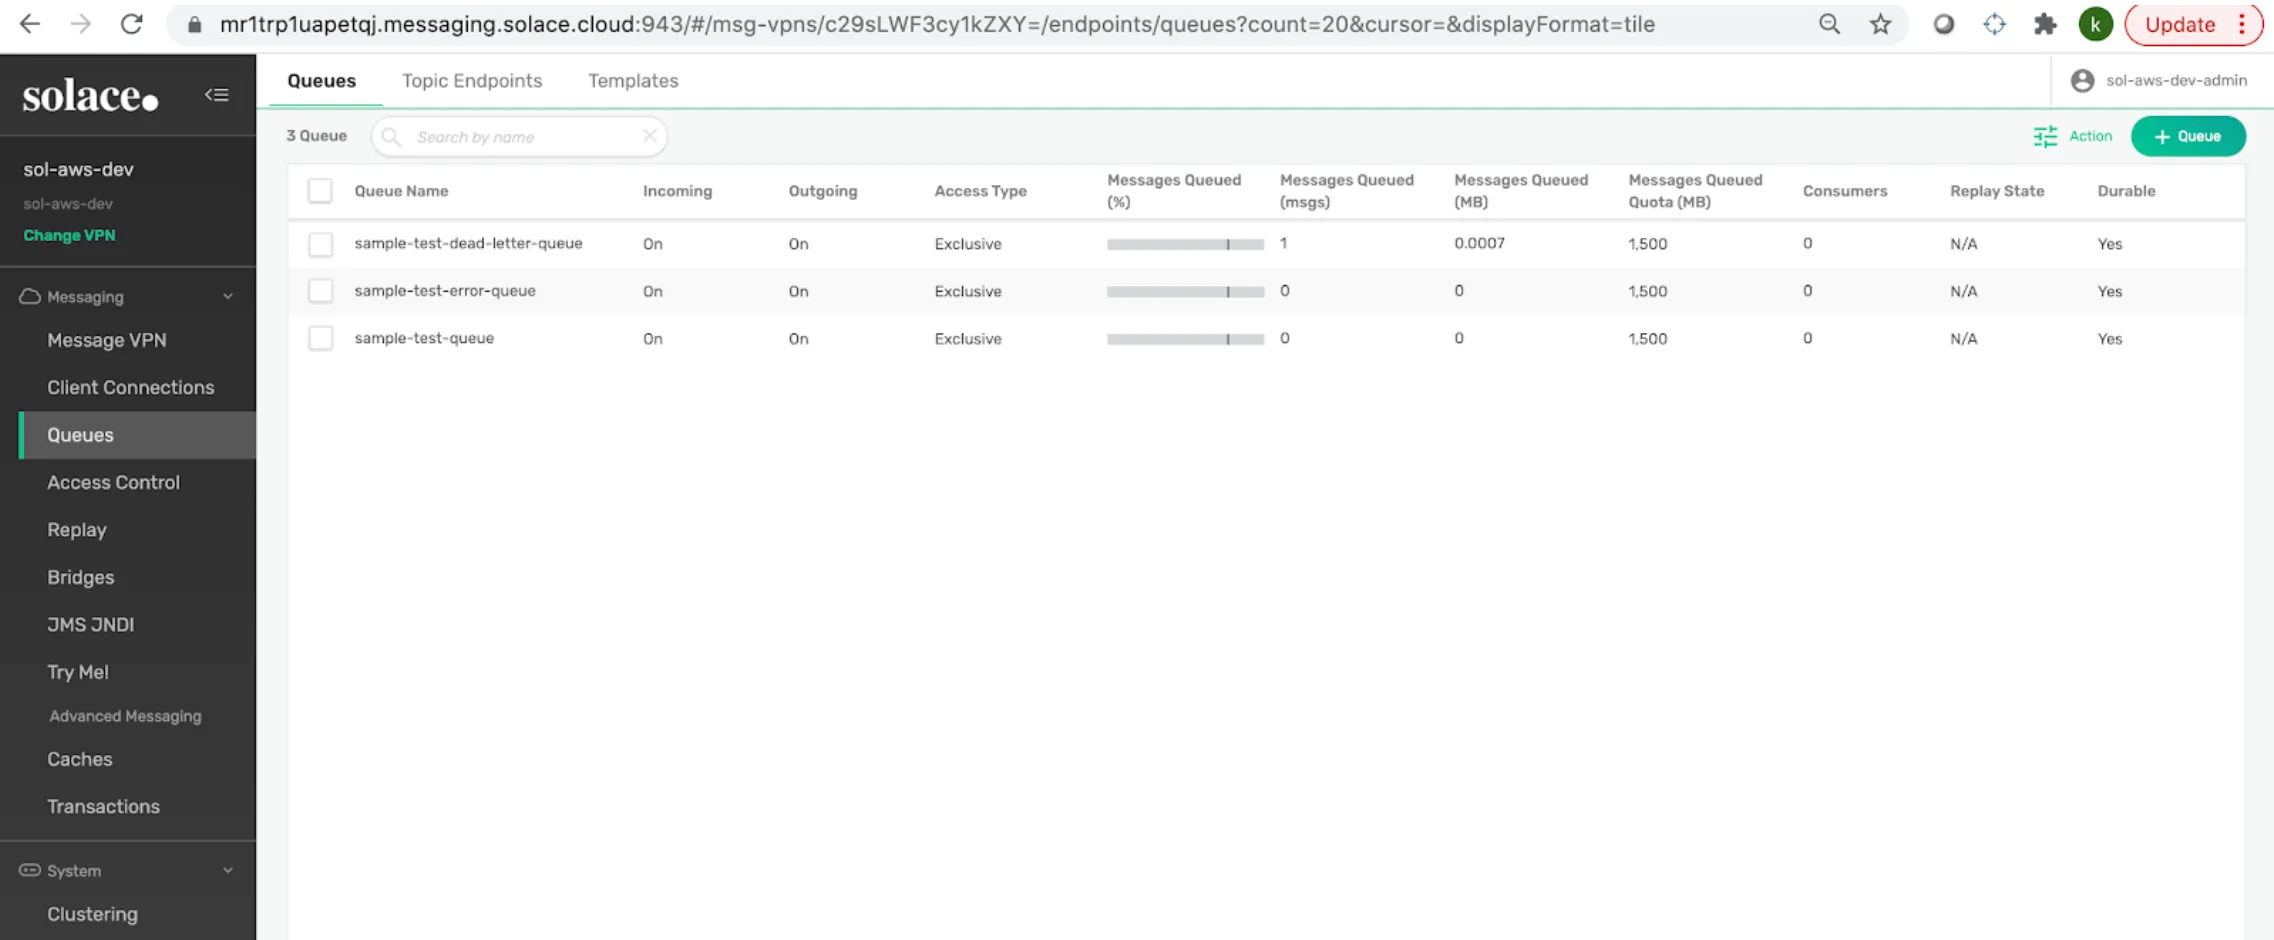
I have created the following 3 Queues by clicking on the “+ Queue” button as shown in the screenshot.
Differences between Queues and Topics
Queues:
- Allow one-to-one communication (Point-to-Point).
- Typically used when you want to send a single event to exactly one consumer.
Topics:
- Allow one-to-many communication (Publish-Subscribe).
- Typically used when you want to send a single event to multiple consumers.
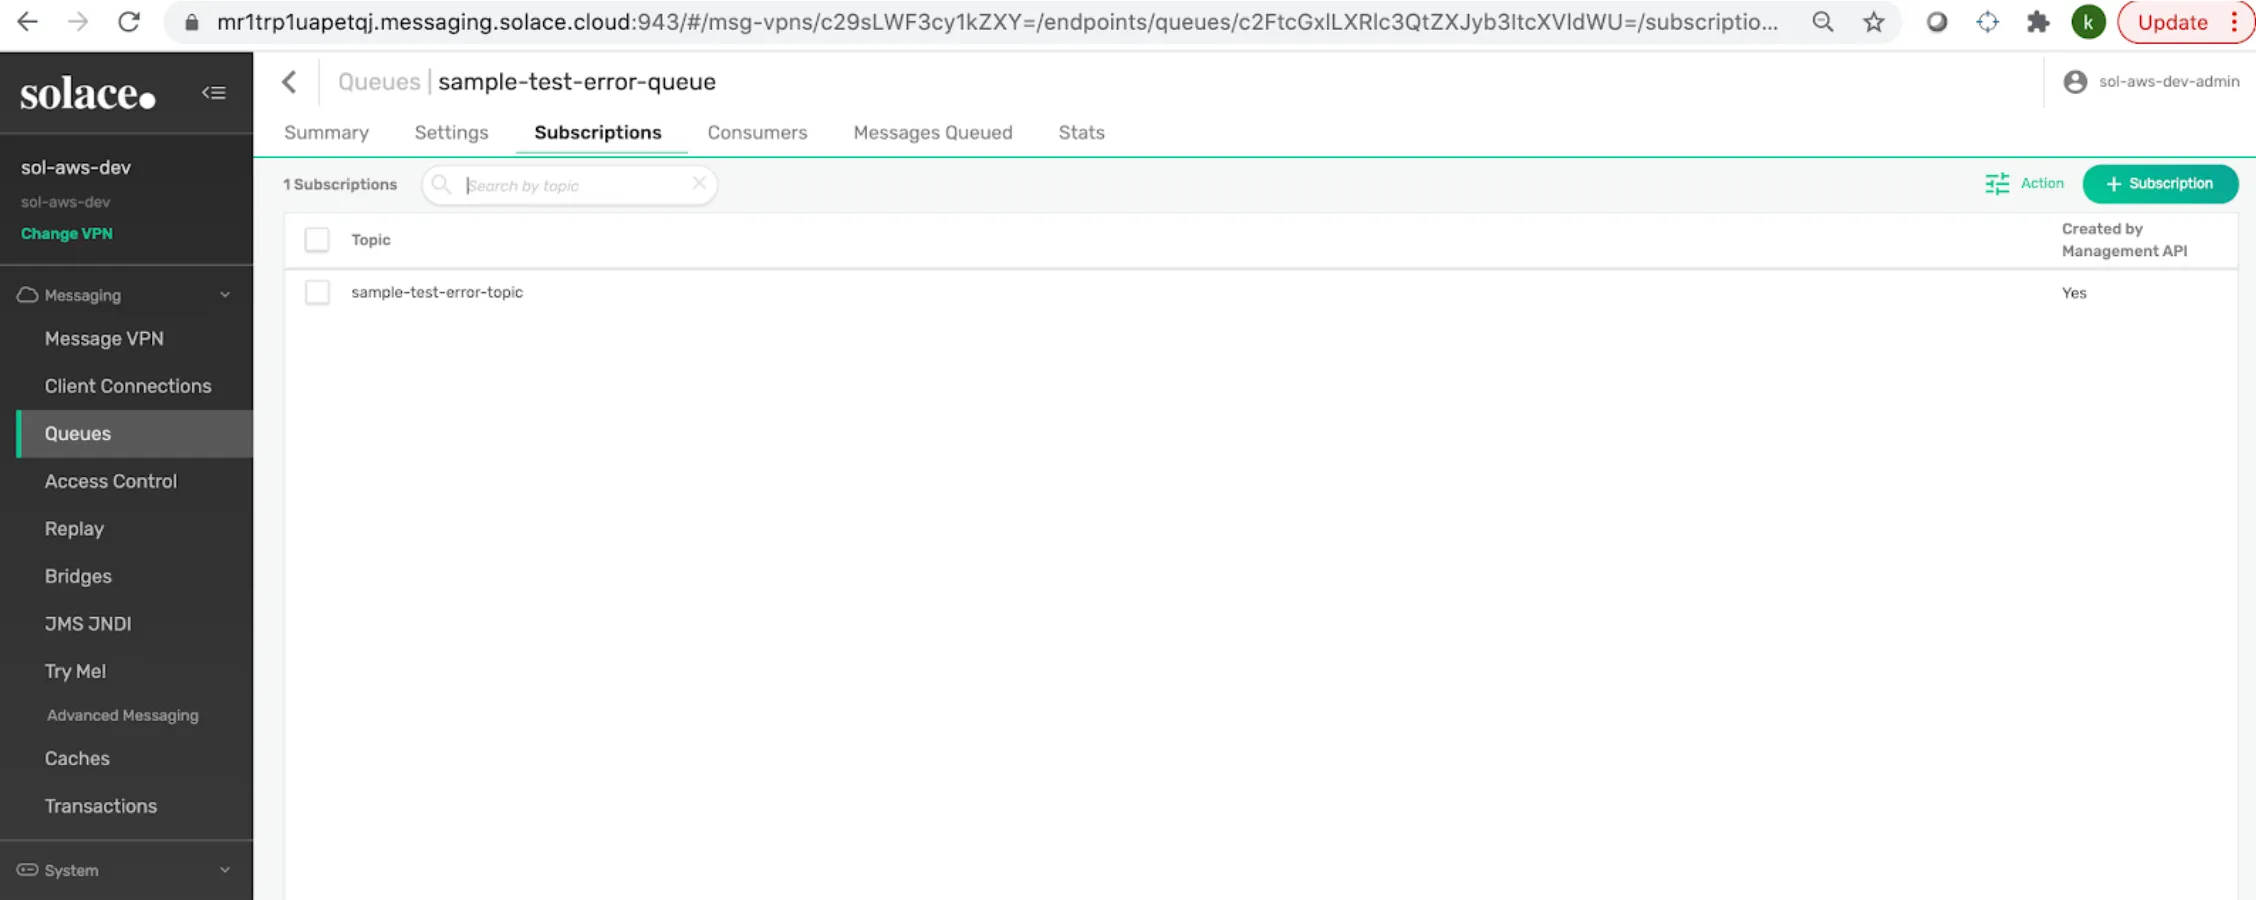
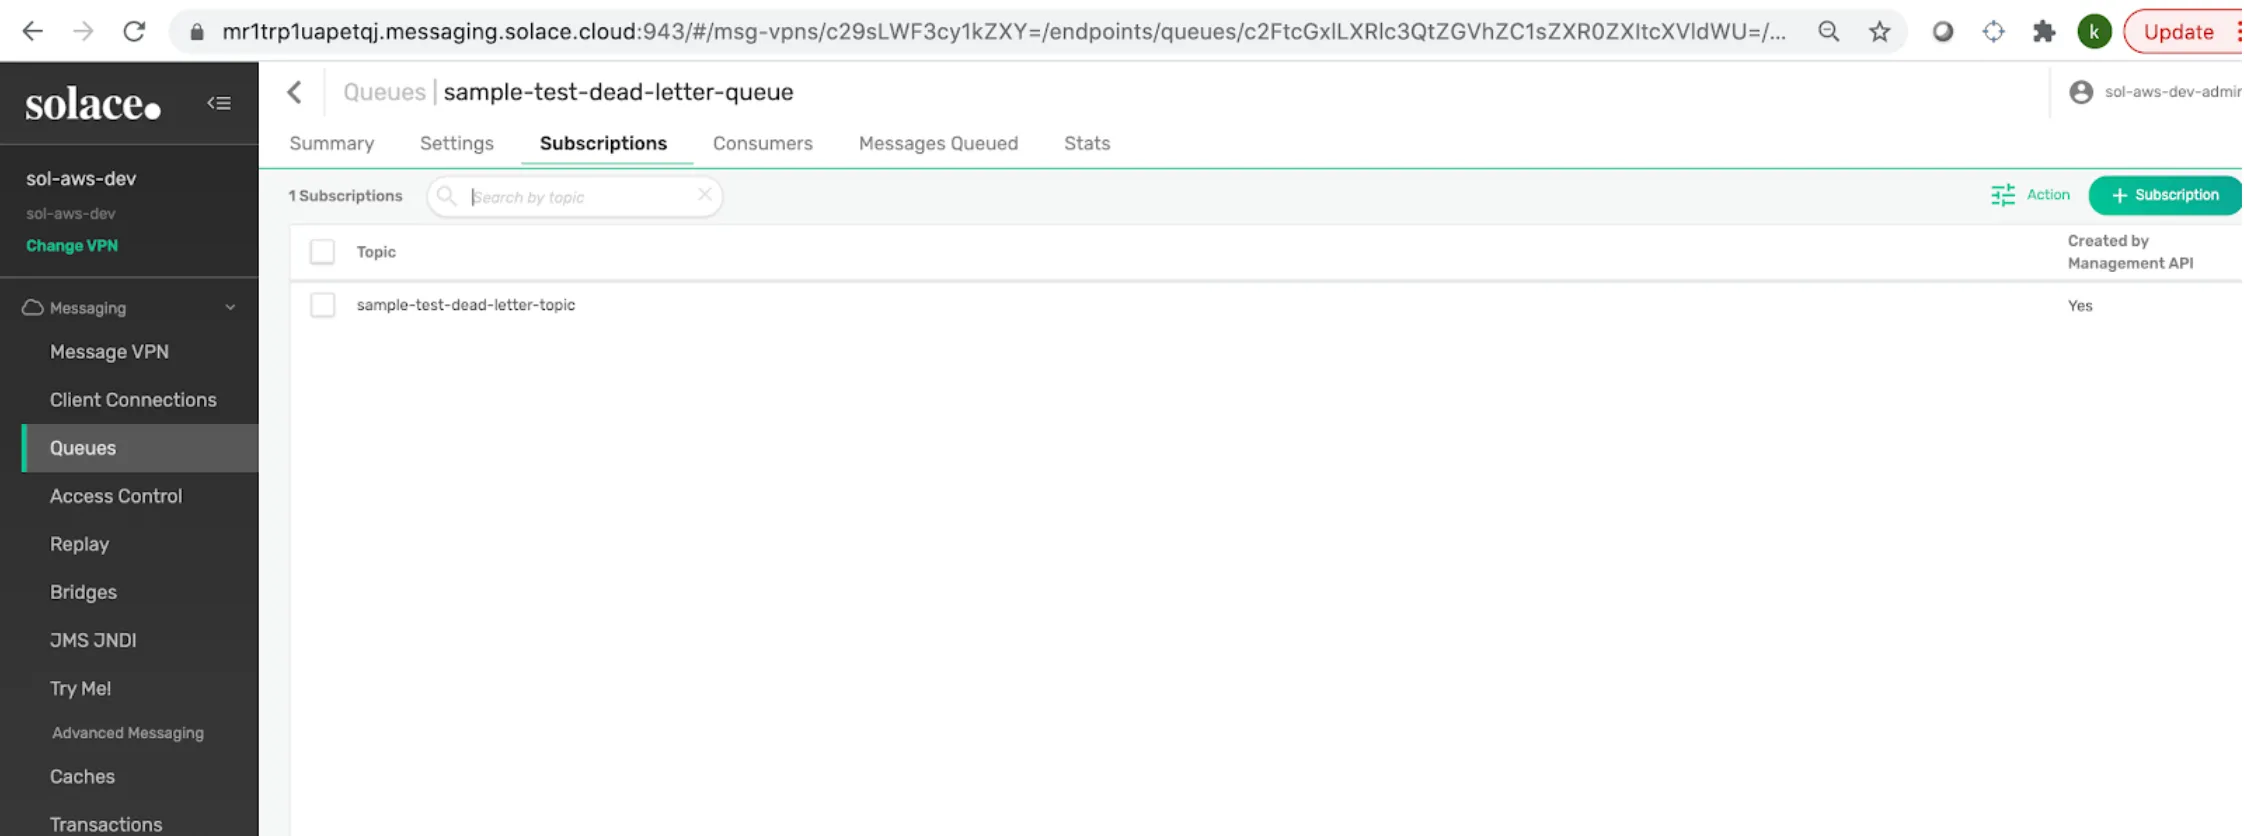
I have created a Topic Subscription for each Queue as shown in the following screenshots.
To understand why we need to map a Topic to a Queue please refer to https://docs.solace.com/PubSub-Basics/Core-Concepts-Endpoints-Queues.htm.

6. Configuring the MuleSoft Project
In the MuleSoft Project, the following dependencies must be added in the pom.xml file. There are three ways to do this. You can add the modules directly into the pom, you can add them through Exchange from the Mule Palette, or you can right click on the project > Manage Dependencies > Manage (or Add) Modules.
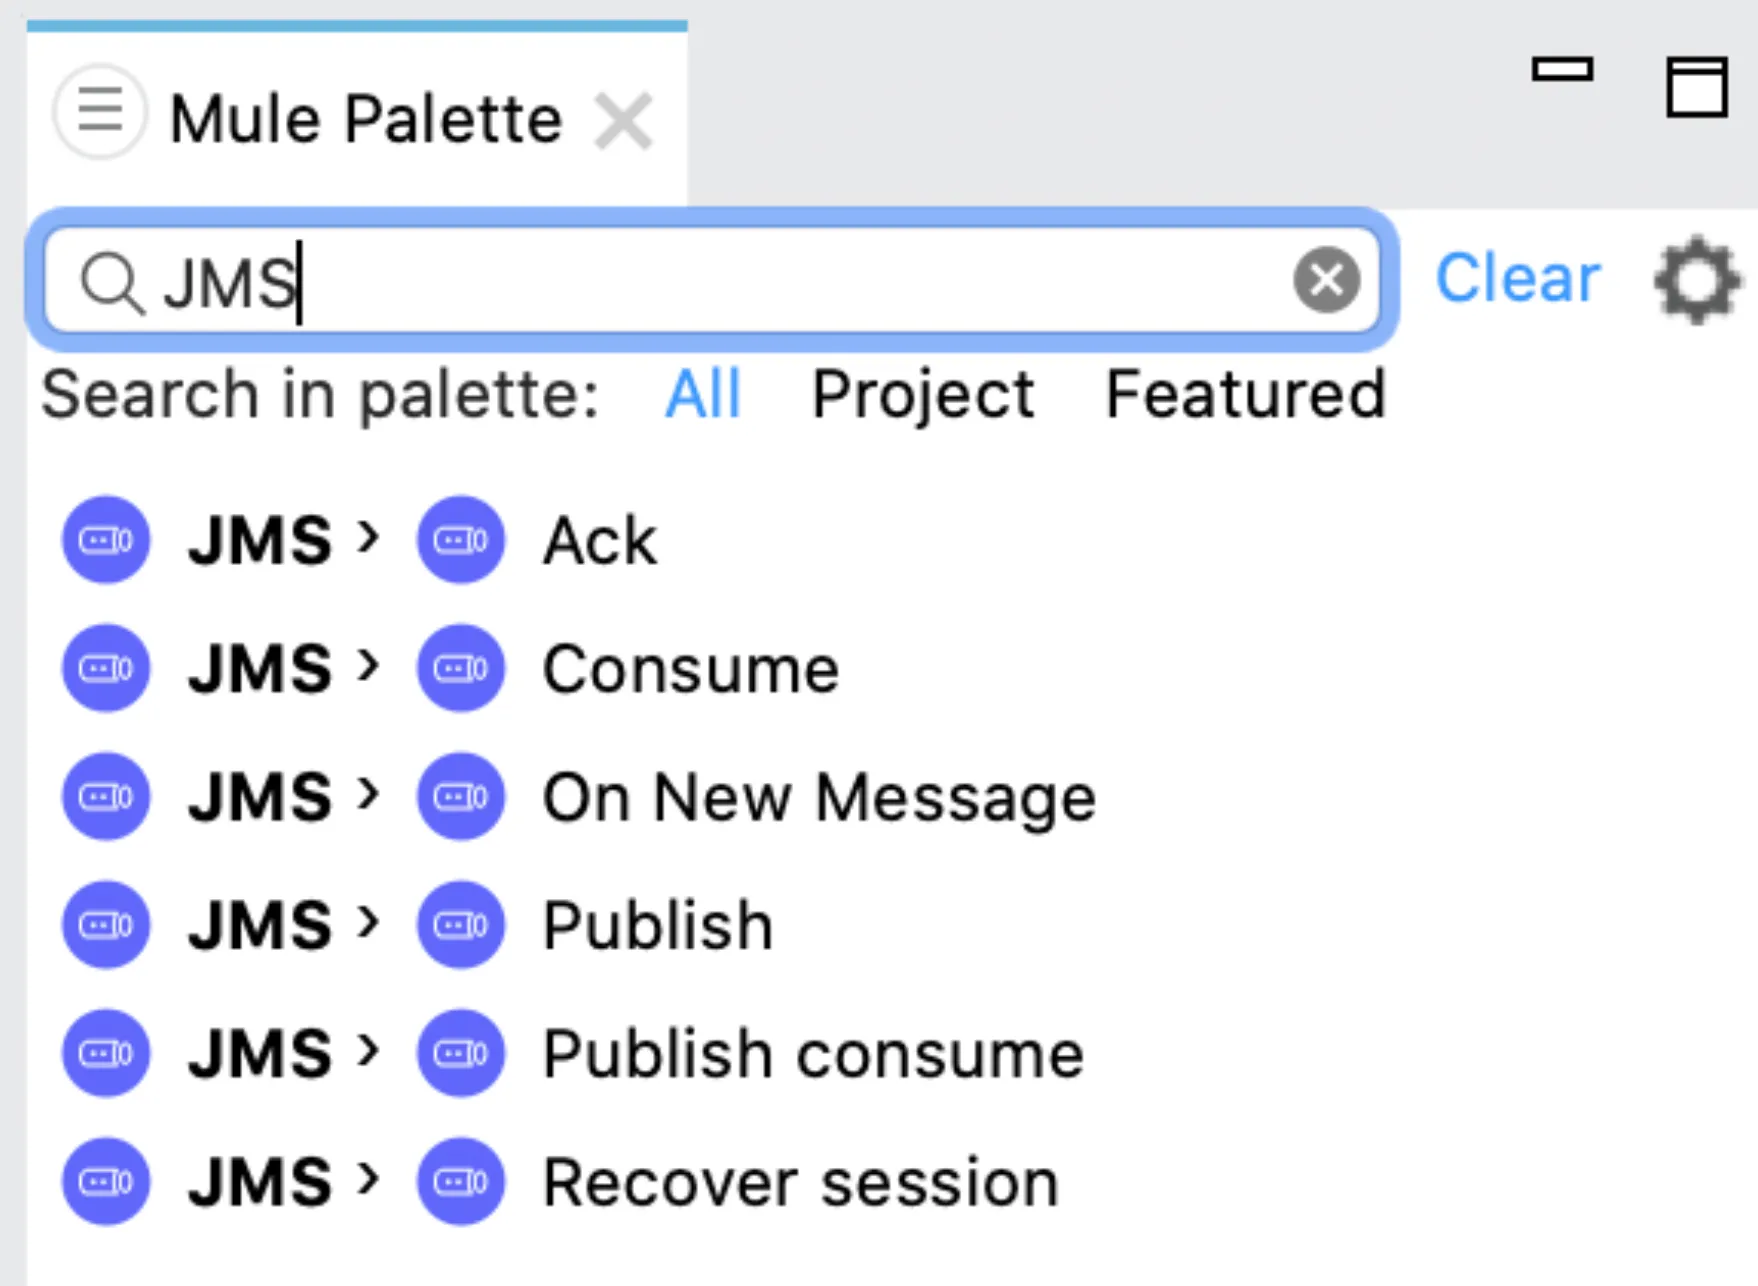
We need to add the Solace and JMS modules to develop our Mule Application.
After adding these modules, the JMS connectors will be available in the Mule Palette:
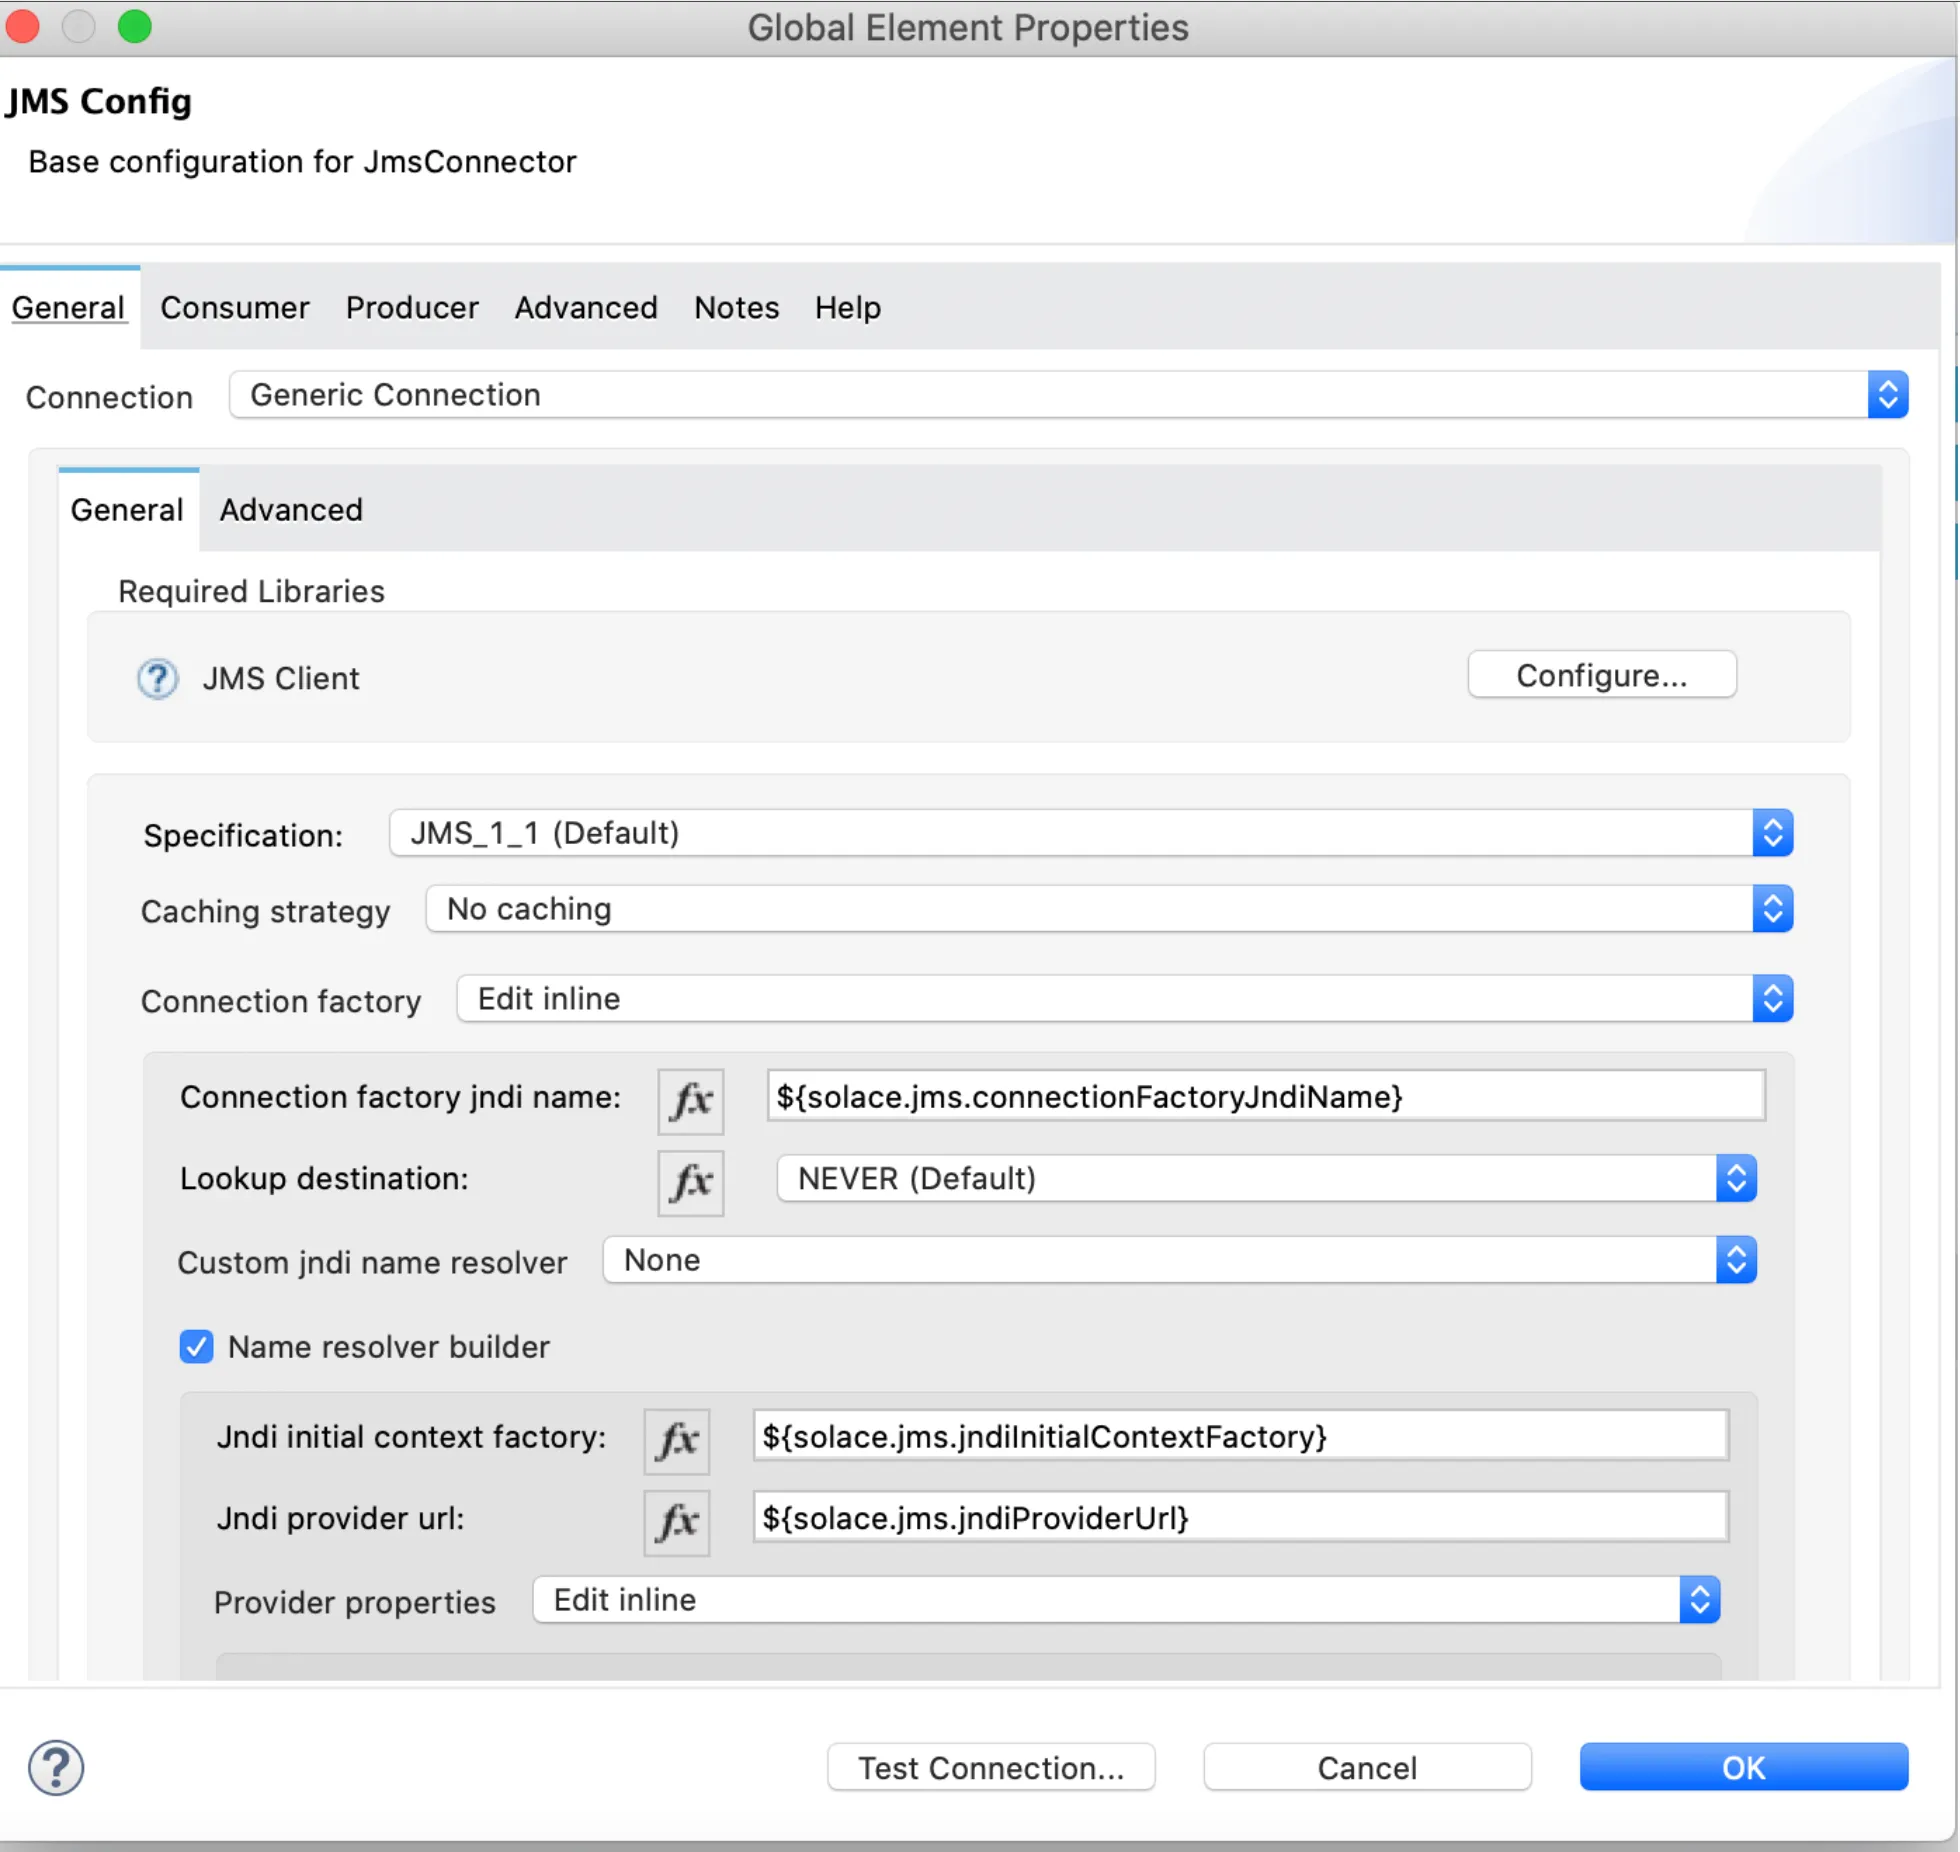
Once you have these, create a Global Element for the JMS Configuration with your desired settings and the connection information from Solace (as mentioned in the “Configuring the Solace KeyStore in MuleSoft” section). For more information on the JNDI Connection properties refer to https://docs.solace.com/Solace-JMS-API/JNDI-Connection-Properti.htm#mc-main-content
Here’s an example:
Note
The GitHub repository with all this code can be found at the end of the post. You can double-check the settings and properties there if you have some doubts.

7. Publishing Message to Solace Topic
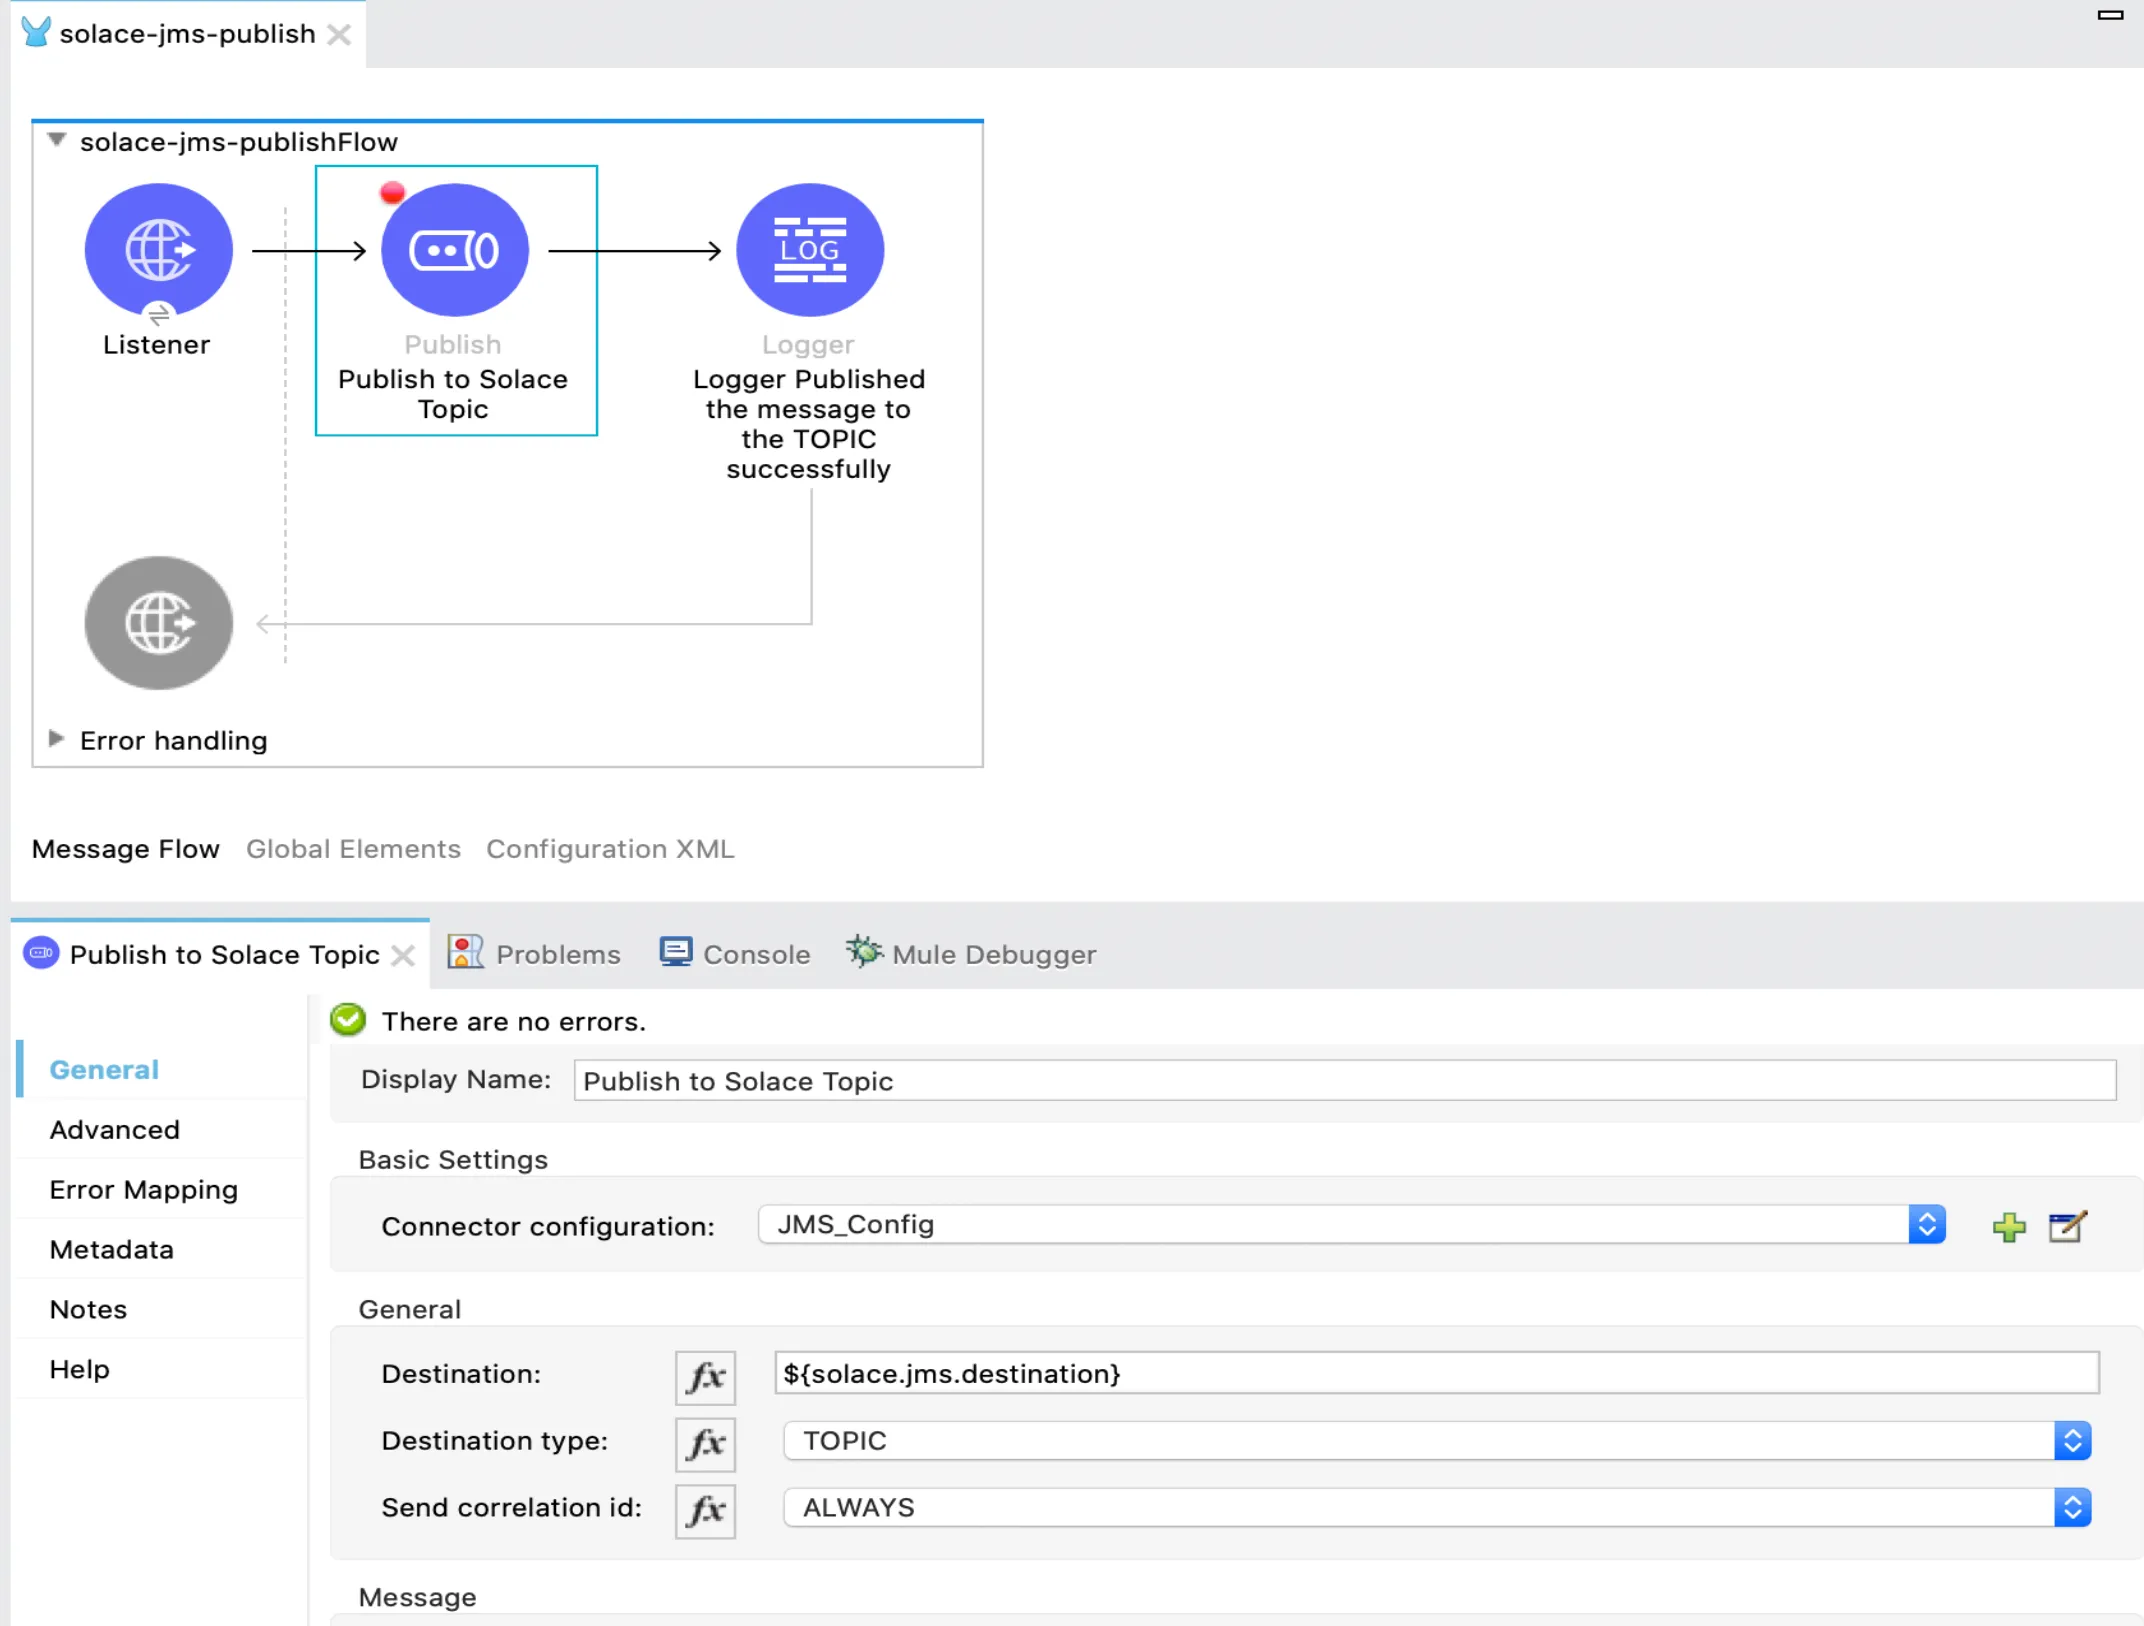
In my case, I added an HTTP Listener in my Mule flow to be able to listen to a request with the content that I want to publish into the Solace Topic. Here you can see how I have configured the JMS Publish connector:
8. Testing the “Happy Path”
Start the Mule App in your local to make sure that everything was correctly configured.
Once the app is up and running, send a POST request from Postman (you can also use the Advanced REST Client, cURL, or any other tool to send a request to your local app).
The Mule app will read the payload you send here and will publish it into the Solace Topic.
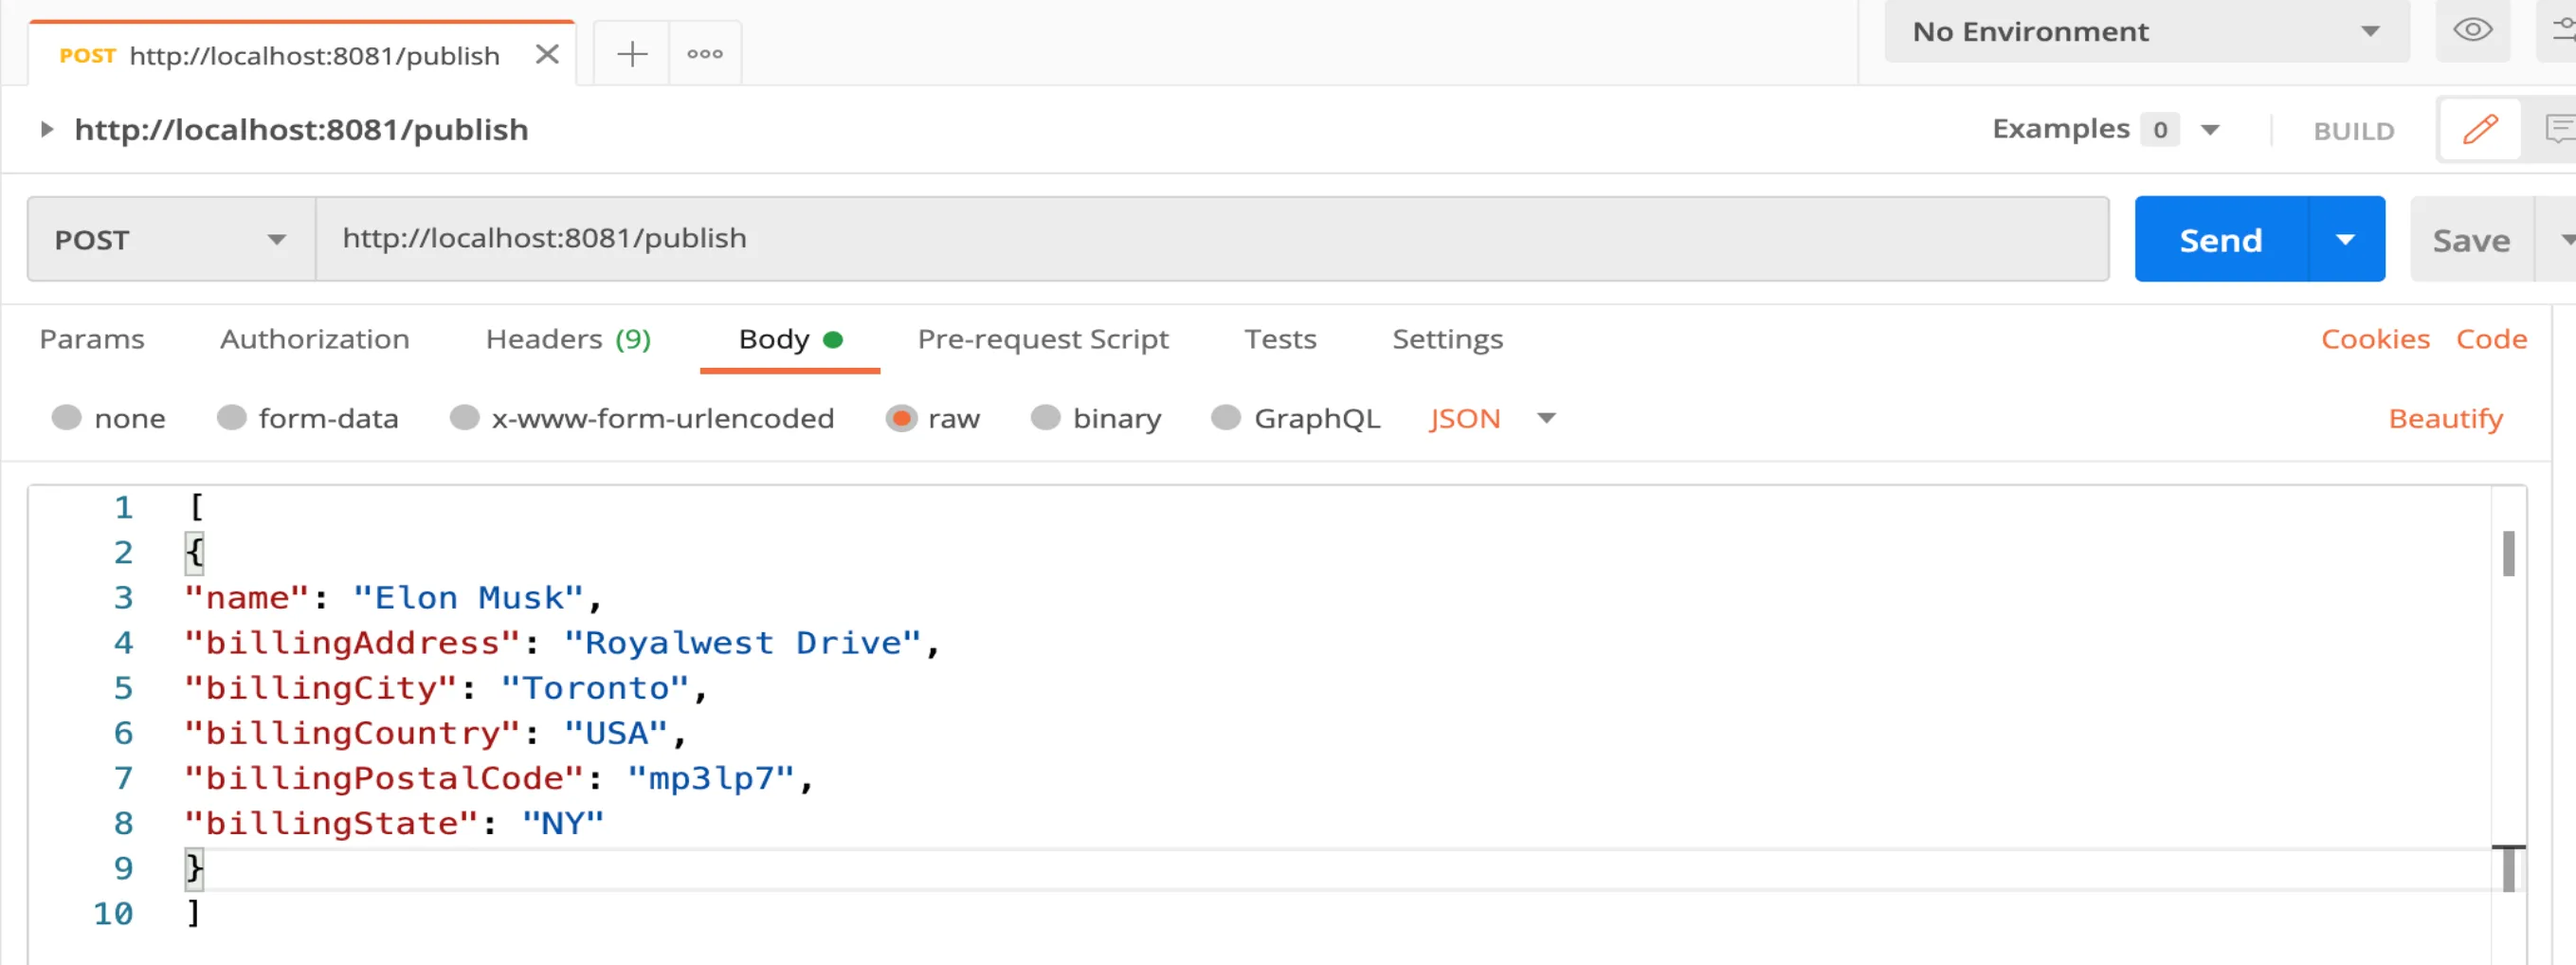
For this demo, I sent a JSON Body like this one:
[
{
"name":"Elon Musk",
"billingAddress":"Royalwest Drive",
"billingCity":"Toronto",
"billingCountry":"USA",
"billingPostalCode":"mp3lp7",
"billingState":"NY"
}
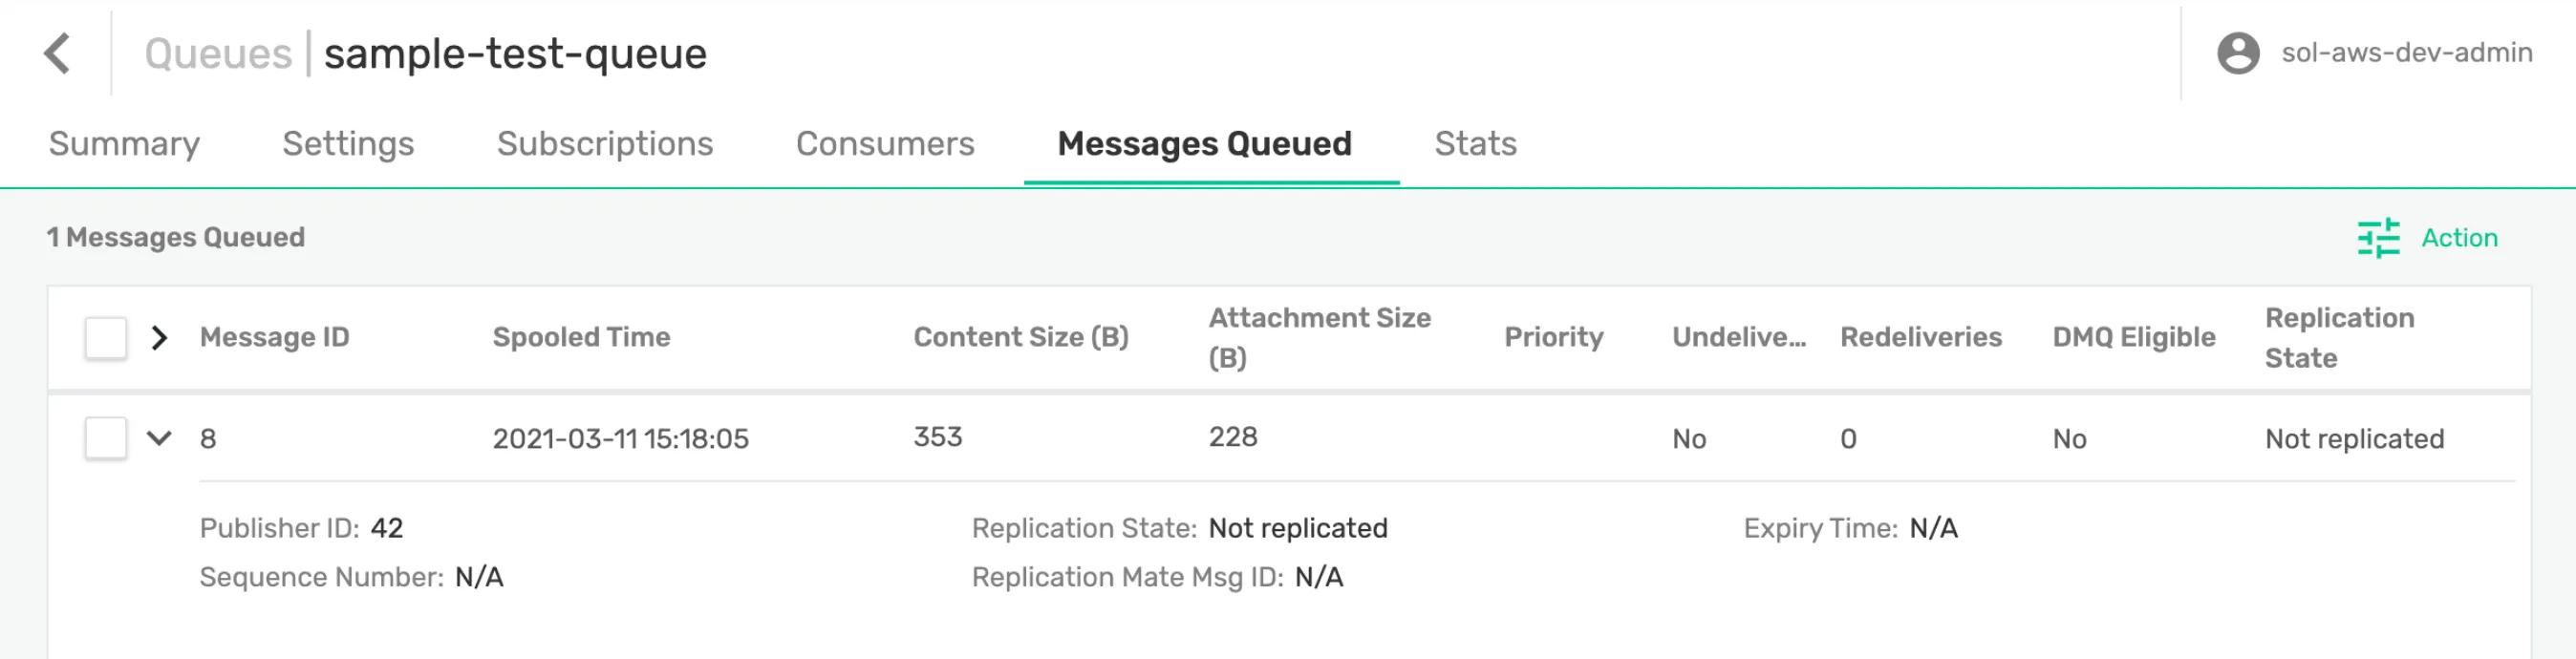
]As you can see in the following screenshot, the message published to the Topic can be seen in the Solace Queue mapped to it.
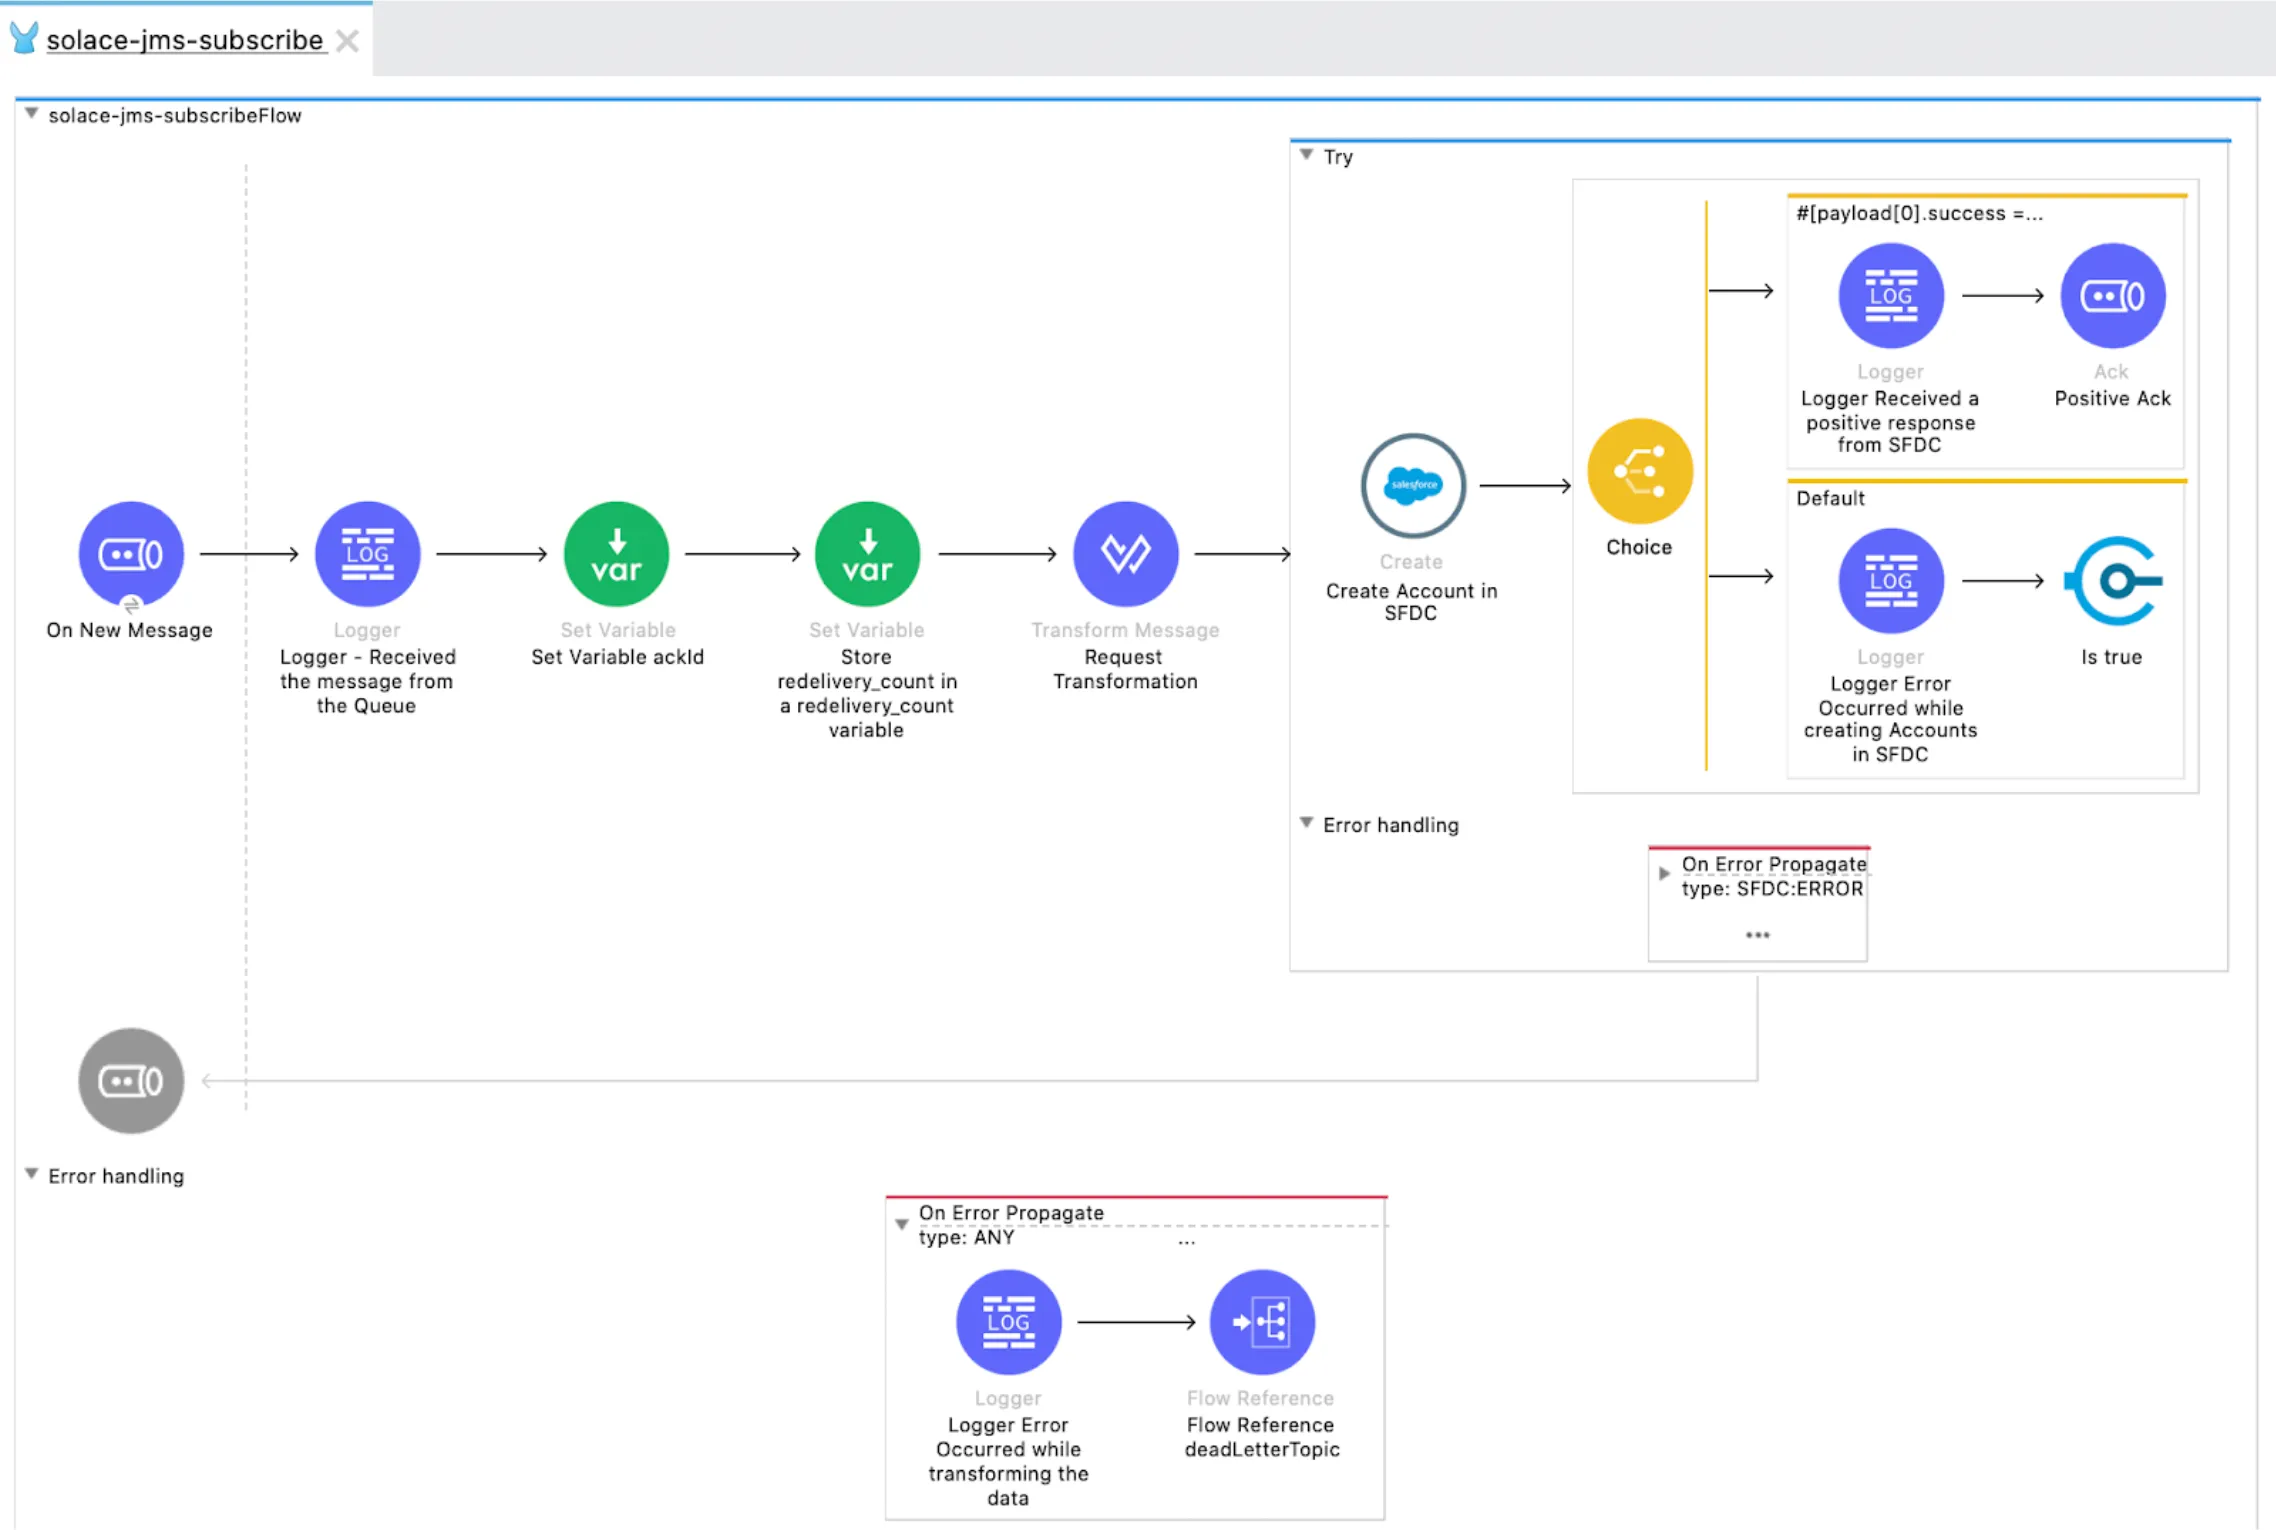
9. Subscribing a Message from the Solace Queue
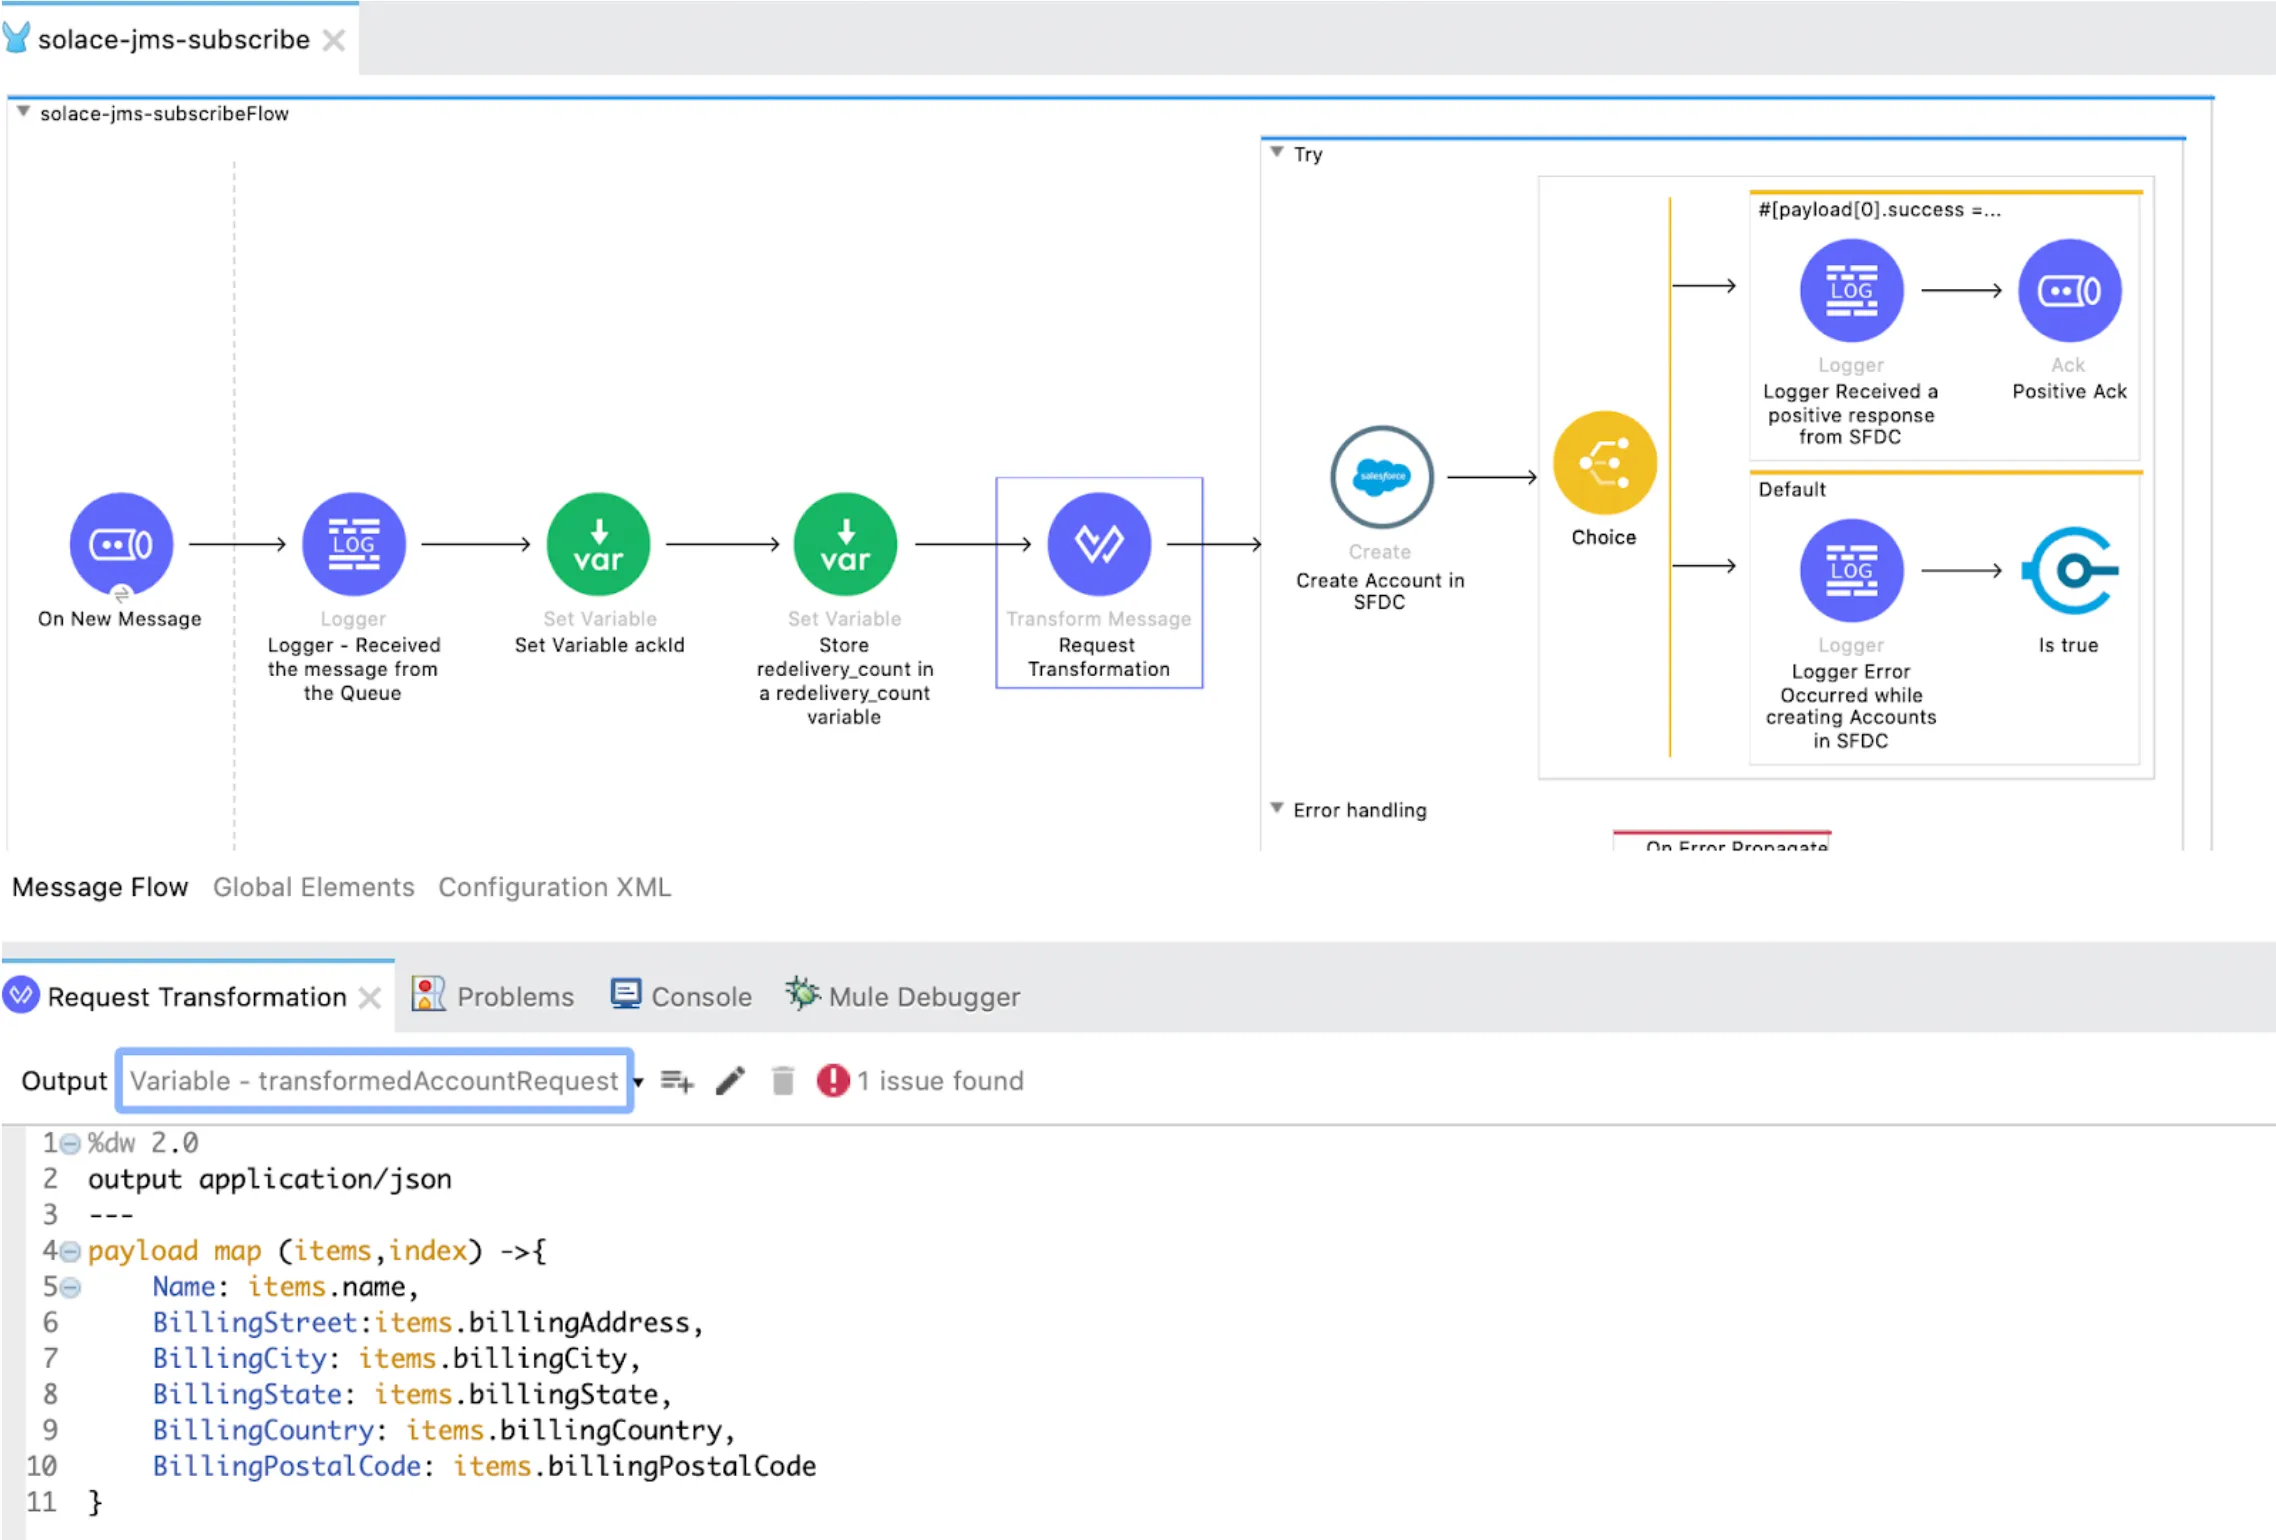
The queued messages must now be processed. In my case, the message that is queued contains information from a Salesforce Account. I have to subscribe to this queue in a flow, transform it, and create an Account object in SFDC. To achieve this, I have created a new flow called “solace-jms-subscribe.”
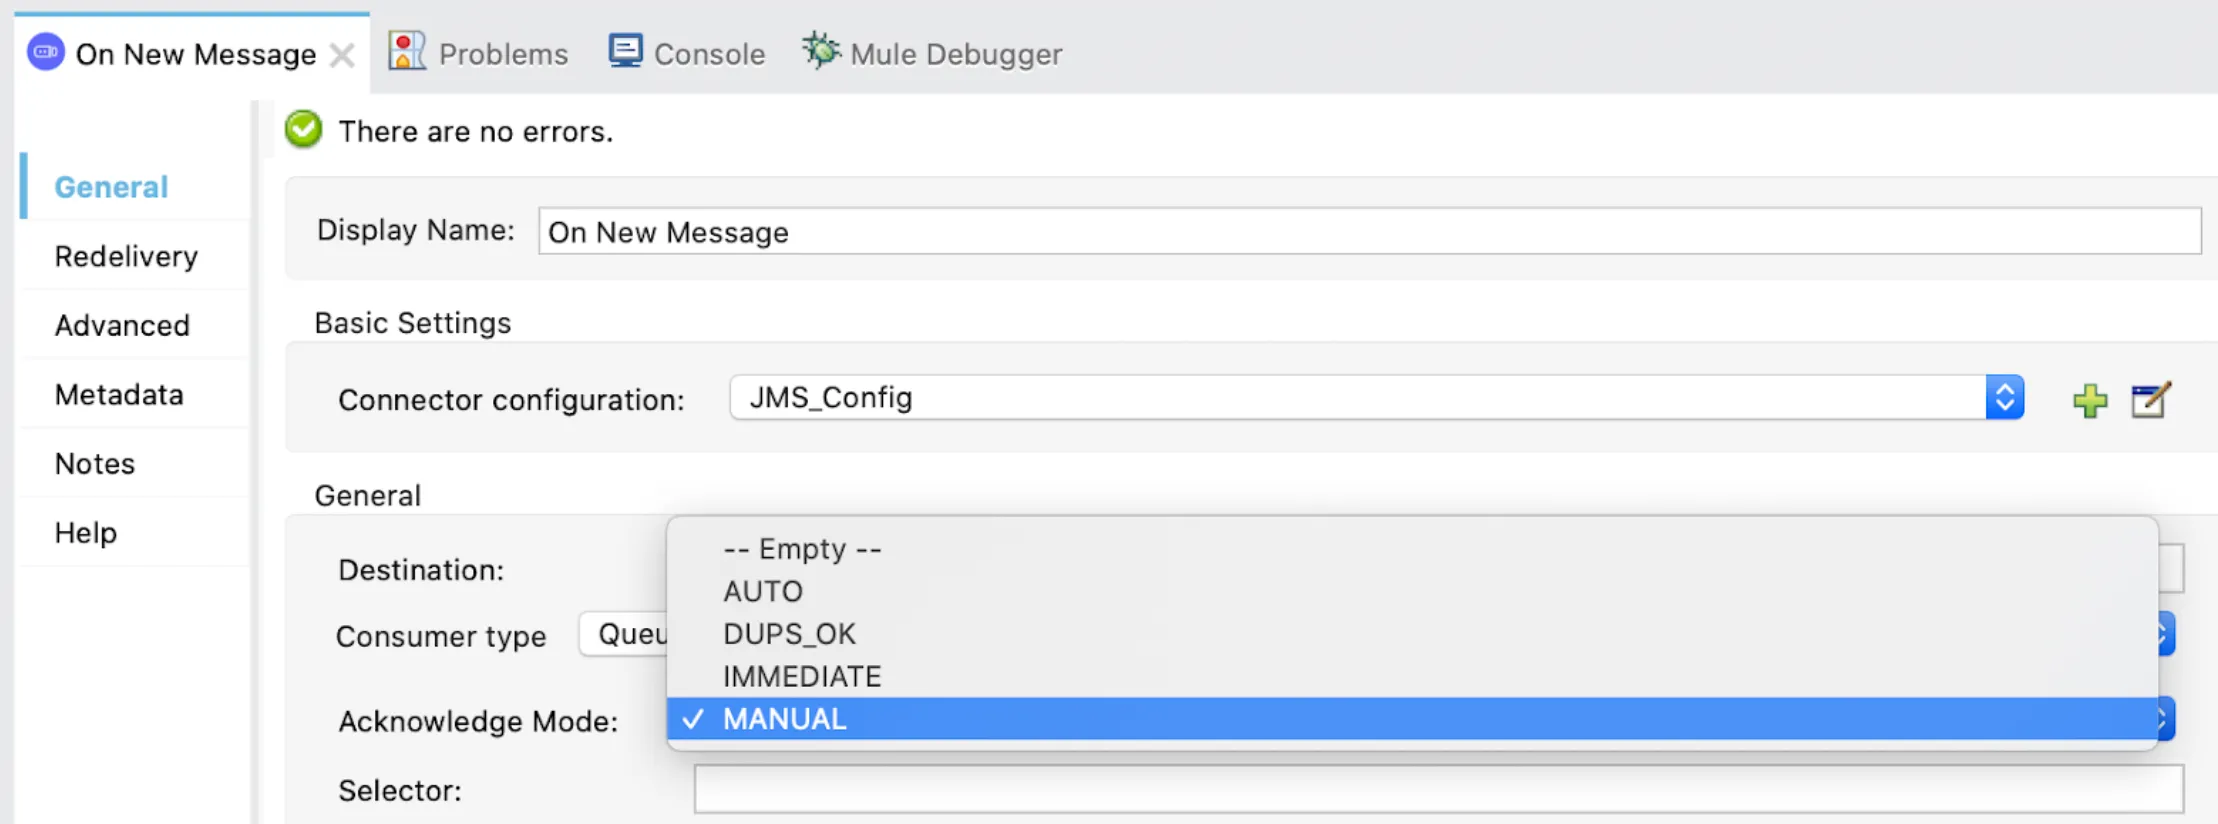
In the “On New Message” component settings, please note that the “Acknowledgement Mode” is set to “Manual” since we want to delete the message in the queue only after further processing it and sending the positive Acknowledgement.
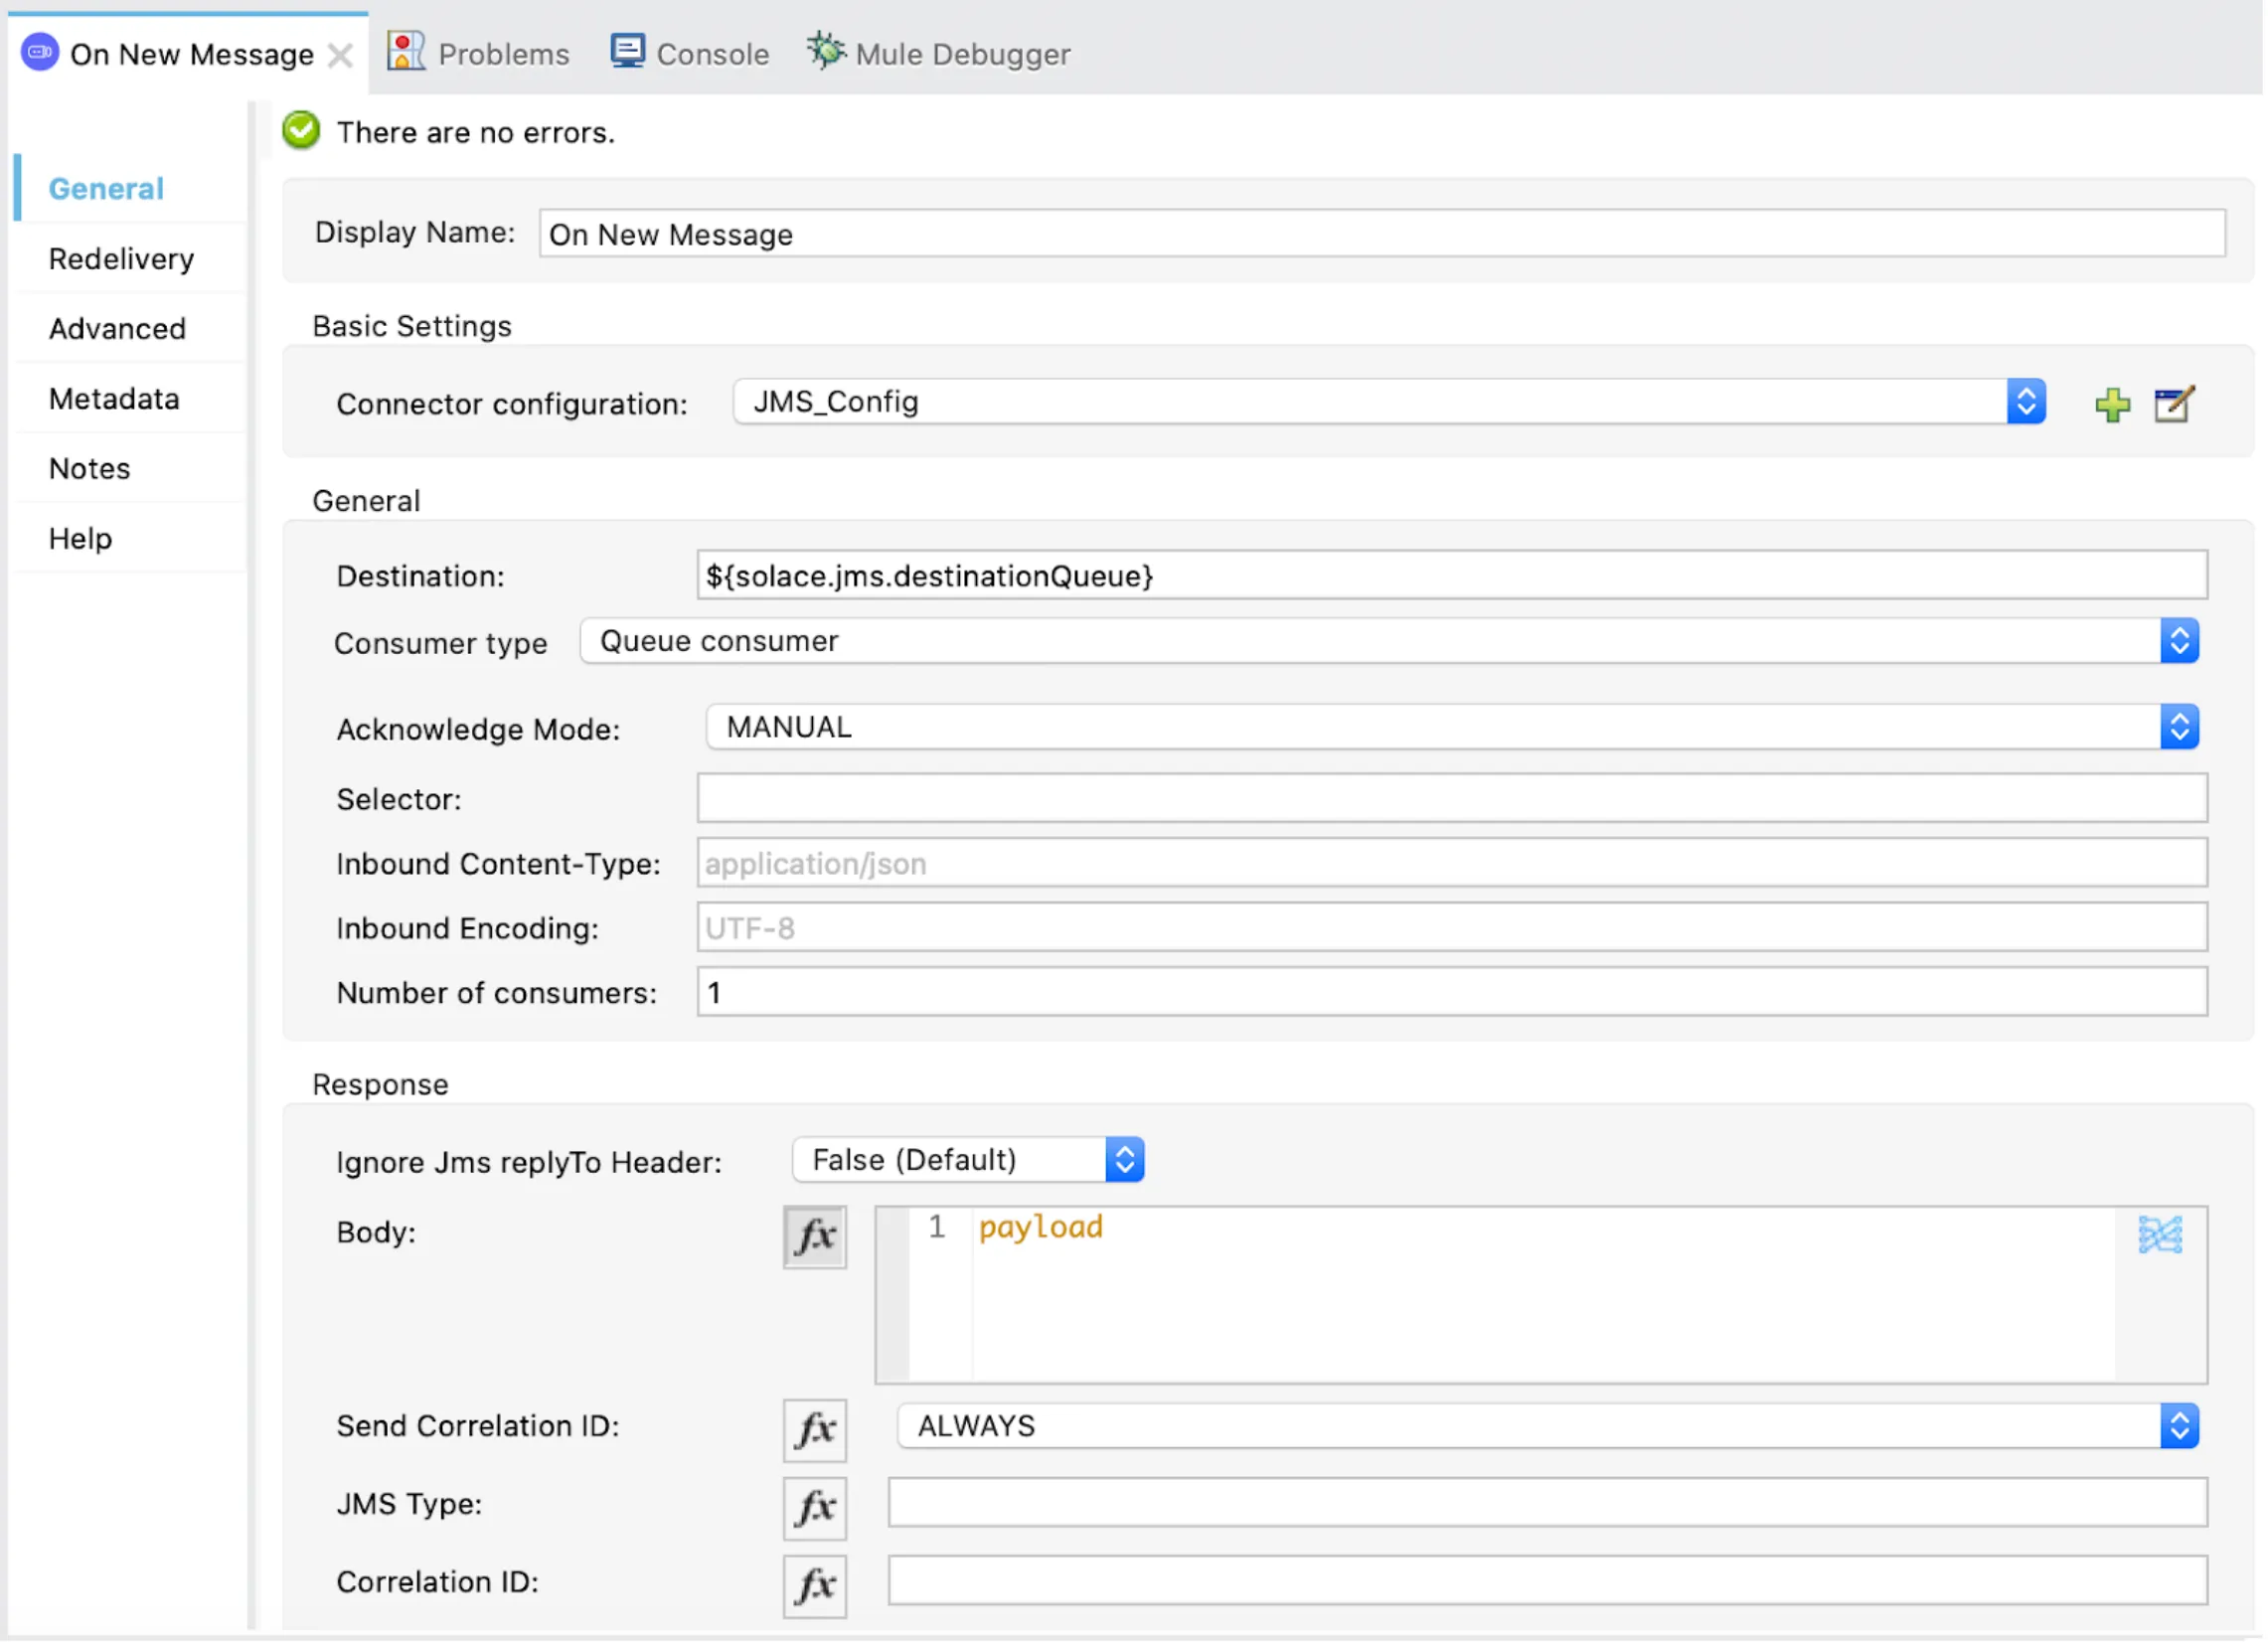
There are different Acknowledgement modes as shown.
More information on all the settings can be found in https://docs.mulesoft.com/jms-connector/1.7/jms-ack.
When the project is deployed in Anypoint Studio, this message is automatically consumed by the “On New Message” JMS Subscriber as shown in the following screenshot:
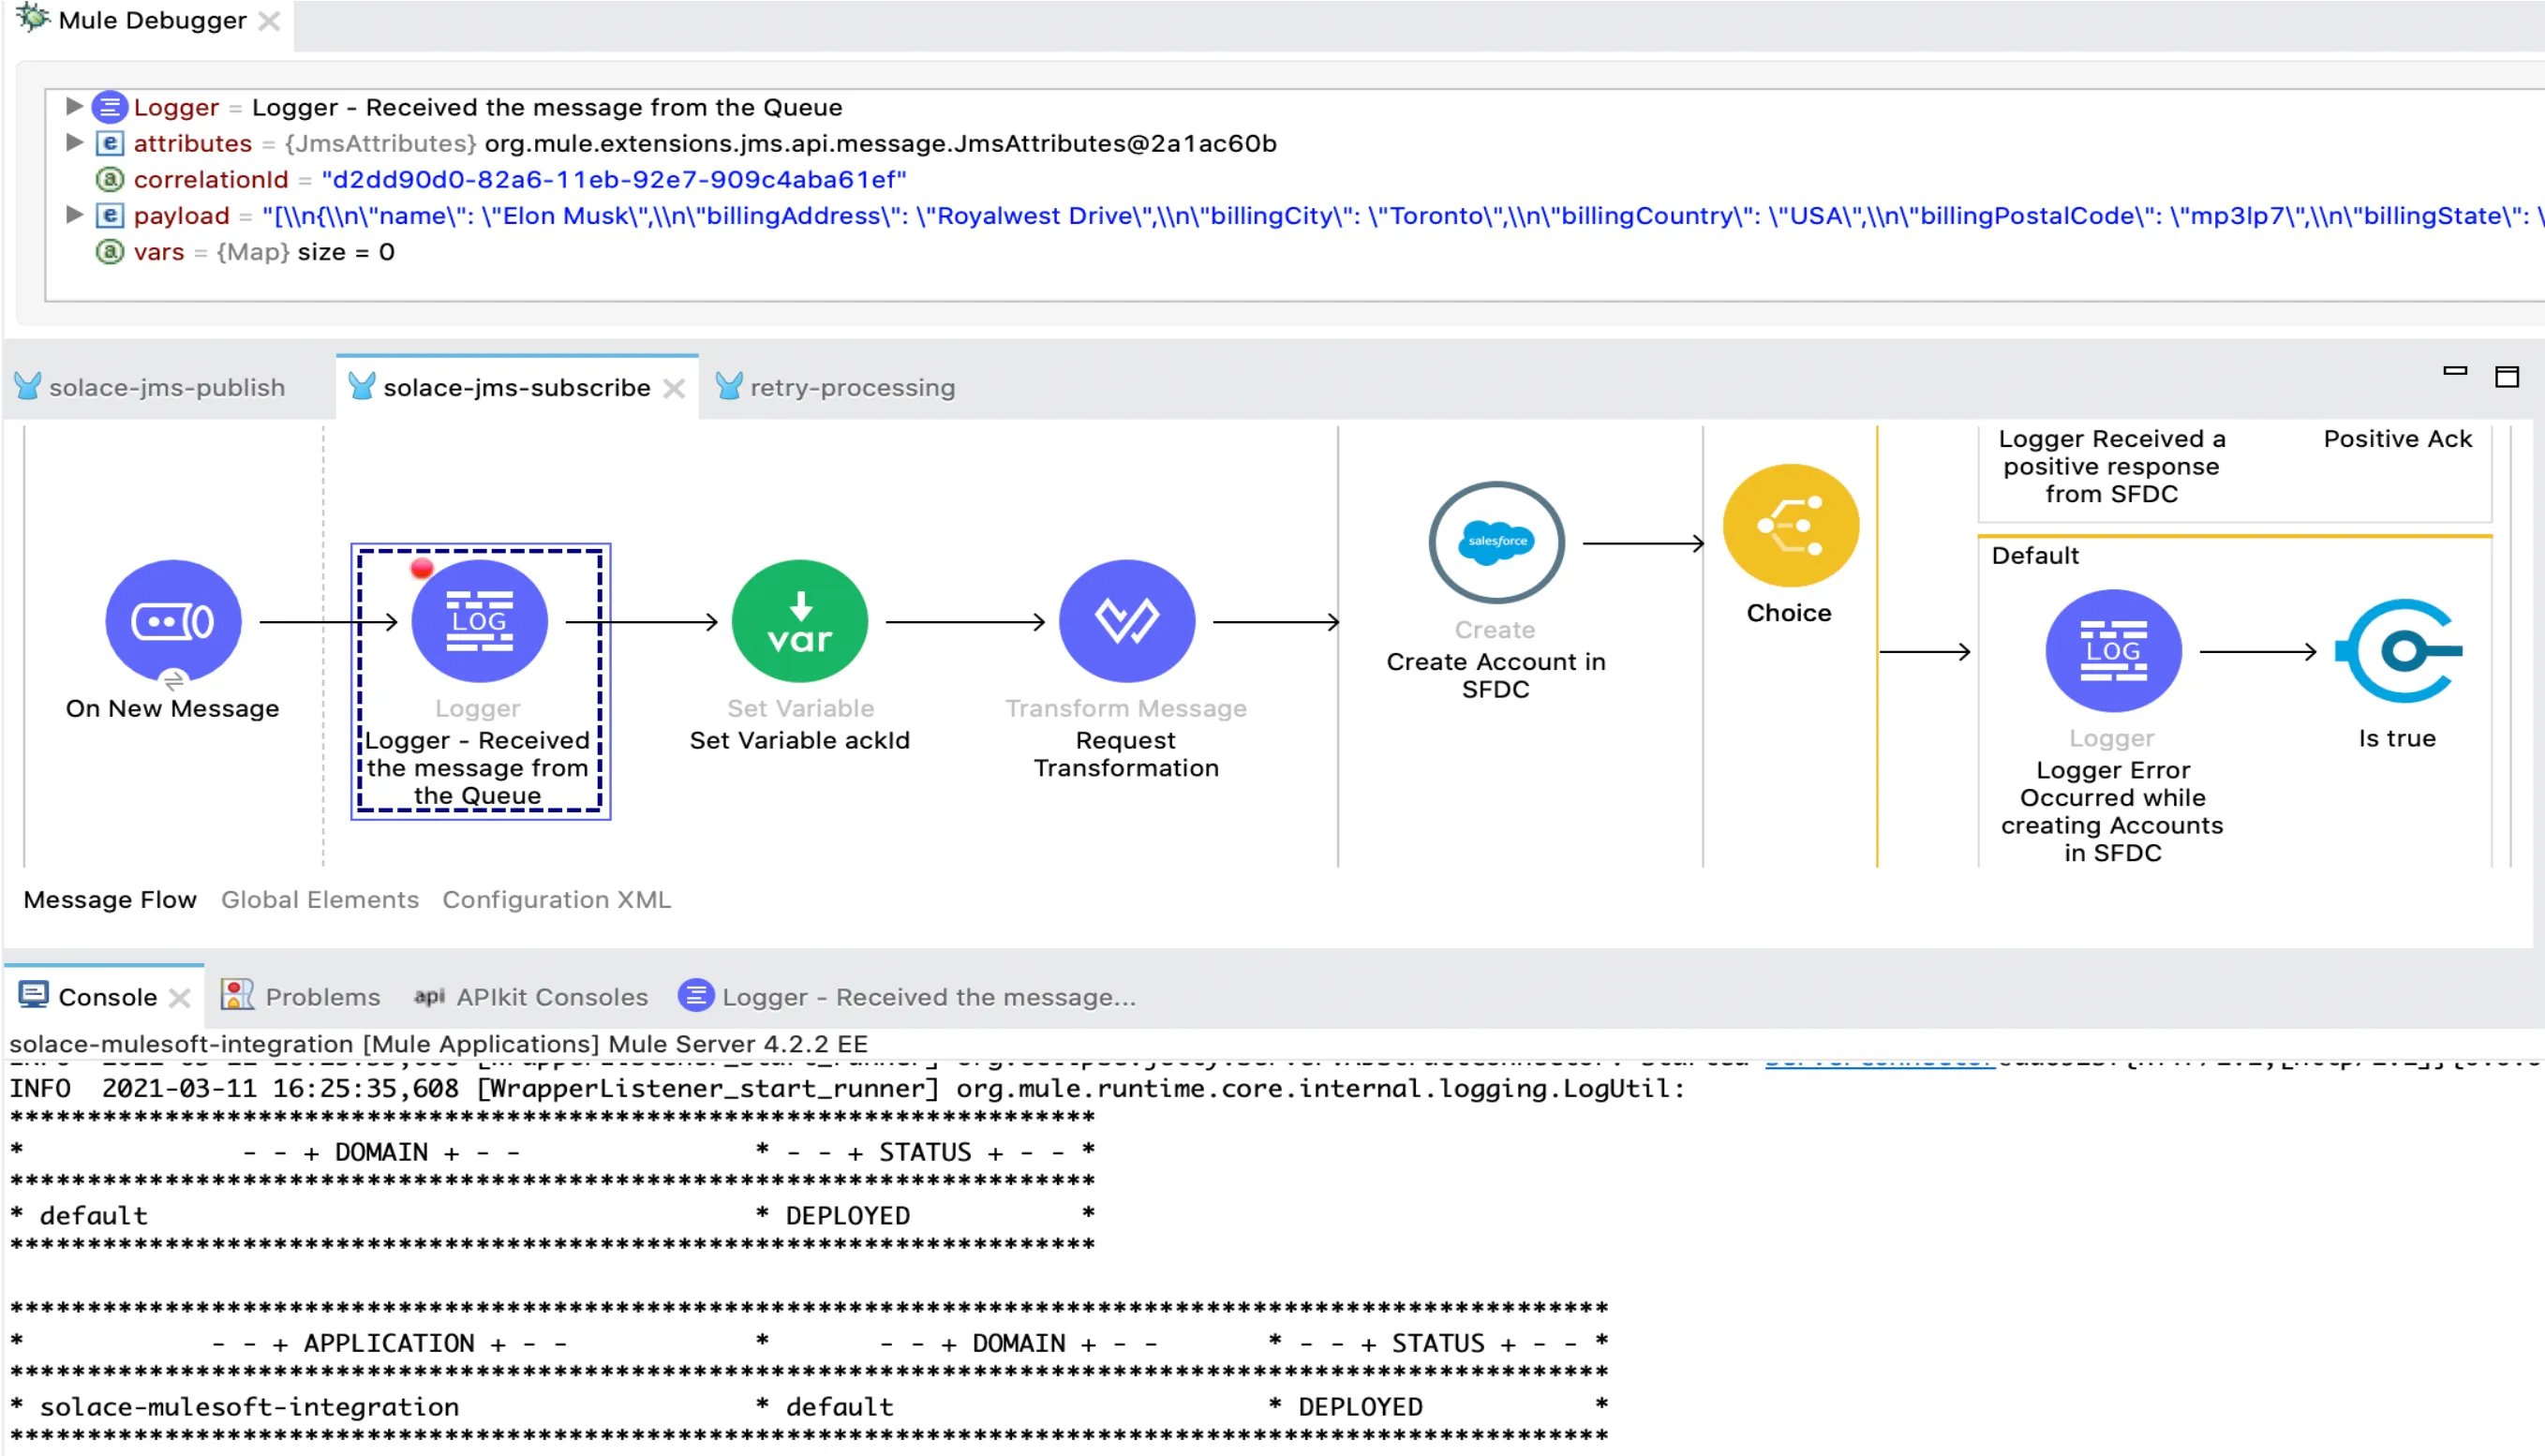
The message is then transformed to the required format.
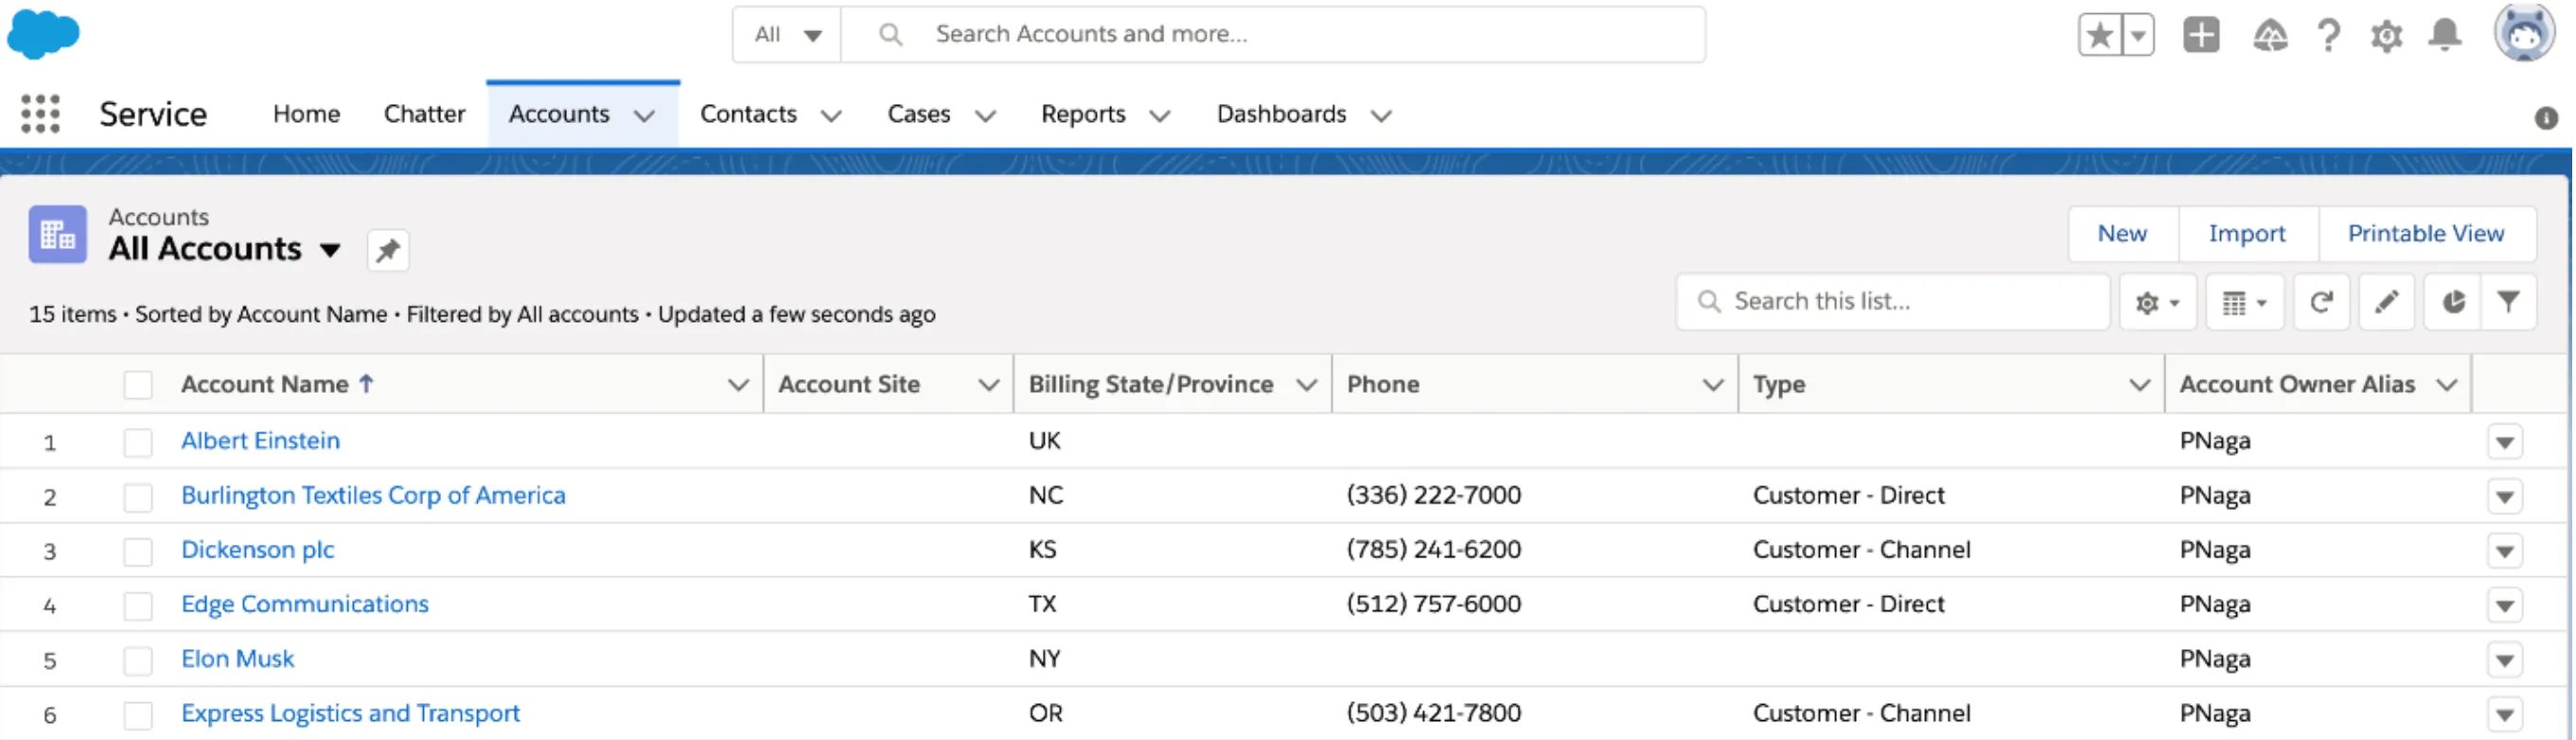
And the account is created in Salesforce successfully using the “Create” Connector. After this, a positive Acknowledgement is sent back to Solace using the “Positive Ack” JMS connector.
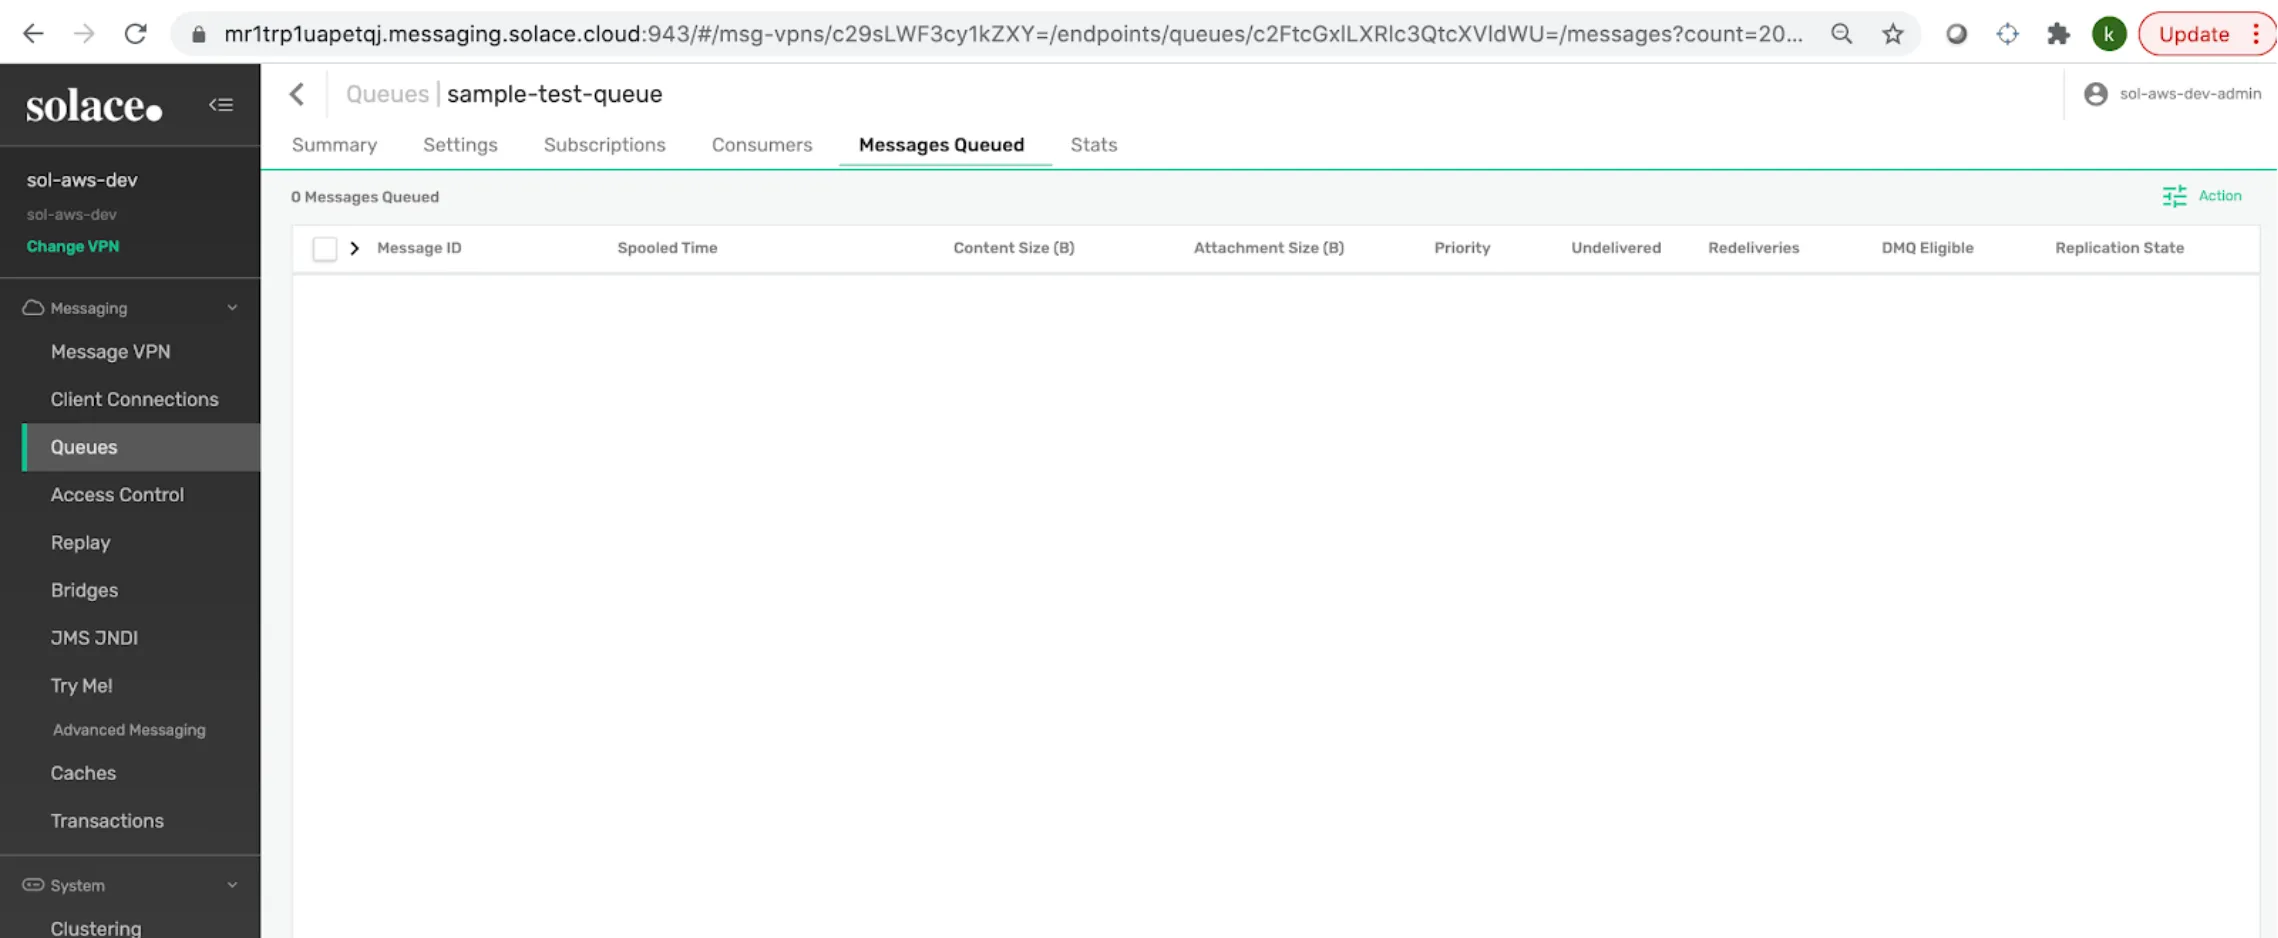
The message in the Queue is now deleted:
Thank you so much for reading my post and I hope it will be of some use. In the next post we’ll dive into the negative scenario and error handling.
Happy Learning :)
Pravallika Nagaraja
GitHub repository
FAQs
Frequently asked questions about this post.
-
How do I create a Solace Cloud account to follow this tutorial?
You can create a free Solace trial account at https://console.solace.cloud/login , then click Sign Up and fill in your details; you will receive a welcome email, after which you can sign in with your credentials.
-
What's the difference between the Enterprise and Developer service types in Solace?
Enterprise is a highly available Service on dedicated infrastructure with customizable connections, while Developer is a Service on dedicated infrastructure with 100 connections. In this tutorial the Developer type was selected.
-
Why do I need to convert the Solace PEM certificate to JKS for MuleSoft?
After selecting the Solace Messaging protocol you can download the TrustStore certificate via the Download PEM link, and this PEM file must be converted to a JKS format using the KeyStore Explorer tool from https://keystore-explorer.org/downloads.html before importing it into your Mule project under
src/main/resources. -
What's the difference between Queues and Topics in Solace PubSub+?
Queues allow one-to-one (Point-to-Point) communication and are typically used to send a single event to exactly one consumer, while Topics allow one-to-many (Publish-Subscribe) communication and are typically used to send a single event to multiple consumers.
-
Why is the JMS Acknowledgement Mode set to Manual when subscribing from the queue?
In the On New Message component the Acknowledgement Mode is set to Manual because we want to delete the message in the queue only after further processing it and sending the positive Acknowledgement, which is done with the Positive Ack JMS connector after the Salesforce Account is created.
More from this series
Integrate Solace PubSub+ Cloud with MuleSoft· Part 1 of 2
- 1.How to integrate Solace PubSub+ Cloud with MuleSoft
- 2.How to integrate Solace PubSub+ Cloud with MuleSoft - Negative Scenario (Error Handling)